The ‘newest’ bike I’ve had for ages. Microfibre cloth and a quick t-cut should bring it up lovely. ![]()

It’ll sit for a few months before I start on it as there’s a few other bits and bobs to sort first. But a new project, I like a project.
The ‘newest’ bike I’ve had for ages. Microfibre cloth and a quick t-cut should bring it up lovely. ![]()
It’ll sit for a few months before I start on it as there’s a few other bits and bobs to sort first. But a new project, I like a project.
Oily rag not good enough these days? Ok perhaps wire wool n oil then!
This rebuild I’m going to enjoy.
Can’t wait to follow this rebuild.
You like a project that’s a challenge!
Nice one, Iron.
Careful you don’t spoil that patina. ![]()
This is how it was ‘discovered’. It’s been left in a greenhouse/leanto since 1984. Considering it’s a 1980 bike I wonder why it’s not standard - blue frame, fibreglass mudguard, ally wheels etc etc.

The lady who sold it - to the dealer I bought it from - said that the man who was working on it became unwell and couldn’t work on it any longer. It had remained in the lean-to since then. The last MOT is dated 1983 - which, I assume, was it’s first and only. The mileage recorded on the MOT was 13,438, the speedo reads 13,514 - so it didn’t get much mileage until it was dismantled. Obviously not for the first time. There were no previous owners. It came with a Haynes manual, an owners manual and the original keys.

It’s obviously got an interesting history. I always like to find those things out as in your case that’s so unusual
Have stripped most of the rust so I can leave alone till it’s time comes
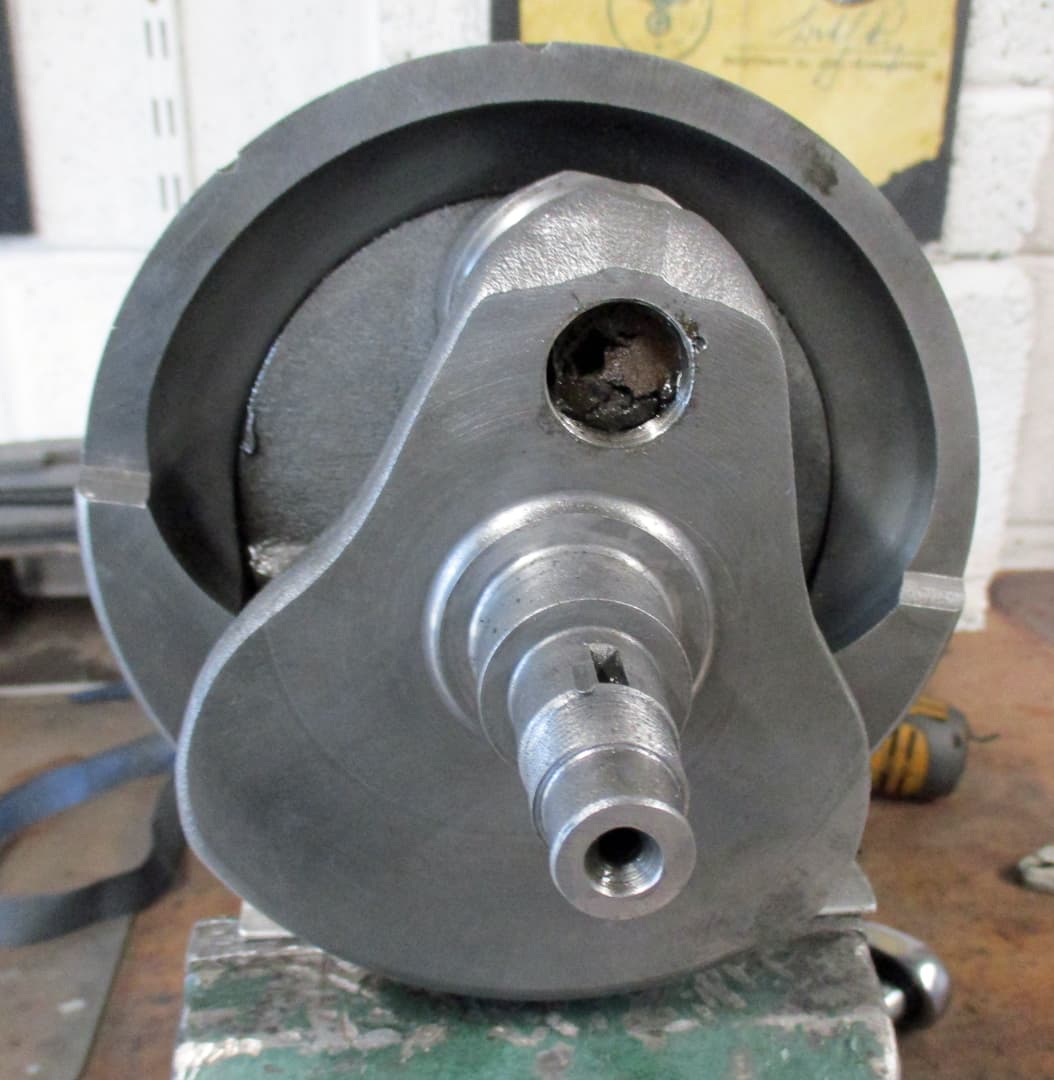
Have tried to clean up crankshaft but it may be lost due to exposure. Maybe this is what he was going for - the sludge trap is pretty full. Just shows you how quick these can fill. Maybe there wasn’t a lot of servicing. Not done a lot of miles 13.5k and sludge trap about 3/4 full.
Only about 4 months later. It’s been sat in the corner awaiting the queue.
Note: I’ve not added to the original message as it doesn’t allow for a bit of a chat with others (who may be interested) as the build progresses.
Any old end up…
Winter is coming and the geese are getting fat, so I had to lift/steer it into view for a bit of a dismantle and inspection before I even think what to do.
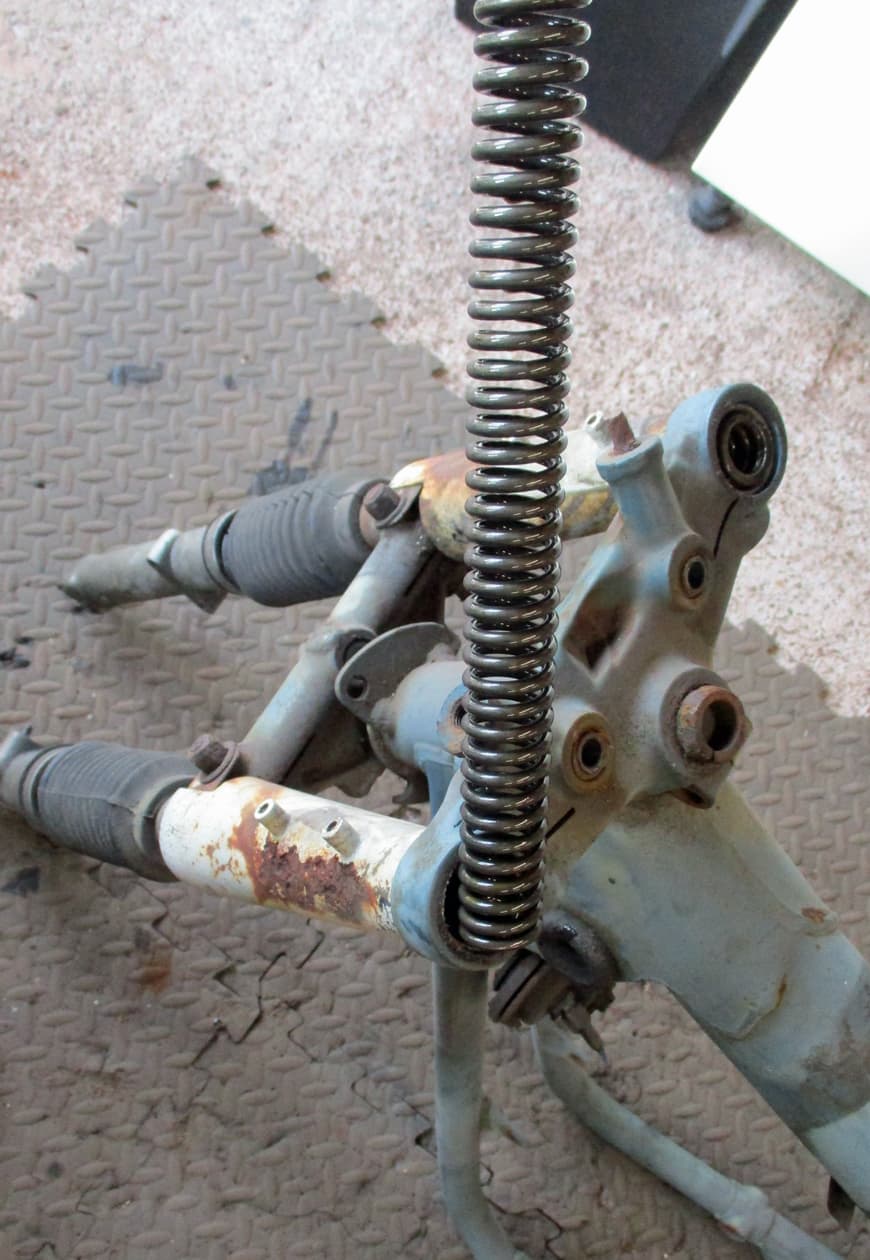
Another note: see those two little lugs sticking up on the top of the sub-frame. They are not on the older T140 frames. I guess they hold the seat in line. They will figure much in this episode ![]()
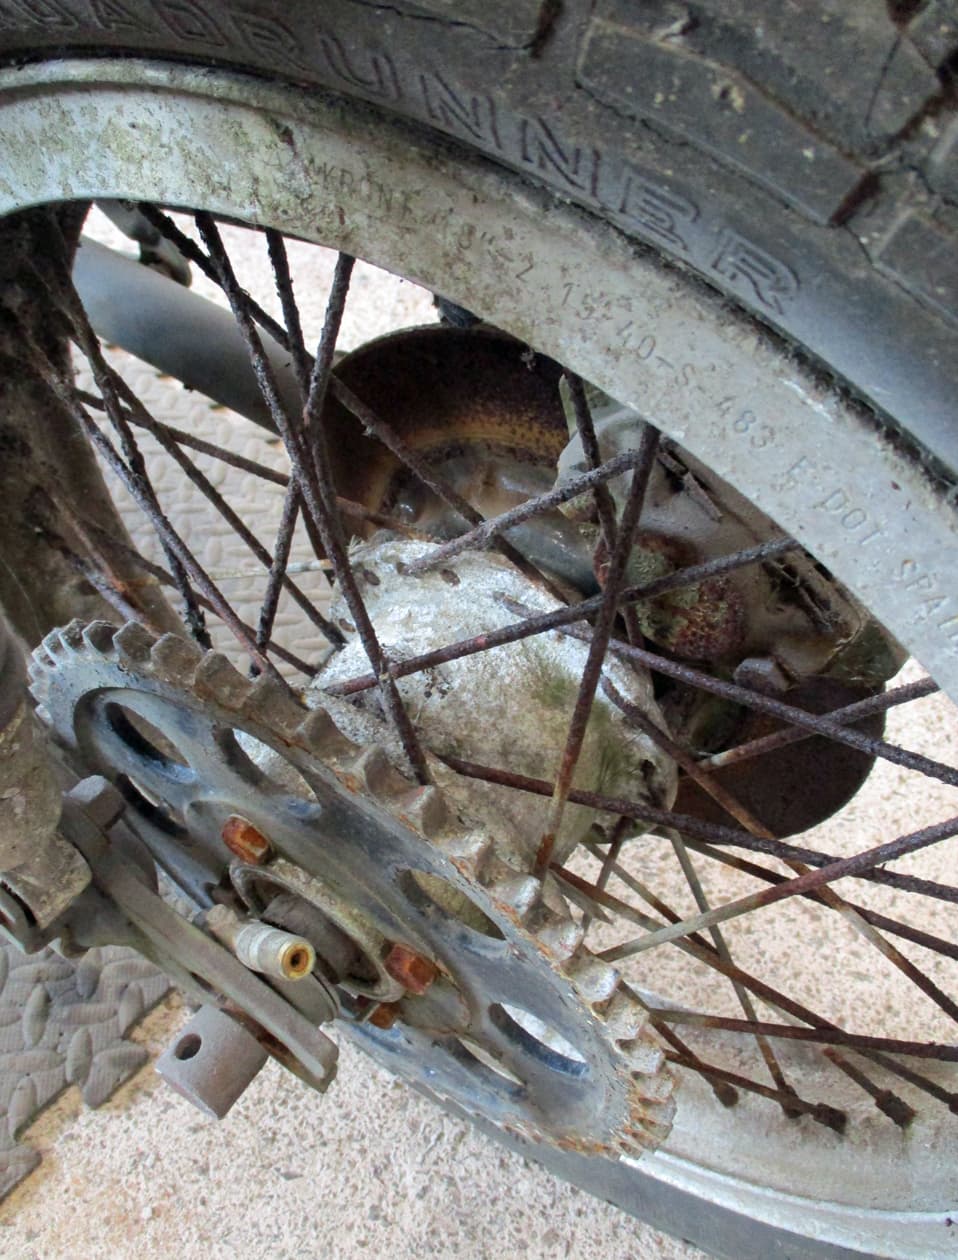
The spacers and bushes don’t look too bad but they’ll probably get replaced along with the brass bushes and grease nipples
This is why the steering head was a bit stiff
I’d have chucked the whole bloody thing in a skip so full respect to you, as always.
Glad your phone ran out of space before you fell on those stud things. ![]() My mum always said bikes were dangerous .At least you can genuinely tell people this rebuild was a pain in the arse.
My mum always said bikes were dangerous .At least you can genuinely tell people this rebuild was a pain in the arse. ![]()
Hope the admin staff stuck plasters on the correct holes when you were bent over…
I was quite pleased the surgery (digging in the holes about an inch with tweezers) went so well as she was laughing so much.
If the holes were any deeper she said the frame would’ve been stuck to me. Imagine that at A&E - “some bloke walked in today with a full sized Triumph motorcycle pinned to him.” Now that’s what I call a badge.
The first Triumph/human cyborg. ![]()
Carrying on and on…
I seem to be taking photos at every stage of dismantling. I keep them all so that I remember what I’ve done but also to pass on to the next owner if they’d like them.
I’ve had a few books on rebuilding these machines but they’ve always fallen short on how to do stuff. They’d say “remove wheels and bearings” without actually showing how it’s done so I’ve started to include the details for those that may be interested in rebuilding one of the older Triumphs.
If the photo diary is going on too much and it’s getting too lengthy and boring let me know and I’ll start trimming the content down.
Just sayin (asking)… ![]()
Cough, cough…ahem,
Take the top nut and springs out of the forks and watch the slimey oil run out. Then to take the slider off of the stanchion the damper arrangement needs to come out.
The damper is held at the bottom of the slider by an allen bolt sealed with a dowty washer. A dowty washer looks like a normal washer but has a ring of rubber in the centre hole. This seals the joint and keeps the oil in the forks where it belongs. But they can seal the bolt in too when the time comes to get them out. Usually the allen bolt will just turn and not actually undo so the damper has to be held.
So a suitable socket needs to be inserted on a few lengths of extension to hold the top nut on the damper.
The allen bolt can then be undone
And the whole lot can be pulled away from the slider
Here’s the dowty washer
That’s the slider off, so now the damper needs to come out so it can be inspected, serviced, binned etc
The damper is held in by the large nut on the bottom of the stanchions. Normally these can be removed by using a large adjustable spanner but this one was being a git.
So the big guns came out. Push the damper back up the stanchion so a large socket can go on the nut and brrrrrrt…it’s off, hooray
Here’s the damper arrangement complete with springs etc. All looks not bad but will probably leave it in some rusteze and replace all the oil seal o rings. These are quite expensive as a unit so good that it might be saved.
Then to get the stanchion out of the bottom yoke. This is rusted in solid but is not as bad as I’ve had them. As the stanchion is toast I’ve clamped it up tight into the vice as I don’t want it moving.
Clean off the rust with a rotating wire brush, it’s surprising how surface flakey rust will hold something. Wedge a suitably sized tool into the tightening split in the bottom of the yoke and force the split open with a few good wallops of the hammer.
That allows the yoke to move on the stanchion
And can be eased off with more clouts with the large rubber mallet
There’s the whole fork in the tray. Now just do the second one, blimey more hammering ![]()