T140e 1980

Before getting stuck into the engine rebuild, a couple of things should be looked at

Each casing (left and right) have a number stamped into them at the factory. Basically there was a bloke who sat next to a pile of casings. He was so experienced, at what he was looking at, that he could tell which casings would fit exactly. He would pick them from a pile, test fit them and then stamp them as a pair.
At least having the same number stamped in each half gives a bit of confidence on the refit that they would be the originals from the factory.
If you are looking to buy a pair of cases, an engine, or even a complete bike it’s worth checking the stamps.
I’ve had bikes and engines that do not have matching numbers (maybe three or even four) and have found them to fit together just as well as matching stamped ones. Matching ones give you that sense of security. Non matching numbers may give you a bit more bargaining on the price - just like non matching engine and frame numbers.

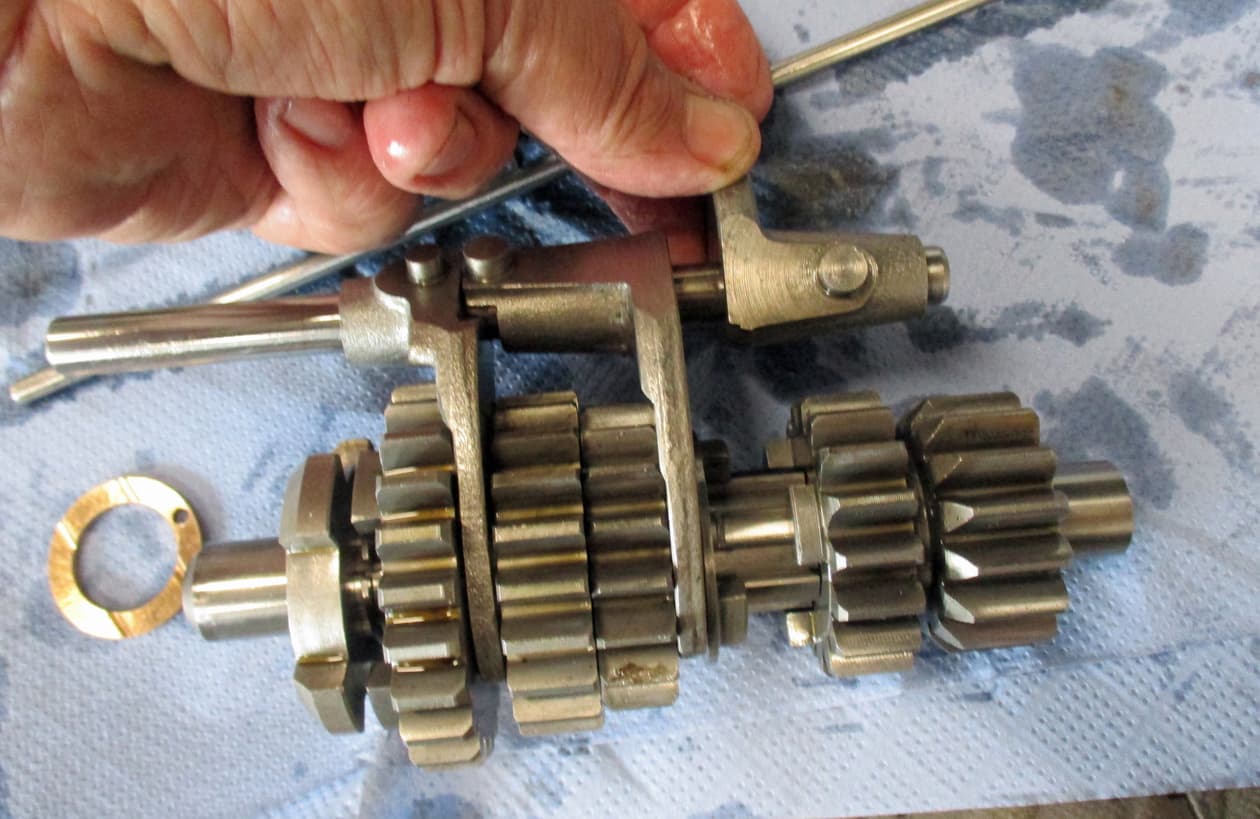
Here’s the new inlet and exhaust camshafts.
There are options on using sportier cams with high compression pistons and all that super speedy stuff (the original cams left a bit of power out of the engine as the engine bearings weren’t really up to the incredibly massive power of the mighty 744cc T140V Bonny - like almost 50BHP - cor :dizzy_face:)
If you want a faster bike go buy a new one. I’m happy with just getting it running nicely and pootling around.

The cams need to be checked athat they are running nicely in the bronze bushes. So give 'em an oiling and threadle them into the bushes and put both halves of the engine cases together.

Once the two halves are pushed together thread a few of the casing bolts in and nip them up. You can see the cam lobes down through the tappet/followers hole. This is where the followers move the push rods up and down to cause the rockers to push on the valves to open and close.
Put your fingers under the cams and check that there isn’t any movement up or down by the cams in the bushes.

Feel for movement of the cams in the bushes. They will have a good bit of float (that is movement along the cam’s axis in and out of the hole) until the cam pinions are attached to pull them tight, but nothing showing that they are ‘slopping’ about up or down, left or right in the bush.
These are fine. I would have been surprised in the relatively low mileage engine if there were any. I’ve only had wear in very high mileage engines.
So, that’s ok then…

Just for interest, here’s a new set of cam bushes from the stash. They are sintered bronze - a sort of alloy mixture containing oil - that can actually self heal.
The old ones, if required, can be fairly easily taken out by using a bearing push/puller. But the new ones will need to be sized to ensure a correct fitment to the cam shafts.

It’s a fairly easy operation to size them correctly if you have the bits to do it. This is them.
A reamer to cut to the blind ended bushes to the correct internal diameter, a guide to ensure the reamer stays true to the open bush, and a correctly sized ball bearing to push through the open bush to size it.
These kits are quite hard to find, they aren’t that expensive and should last a lifetime if kept oiled and greased up.
If you need to borrow a set, give me a shout…welcome, over :slightly_smiling_face:

15 Likes

Rebuild of the crankshaft/flywheel

With it all cleaned out and ensuring journal oil feeds are flowing freely, just make sure evrything is all sparkley. Insert a new sludge trap tube. There’s a hole in the top/middle that will take the flywheel bolt so make sure it’s central so the bolt doesn’t mash it up.

Once all in place correctly fit a new flywheel bolt. These are quite brittle steel so I always get a new one as it is torqued to 33ftlbs. The next rebuilder may snap it going for the sludge trap so just thinking of him.

This is the oil feed from the crank centre into the sludge trap and on to the big ends. The plug shouldn’t obstruct it so measure and make sure it’s screwed into the correct depth.

New ones have a hex drive rather than a slot. This one measured good to go flat to the surrounding surface. Then bang in an additional pop mark to hold the plug in. No chance on it coming loose as I’ve spotted with blue locktight and it was a right hard wind in, but the next guy will know that it’s been out once since the original build.

Onto the connecting rods. Note the additional temporary nut on the bolts.

also note the pock marks on one side of the rods. The rods must stay with this orientation. Mix them up and they’ll be a heck of a knocking and a very quick disintergration of the shell bearings. Yes, I know, and what a proper bollox it was.

New shell bearings are required.

The bearings are atamped with their part number and their size. These are 20 thou over (marked 020). They need to be thicker as the crank journals were ground down by 20 thou to remove the rust pitting. I’ve measured everything and they fit luvly.

The shell bearings are pressed into the big ends so the tangs fit into the slot. This is done dry, the faces are thoroughly cleaned before they are pressed together. No slippage is wanted on this joint once the engine is running.

Some of this gloopy sticky oil is good to use to ensure it stays in place until engine start some time in the future.

Apply a line across the shell bearing

And whack it into place onto a very very clean journal.

Add a similar amount of assembly oil to the bottom half of the big end and push onto the journal. Make sure the pock marks line up. The tangs on the shells will be on the same side - although you can’t see this.

The new LF Harris conrods require 24ftlbs while the workshop manual/haynes etc says 28ftlbs. Go with the conrod manufacturer’s requirements. That’ll be 24 ftlbs then.

Take the bolts up to the required torque in stages - I start by nipping both the nuts up, then take them both to 15ftlbs, then both to 20ftlbs, then both up to the required 24ftlbs.

Do the same with the other rod and we’re on and moving freely.


Check that they fall under their own weight.
I then fill the sludge tube with oil through the normal oil supply route in the centre of the crank and watch for oil feeding the big end journals.
Luvly, thankyou, over … :slightly_smiling_face:

11 Likes

You’re a wizard, good sir. Beautiful work.

New bearings into timing (right) side crankcase

The right side crankcase of the engine also has the gearbox built/cast in. (Hence unit engine as opposed to the earlier pre-units that have seperate gearboxes. So before the carnkcases are assembled all the bearings are easier installed now.

The parts catalogue’s drawings and the workshop manual are particularly unhelpful at this stage.

These are the two main bearings. They support and allow the crankshaft to turn within the crankcases. The right side bearing is a single piece and is fairly cheap. The left side bearing is a multi part bearing which allows the crankcases to be pulled apart a lot easier than if both bearings were of the single piece type.

This is the single part bearing that is pressed into the timing/right sid ecrankcase.

This is where it needs to go.

A cheap set of bearing basher thingies makes the job a bit easier - they are pretty cheap from Amazonian and are well worth having.

Lots of fire is the way. A blow torch applied to the metal around the hole for 4 or 5 minutes heats it enough to expand and allow the bearing to be pushed in by accurate hammering. Try to start the bearing off as squarely as possible. Sometimes they take a fair bit of cajoling to get in. In this case it actaully fell in most of the way. Listen to the noise the hammering makes as you can hear when it’s seated.

Goody gum drops.

The gearbox layshaft blind needle bearing needs to go in.

The drawing shows that the bearing should stand slightly proud to allow the thrust washer on the lay shaft to be held in position by it.

Here it is in after heating and hammering in. The thrust washer is in place. I hammer it in until it is just below the washer’s surface. As the whole of the casing is bloody hot you need to be careful when holding the bearing as you hammer and also when feeling it’s depth.
A slight hot feeling causes an involuntary jump movement which then makes your hand contact the side of the gearbox. Before you know it, your hand is flyinbg round the inside of the gearbox like a burnt mad jumping bean. The noises emitted are pretty funny too. :laughing:

here it is from the outside.

Then the high gear bearing needs to go in just above the needle bearing.

Same method. Apply liberal amounts of fire to the casing and hammer the outer race of the bearing into place. The bearing is symmetrical but I always keep the lettering on the bearings point outwards from the engine. The numbers can be seen then from the outside.

Then there’s the circlip to keep the bearing in place. How it would ever move I don’t know, these bearings are really expensive and are a git to get in and I haven’t got one out without mashing it up.

Then there’s the oil seal. This is one of the hardest oil seals to get to if there’s a leak in the future so make sure it’s a good quality one and it’s fitted correctly. That’s that side crankcase done.

Then onto the primary/left side crankcase. Only one bearing in here.

It’s the very expensive two part bearing.

Two parts. Note how the lettering is on the same side of the bearing on both the centre and the outer races. It needs to be assembled the same way when fitted.

The outer race pushes into the casing with the lip to the outside. That is with the lettering side poiinting outwards, away from the engine.
When taking the cases apart on dis-assembly the bearing needs to come apart to allow this. So the lip is towards the outside of the engine.
Lots of fire again and lots of hammering. In all hammering make sure the cases are fairly level and are positioned on pieces of wood so that any protuding bolts etc are not damaged.

Ta-da. Sorted. Welcome. Over… :slightly_smiling_face:

11 Likes

Any reason you don’t freeze the bearings as well as heating the case?

I don’t find there’s any need to freeze them, they go in ok with a bit of persuasion and some swearing. I’ve always thought that red hot and freezing cold could cause shock fractures, so I don’t do it.

4 Likes

Another lesson in engineering. Brilliant just brilliant :grinning:

1 Like

Now to get the engine cases assembled.

The centre of the two part bearing is pushed onto the primary side of the crankshaft. Sometimes this needs to be hammered into place using a tubular drift, in this case it just pushed on by hand. Remember keep the lettering on the race pointing outwards.

Leaving the crankshaft in the vice go get the primary side crankcase and place it so that the two part bearing slips together. These are really accurately made and are a precision fit, if held vertically it just slips together, do not force.

Here is what the bearing looks like once it’s together.

Now take the whole thing out of the vice - an extra pair of hands helps here to undo the vice while the crank is held. It’s easy to let the conrods bash the side of the casing so try not to let that happen. It’s worth wrapping them in a split piece of pipe lagging or a cloth to stop them clanging about.
Turn the whole thing over and place on some pieces of wood on the bench.
Apply your favourite joint bonding stuff to both faces of the crankcases.

Oil up and install the nice new camshafts. They just slip right in. Making sure the inlet and exhaust go in the right side.

And plonk on the timing side crankcase. Again this can be a bit of a git to get all the way on seated. Sometimes the main bearing is quite tight and needs some help to get all the way on the crankshaft. This one just needed a few taps with the rubber mallet.
Nip the casings up with a couple of the bolts just to keep it from coming apart…

…while the whole thing is lifted upright to allow all the new bolts to be tightened up.

On T140 engines there is a sleeve that is pushed into the front engine mount.
Earlier T120 engines don’t have these and can cause a bit of frustration when taking your first T140 engine apart.

Make sure everything turns nicely and easily and put it in the engine stand.
:slightly_smiling_face:…over…

14 Likes

A few more new spares to bolt in

Double nut new barrel studs into the crankcases. I’ve also replaced the hollow dowels that ensure the barrels position correctly

I pushed the old barrels on just to make sure everything is lined up.

Then put some main stand rubbers over the studs to protect the conrods.

Bolt in a new oilway plug

And blank off the tacho drive hole. No need for a rev counter. This thread is left handed.

A new plug for the timing hole.

The flywheel on T140s have two slots cast in. The slots can be found by removing the timing hole plug and inserting a screwdriver (there is a special tool but a phillips screwdriver does the same thing). The first slot is at Top Dead Centre (TDC). This is checked by inserting a stick through the sparkplug hole and feeling when the piston is at the top of it’s travel. Find the slot in the flywheel with the screwdriver.
Then move the rear wheel backwards until the second slot is found with the screwdriver.
The engine is then at 38 degrees Before Top Dead Centre (BTDC).
This is when the engine should fire - ie when the sparkplug sparks. So that’s where the points or electronic ignition is set to. Easy peasy lemon squeezy.

Move onto the inner gearbox cover as there’s a couple more bearings to replace. The larger bearing is on the gearbox main shaft and the needle bearing is on the gearbox lay shaft.

While I’m playing with it, let’s remove the neutral light switch (that was another ‘safety’ item required by the Shermans on imported bikes). Just another thing to go wrong so bin that.

And replace with another plug made from a cut down UNF bolt. Gotta watch out that it doesn’t jam up the nipple on the quadrant so not too l;ong.

Here’s the circlip going in after both bearings have been replaced in the usual manner with fire.
And that’s all the bearings and pension done for this month.
Thank you, welcome… :smiley:

16 Likes

I tried that when checking the timing on my modern bike but found there was a good 10 or 20 degrees of movement whereby I couldn’t really tell if it was TDC. So I had to resort to the official method of removing alternator cover and putting a special pin through the relevant holes to align the engine innards.

1 Like

Yes, a bit easier on T140s :slightly_smiling_face:.
There’s no chance to get TDC anywhere near accurate by just using the patented ‘stick method’, it just gives an indication of when you are in the right sort of area, then feeling for the screwdriver to fall into the flywheel slot gets it exactly.
It’s a pretty neat design on T140 engines - that little access hole behind the barrels - saves loads of faffing around when timing. It’s so accurate I hardly ever need to use a strobe now.

3 Likes

Spotted this when I was painting…

The kickstand has a long bit with a knob welded on the end - not something I’ve dealt with before on pre 1980s Triumphs - and there’s no adjustable ‘stop’ on the stand either. Why’s that then :thinking: I’ve no idea. Maybe I should go read up on it.

On earlier models the blank nipple on the kickstand had a bolt and locknut fitted that allowed the kickstand to have some adjustment.

So, drill an appropriate sized hole…

…thread for a 5/16 UNF…

… and install required bolt and locknut.

Then discover that the wearing metal pad is missing from the frame. Bah! savings eh? who’d have them.

Find a suitable piece of scrap mild and bash with a large hammer…

…until the required radius is achieved.

Cut to size and trial fit.

Remove the nice new paintwork, weld the piece on, a spot of primer, paint and lacquer.

And all is good again. Although I did spot that the kickstand has an additional bend in it compared to the older versions which may not allow me to cut off the offending Knobkerrie. We’ll wait until the zorsts are fitted…over…

10 Likes

I’d normally rebuild the engine on the bench in the stand, then manhandle the engine into the frame. However…

…it’s gone in early.
I’d forgotten that I’m a pensioner (I think we all are about 18 in our heads) and lifted a bike up a couple of weeks ago. Not a problem doing it but, fuck me, the next day - jeez. I’ve had to be careful since then letting the healing happen.
Life has changed in the last few years, old has been creeping up on me. It’s a bollox.
So now, I probably need a proper bike lift and a chair. :older_man:

This is the detent plunger for the cam plate in the gearbox. New washer, new spring and new plunger but cleaned up the casing.

Fits up from underneath into the gearbox…

…and holds the cam plate by sitting in a notch. At this stage I check that the camplate moves through the gears making sure all is smooth.
Blimey, it was hard to get the plate to move out of neutral, well harder than usual. Normally it’s pretty easy to turn by hand but this one wasn’t.

This is the cam plate showing the notches the detent plunger slides into to hold the bike in gear. The funny shaped grooved slits in the cam plate move the selector forks along the mainshaft and layshaft to align the gears as the cam plate turns.
The cog in the centre is driven round by using the gear lever up or down.
There’s a lug each side of 1st and 5th gear to ensure the cam plate doesn’t move further if trying for that non existent extra gear.

So, took the detent plunger out again. I also had a search round in the stash and found two others. The new one is obviously a good 1/8th longer than the others. Tried it in the housing but it wasn’t anywhere near the bottom so it pushed down just as easily as the other two.

Here they are again. The new one is in the middle. I think a bit more ‘pointy’ than the others.
So, I cleaned up the original one that came with the bike (polished off the rusty bits as it needs to move freely in the housing) and put that one in.

Much better. Moves easier out of neutral and through the gears. So I’ll go with that one then. Used my favourite sealer (threebond) as this is a future oil seep item and wanged it in… :slightly_smiling_face:…over

9 Likes

Timing side…

all the clever engine timing happens here

Pinion gears need to be installed correctly to ensure correct timing between the crankshaft and the camshafts. The pinions changed ever so slightly during the lifetime of the Bonnevilles and Tigers. Older versions had ‘A’ and ‘B’ stamped into them while newer versions just had dashes and dots but more or less assembled the same way.

The new cam keys are inserted into the camshaft slots. These are very bloody fiddly and can be a tight fit. Hammering will only mark up the bronze bush so care is required. They have a rounded bottom so have a tendancy to ‘roll’ out but eventually they seat ok.

This is the inlet side. The camshaft pinion is pushed on over the key - much easier said than done. These are a tight fit so I always check that the key slips into the groove it’s meant for before I put the key into the camshaft. I nearly always also have to do a bit of grinding to the pinion to ensure it pushes onto the camshaft by hand.
They are normally so tight they have to be hammered on. This then causes the key to lift up on the back side ramming it into the bronze bush. On nearly all builds I find the bushes have been dented by the key.
So I remove that risk of damaging the bush by making sure the cam pinions slip onto the camshaft and key by hand.
Note that the previous dismantler has conviently marked into which slot the key goes by scratching a dash into the cam pinion.
The workshop manual isn’t that clear about where they go but the key should be aligned with the timing mark that is going to be used when lining everything up. On the inlet side that is the dash stamp as above.

Here’s the exhaust cam pinion with the key aligned with the dot (as PO has correctly scratched when dismantling)

Back to the inlet side and the retaning nut is scrwed on. It’s a left handed thread and has the off-centred knob on it to drive the oil pump.
The plain nut is also screwed onto the exhaust side which is also left hand thread.
Both are just finger tight for now, they’ll be torqued up once everything is timed up.

Insert the woodruff key into the crankshaft - again it can be a bit of a git to get in properly as it’s round bottomed. Whack the clamping washer onto the crankshaft (it won’t fit once the timing pinion goes on)

Slide on the intermediate pinion (with the stamps facing outwards obviously) and align the pinions so the inlet pinion dash aligns with the intermediate pinion dash and the exhaust pinion dot aligns with the intermediate pinion dot.

The crankshaft timing pinion then goes on. This has to be removed on disassembly with a special puller so will not just push on.

It needs to be drifted on with a little help. Ensure the two dots on the intermediate pinion straddle the single dot on the timing pinion.
Once all looks good and the timing marks all align as required then hand screw on the timing pinion nut. This nut will sometimes obscure the timing dot on the timing pinion so some put a dot of paint on the tooth so they can see it.

As there’s nothing to stop the engine turning over when torquing up the nuts place a spare timing pinion (as there’s always one in the stash for just this purpose) to jam everything in place.

Torque everything up, remembering that the cam shaft nuts are left hand thread.
Then check that the camshafts have some float. Pull on each cam pinion and feel that they move in and out just slightly. Just like feeling for the movement in a tappet, a small clicking can be heard as it’s only a few thousands of an inch.

And there it is, all timed up, showing the correct alignment of the timing stamps on the pinions.
Thank you, welcome… :slightly_smiling_face:…over

10 Likes

This could be made into a photo book… No words, no explanation… just the photos… in a book! :heart:

3 Likes

We’ve just been discussing that very thing here. I think it’ll need some writing in it though. It’s a plan for this winter. Honest :smiley:

Edit; That’s assuming I get the bike finished by then…

8 Likes

Another masterclass @Iron :grinning:

1 Like

Thanks again all.
I’m sort of hoping that anyone rebuilding a vintage Triumph will get some aid here as the T120 and T140 unit engines are very similar albeit parts are mostly not interchangable.
I’m also planning - along with massive help from the Admin Staff to get a sort of book together to also help anyone having a dip into their bag of spanners.
I’ve enough books on the shelf that have turned out to be mostly unhelpful and it’d make a change for me to have one that shows how to do stuff and is actually by me! How great would that be…

Any old end up, onto the gearbox build.

This is the five speed T140 gearbox that’s been in a box for almost 40 years. Along with the books that should really help with getting it all together.
They really don’t help at all.

So, we need to get all of the stuff on the floor into the hole in the side of the engine and we’ll have a working gearbox.
I’ll try to show each step on how to get it all in without resorting to throwing it all out the garage window. Bear with me, it’s honestly really quite easy and quite satisfying but I’m going to show each step so it’ll be a long post.
Take a deep breath…

6 Likes

Oh, before we start, I’ve checked everything for condition and wear

I’ve taken out the high gear oil seal (prize out with a screwdriver) and…

…made sure the needle bearings are fine. They can be pushed out with suitable sized drift either way if they are showing wear or rust etc. These are fine. Then whacked in a new oil seal.
The main shaft had a few pitting spots but they polished up ok. The races that run in the bearings and oil seals were fine so I’ll run with that.

7 Likes

I’ll photograph as best as I can the inside of the gearbox as it’s built. Oily hands and cameras don’t really work that well together

The back of the gearbox has three holes - the larger top one is the back of the bearing and will take the high gear from the mainshaft, the smaller one with the needle bearing will take the lay shaft and the blind smaller hole will take the selector fork rod.

The camplate is turned into the neutral gear position. The index plunger is in the second slot between first and second gear. It needs to be in this position to allow the little knobs on the selector forks to easily push into the slots in the camplate.

First thing to go in is a new thrust washer against the needle bearing hole. The washer is ‘glued’ to the side with lovely lashings of grease. Hopefully it stays in place while I fart around building the gearbox. The washer has a small hole to take the nipple that can be seen on southwest side of the bearing. It needs to sit flat against the side of the gearbox in it’s groove.

Take the mainshaft high gear assembly, note the race that will sit inside the mainshaft bearing.

it is pushed through the bearing so the race runs against the rollers in the bearing.

This is the high gear from the other side of the engine. The race can be seen against the rollers. It has to be fully home and can be a fiddle as it has to go in dead straight.

Next is the 4th gear and mainshaft together…

…along with the 4th gear selector fork. Note how the selector fork slides in a groove alongside the gear. It turns in this groove as the gears turn and will use the groove to pull/push the gears into place when changing gear.

Stuck into it’s place with great globs of grease. The grease is to try to keep the selector fork in place while the rest of the box is built. The fork will want to fall out of position due to gravity so plenty of grease.

The mainshaft including 4th gear and selector fork is pushed through the highgear assembly. The selector fork is fed in below the mainshaft and as it’s going into place the slector fork is pushed upwards so the knob on the fork fits into the camplate slot.

This is it all in place. The selector fork will want to drop out of the camplate so keep a beady eye on it.

The driving dog (gear bit that looks like a cross) slides off and the circlip taken off to allow the layshaft with 5th and 4th gears to be taken apart

This is the layshaft with 5th and 4th gears.

Which is then pushed into the layshaft bearing. The gears will need to mesh with those already inplace on the mainshaft so a slight turn of the gears may be required to allow them to be fully pushed home

Here’s the 5th and 4th gears slotted together and fully home. Note that the mainshaft 4th gear selector fork is still greasily stuck in the camplate. If the fork selector has moved push it back up into place.

Then back to the cluster and take the layshaft’s 3rd gear along with it’s selector fork.

This is them, with the selector fork in it’s groove alngside the 3rd gear.

Another blob of grease on the knob on the selctor fork. Slid the 3rd gear with the selctor fork onto the layshaft and make sure the knob fits into the camplate.

This is a different angle to show the slot in the camplate that takes the selector fork.

The high gear selector fork dropped slightly out of the camplate so I threadled a long screwdriver through the slector fork holes and pushed it back up into position. The holes in the selector forks need to stay aligned as the selector rod will need to be pushed through once it’s all in place.

Back to the cluster and take the mainshaft 3rd gear

This is the mainshaft 3rd gear the right way round to slip on…

…to the mainshaft. Note I’ve still got the long scrwedriver through the selector forks to hold them in place (it’s just sitting there, it’s got enough weight to just sit there holding the forks all by itself, I’m not holding it)

This is mainshaft 3rd gear in place

Back to the cluster and pick up the layshaft 2nd gear

This is the layshaft 2nd gear…

…which just slots onto the layshaft

Screwdriver still in doing it’s job while the gears go into place.

Back to the cluster and pick up the mainshaft 1st and 2nd gears - this is a single piece

And slot onto the mainshaft

1st and 2nd mainshaft gears in place

The layshaft 1st gear and it’s selctor fork is next

Here they are, the lttle beauties…

Pushed onto the layshaft…

…and the selector fork knob into place in the camplate slot

the screwdriver is re-inserted to make sure all the selector forks are in the correct place.

Back to the selector fork rod. It’s showing some marks but they are just stains there’s no wear.

One end of the rod has a flat section. This is the end that pushes into the blind hole at the back of the gearbox. If there was no flat and as the hole is a good fit then it would be a right bugger to get in or out once there’s oil in there, the flat breaks the vacuum, so that end in first.

Threadled through the slector fork holes. You can feel the forks as the bar goes through, and you can feel when it’s at the back of the gearbox. Feel for the hole…

…and push it all the way in. Again, feel for the back of the hole.

Back for the circlip. Make sure you’ve ordered a new one. This one is bolloxed and I forgot. One is on it’s way. Thruppence can hold a job up, poo bears.

it goes into the slot on the end of the layshaft.

Back for the layshaft 1st gear dog

Here it is

And on it slips

It’s all in place, luvly. The mainshaft can now be turned by hand to make sure evrything is turning freely. Once I’ve had a play and ensured all seems well I lined up the dog so that the layshaft 1st gear will slip into the dog.

I then push on the tab on the camplate and move it all into 1st gear. The cluster will move into the dog. Turn the mainshaft again making sure all is well.

Then using both tabs on the camplate turn it back into neutral and then into 2nd gear. The mainshaft etc should turn the gears nicely.

And that’s bloody it!

Oh yes, last bits and pieces. This is the clutch pushrod.

That goes through the mainshaft. It doesn’t need to be in place just yet and it’ll go in from the other side once we’ve built the clutch.

And there’s the other thrust washer that will be stuck onto the inner gearbox cover once we get to that bit.

So that’s that then. :slightly_smiling_face:, thankyou, welcome…over, phew

7 Likes