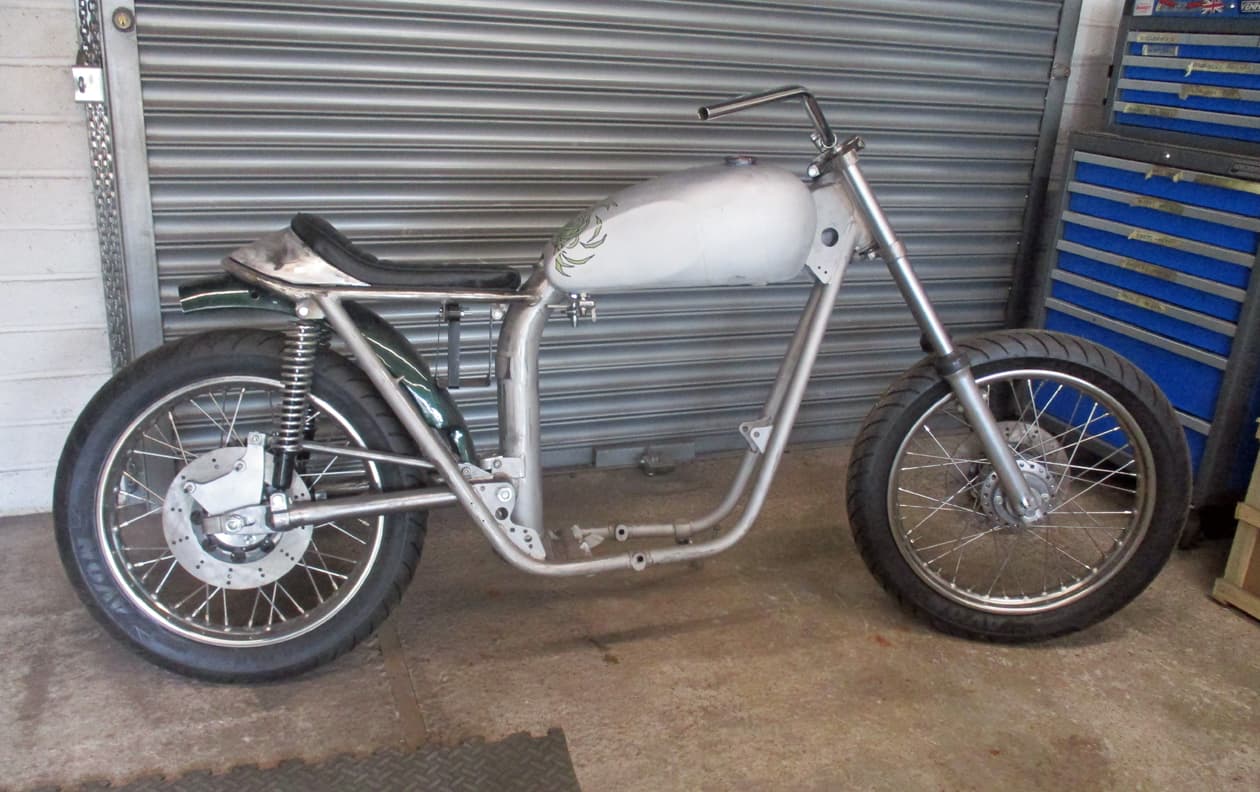
Simple solutions are often the hardest to think up! And usually the best solutions too ![]()
4 Likes
Let’s see if best laid plans actually work out.
I’ve a couple of those cheap e-bay seats hanging around, that looked to be ok when purchased last thing at night but didn’t quite fit as I would have liked. But they do have nicely stitched covers. So I’d sized the seat not only to suit the bike but also with trying to use one of the seat covers.

I thought I’d go with the riveting on the cover this time. So drilled a few holes around the edge and stuck on some nice rubber edging (so the sharp edge of the metal seat pan doesn’t cut the cover or stick into top of legs). Superglue has a magic magnetic effect onto hands - which, I suppose, it was originally intended for anyway.
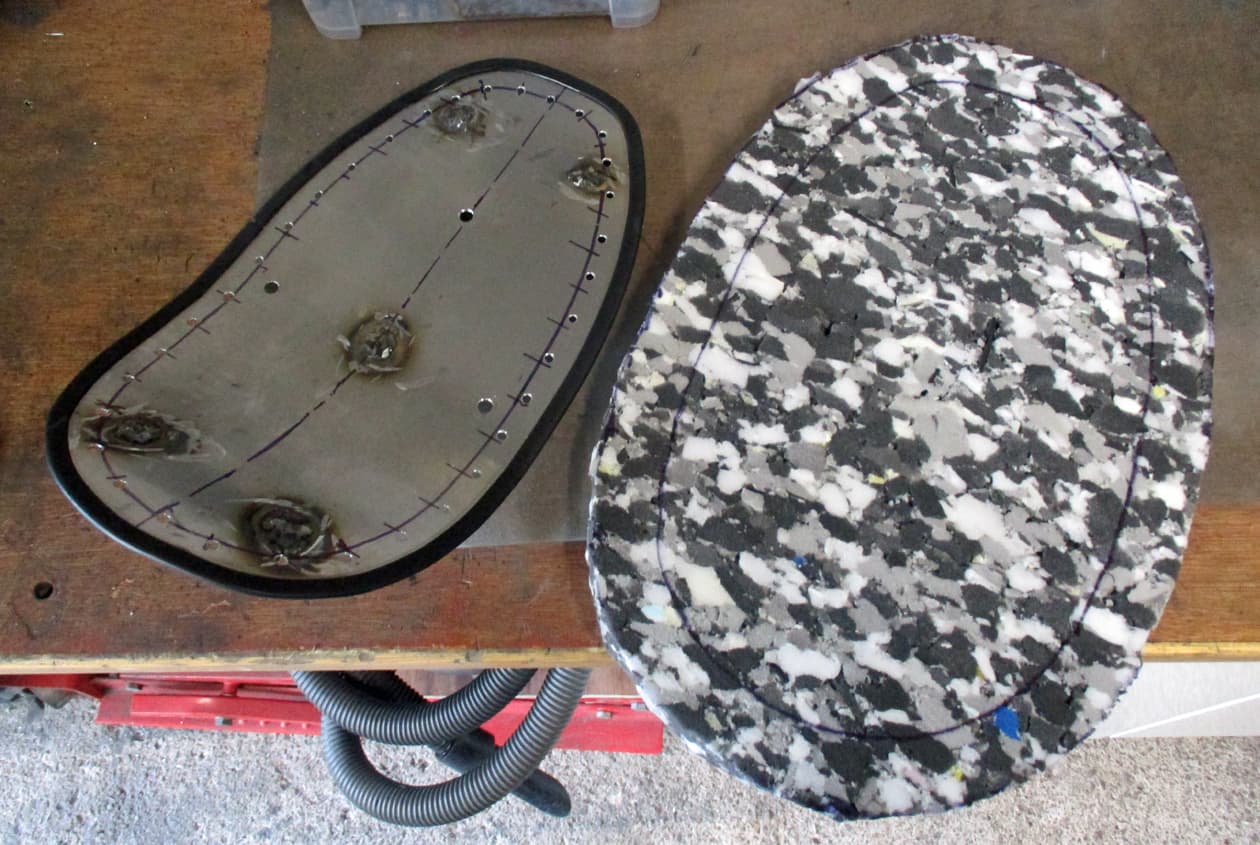
Marked out the outline onto the seat foam and added about an inch and a half of ‘squidgeness’ all around. And cut out with scissors.
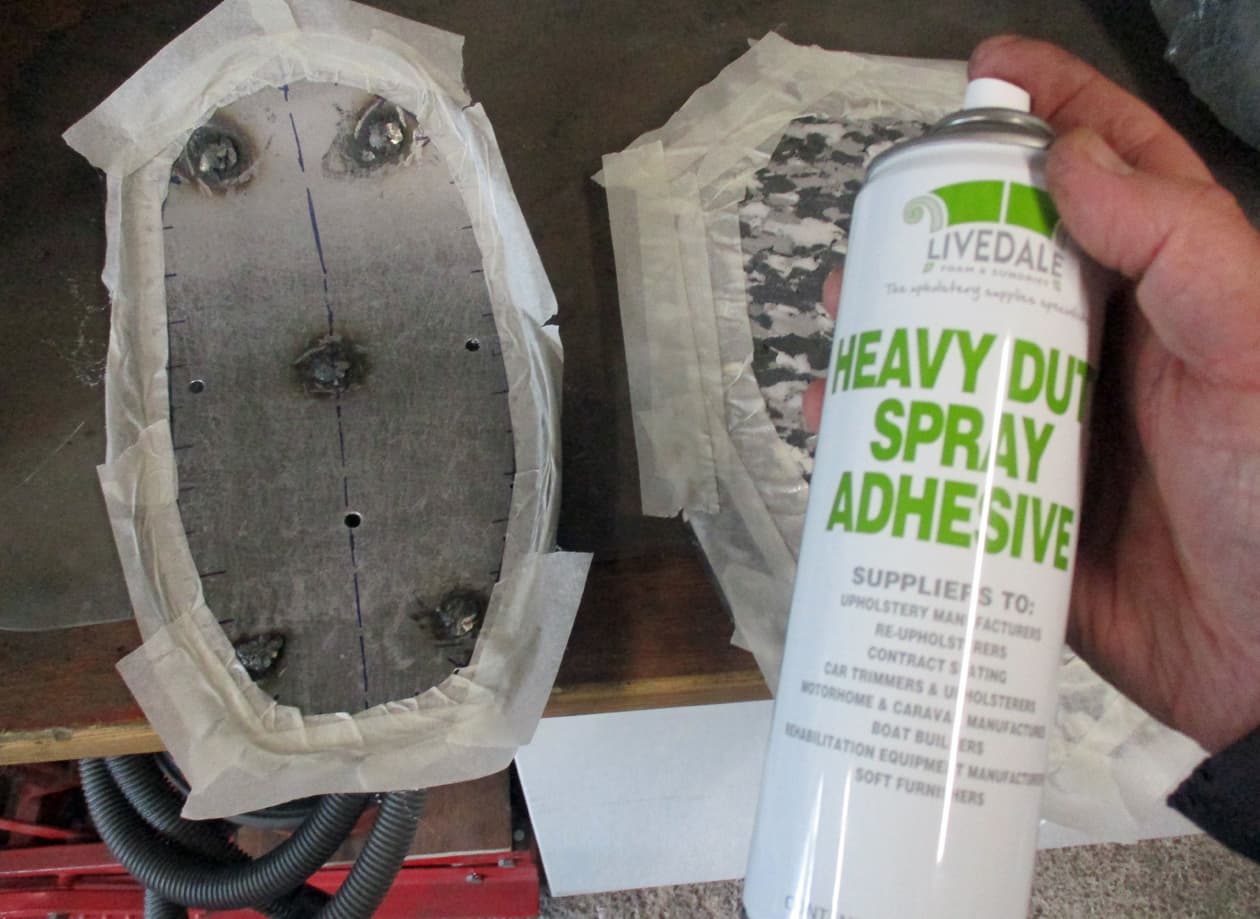
Then masked up around the ‘squidginess’ gap for the foam and used some heavy duty spray adhesive.
It comes out like candy floss not like spray paint at all. So sprayed on a few coats and removed masking
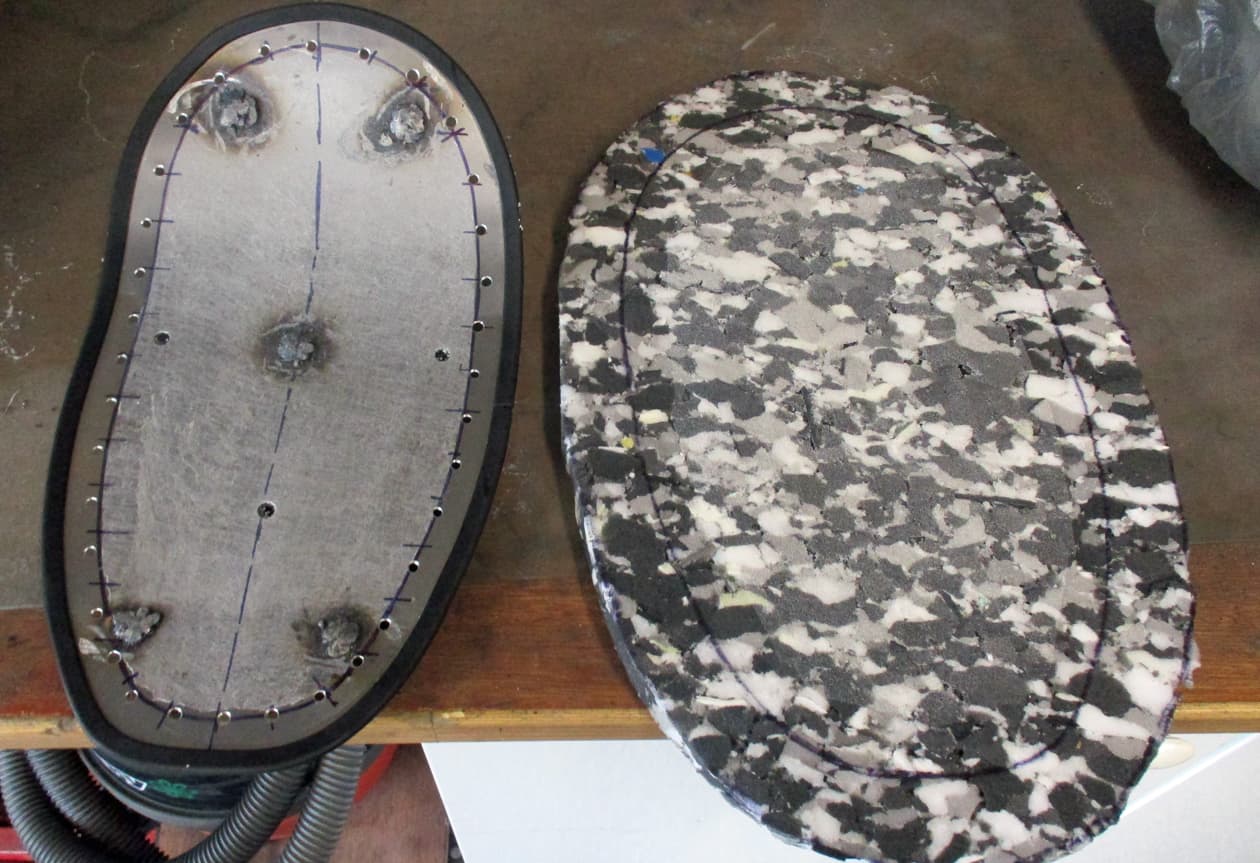
Stuck the foam on after letting the solvent gas off for a couple of minutes. Blimey, there’s no moving it once it’s on. Make sure it’s in the right place as there’s no slippage once it’s placed.
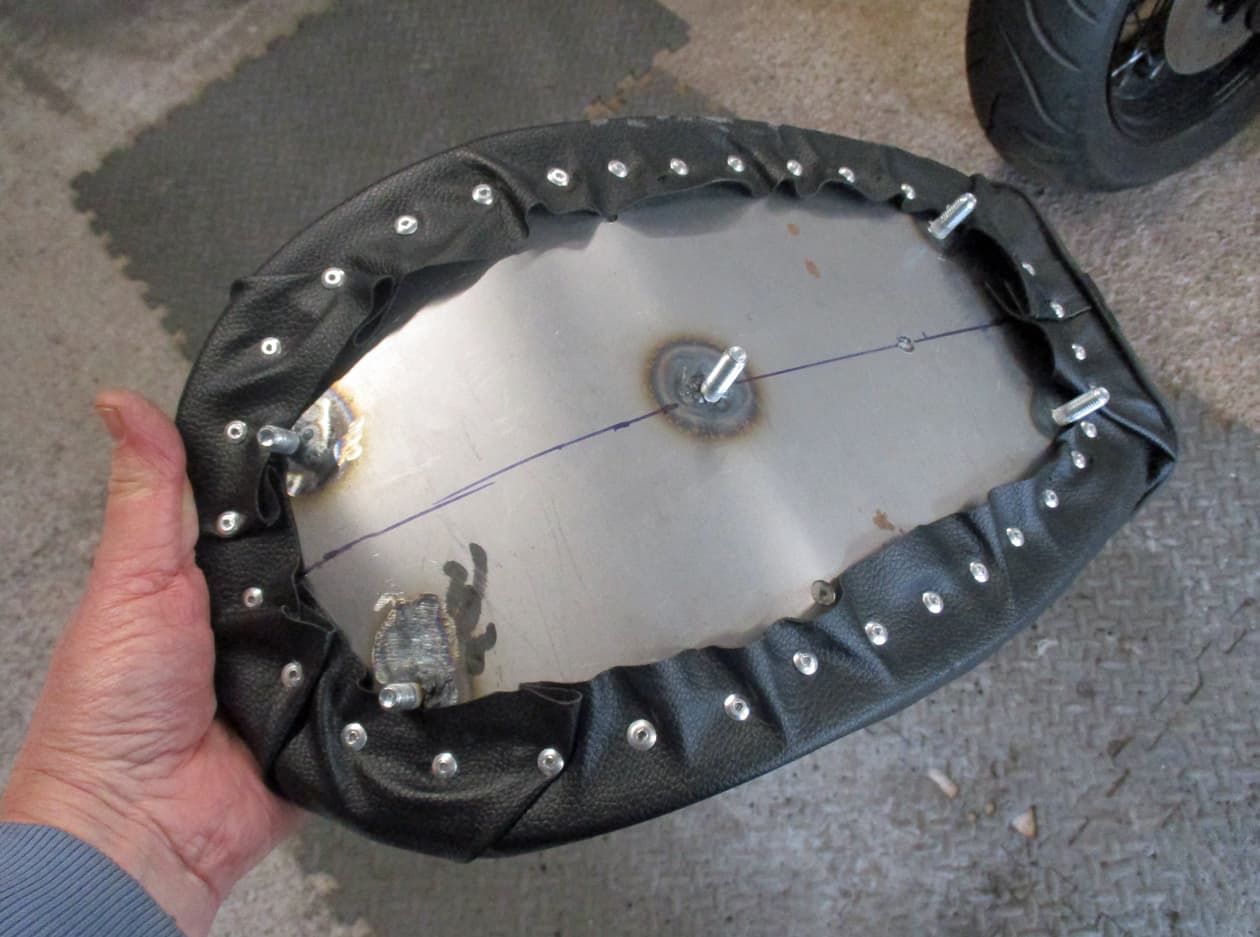
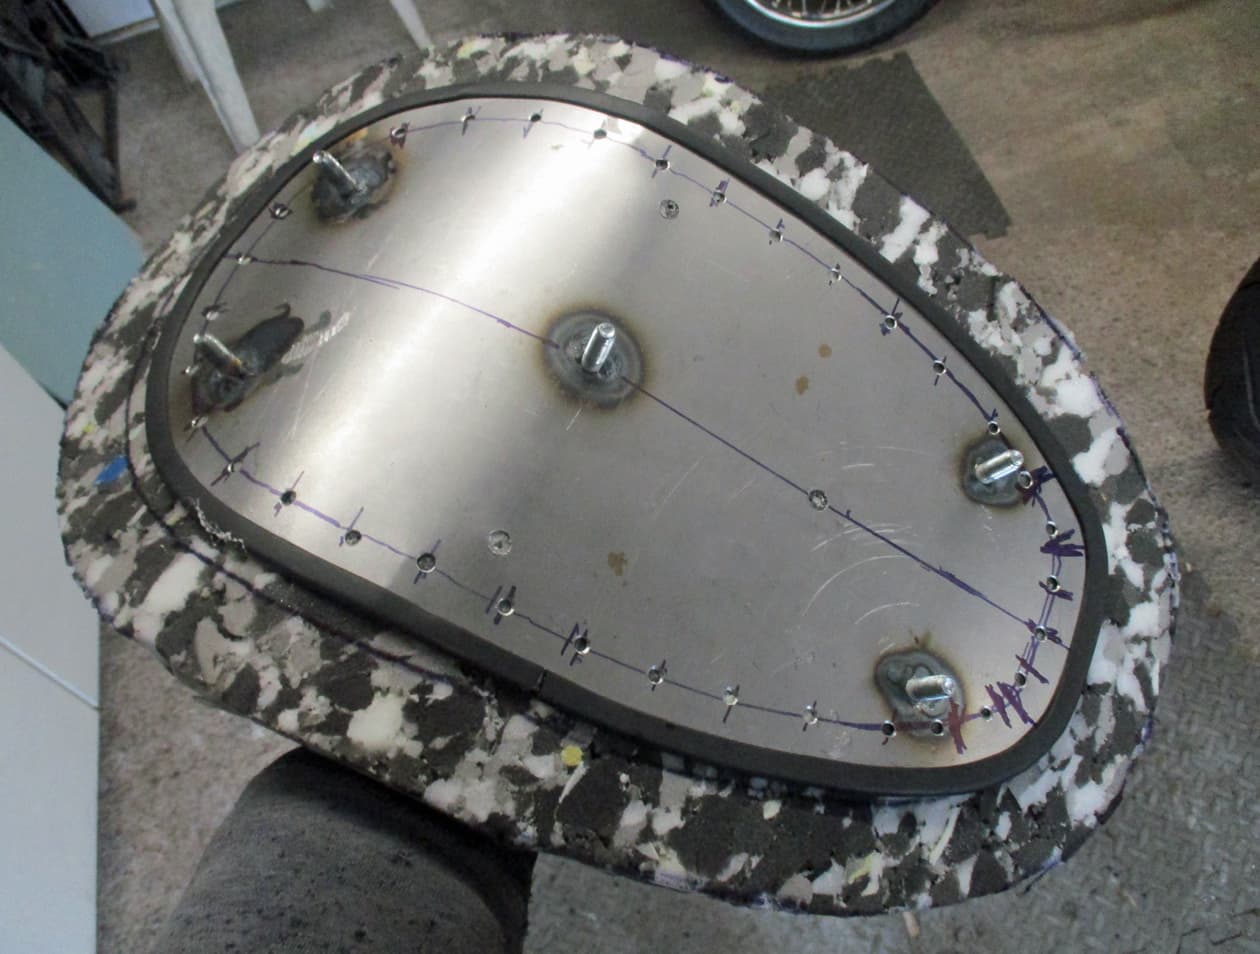
The Admin Staff was then recruited to position, squidge the foam and pull tight while I used the rivet gun. This took some time as stretching and positioning is really important to start everything off.
Of course the rivet gun thing got jammed up half way through, but we got there in the end. Good job Admin Staff…
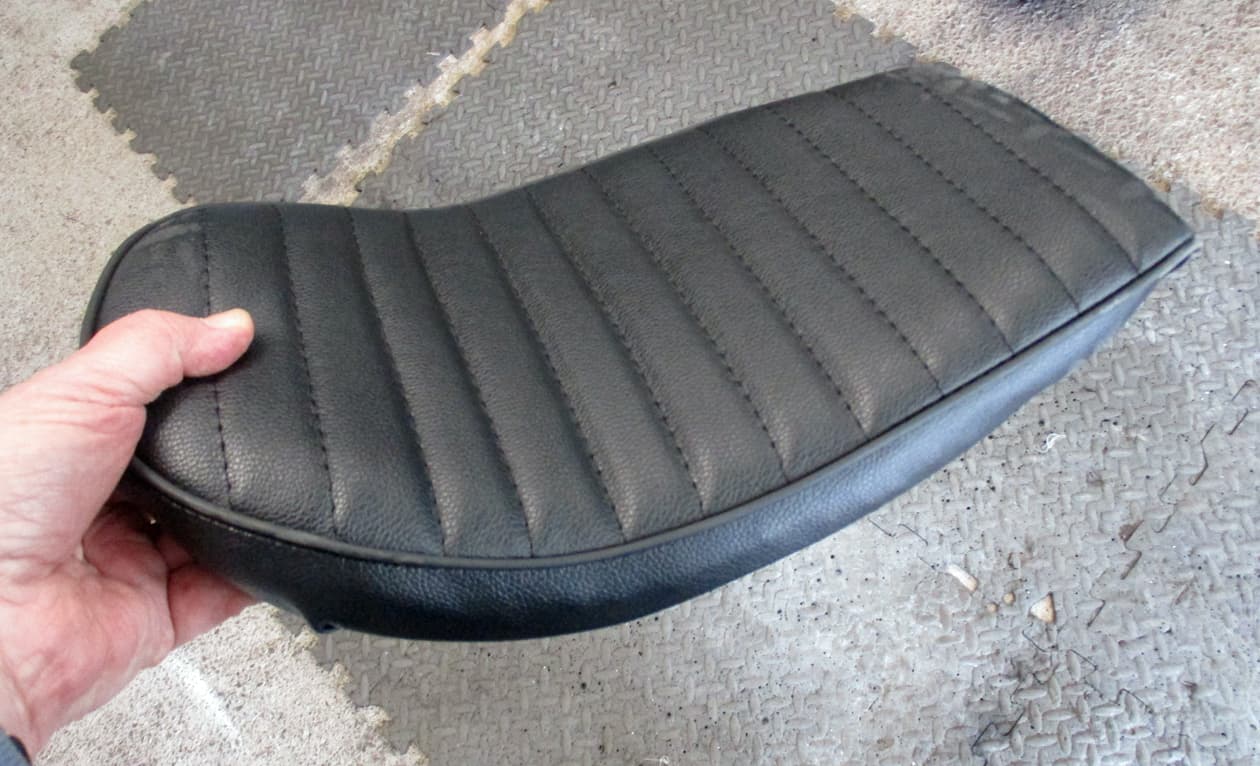
All looks pretty good
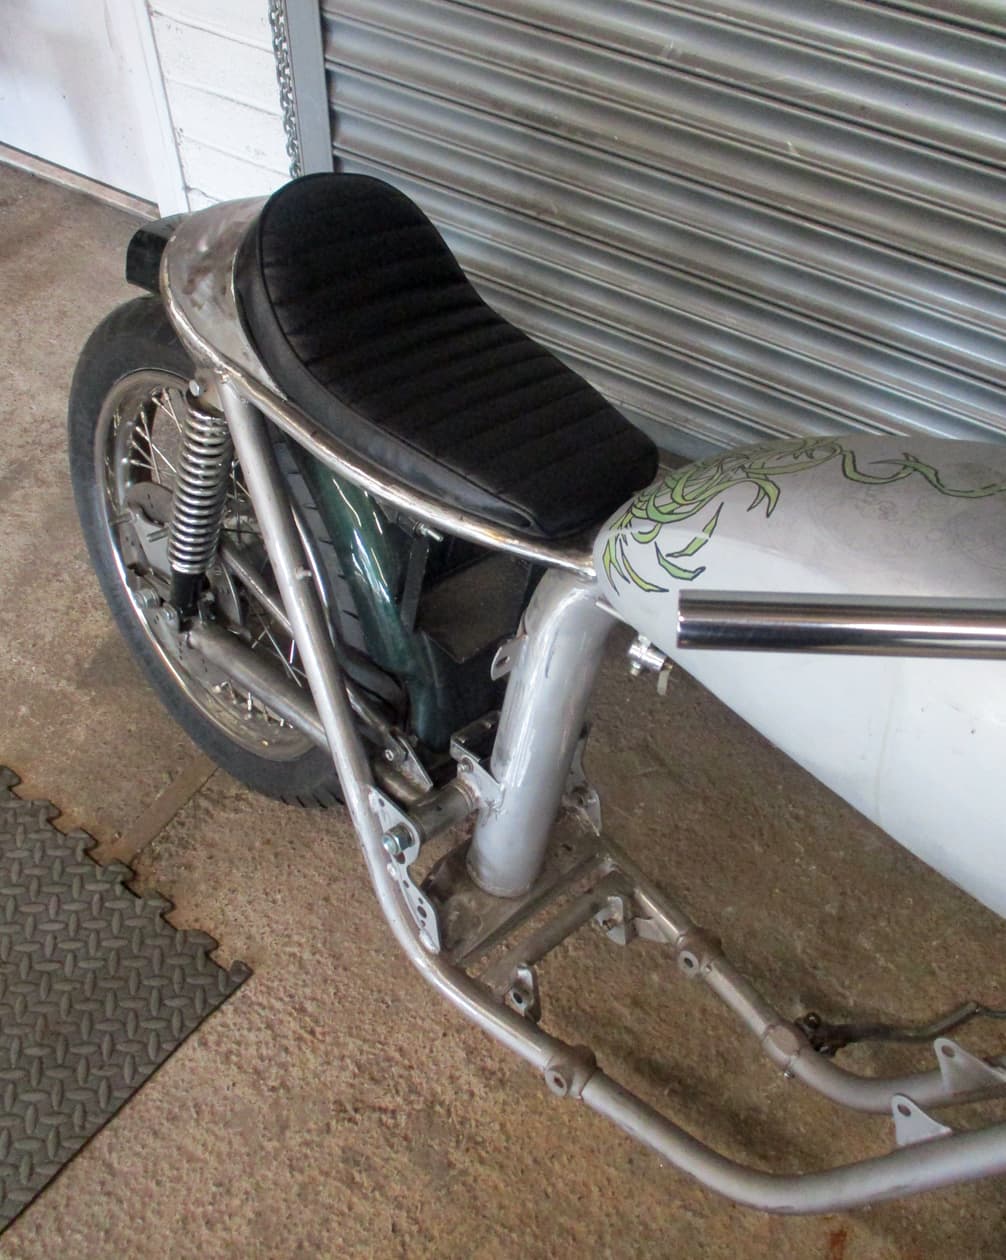
Quite pleased with that I think…thank you…over ![]()
13 Likes
Excellent work all round. If I’d tried that I would stuck half the material to myself, sworn profusely and ended up with the seams uneven to the point where I threw it out the garage and stomped back to the house in a huff.
3 Likes
Awesome job… I’m really loving this thread
5 Likes
And there I thought you were going for the camo look then it became clear that was the foam ![]()
1 Like
Brilliant, just brilliant ![]()
1 Like
Iron for Prime Minister ![]()
1 Like
The existing coil holder tray rusted away to mostly nothing prior to the turn of the millenium. So a new one is required.

Here’s one on another bike. The tops of the coils can be made out. The tray thingies are easily available but this month’s pension is already allocated to the dentist. I have three half hour visits for the next three Fridays. Each visit is half an hour long and each is costing £295! That’s £10 per minute. Oh joy.
So thought I’d have a go at making a coil tray…
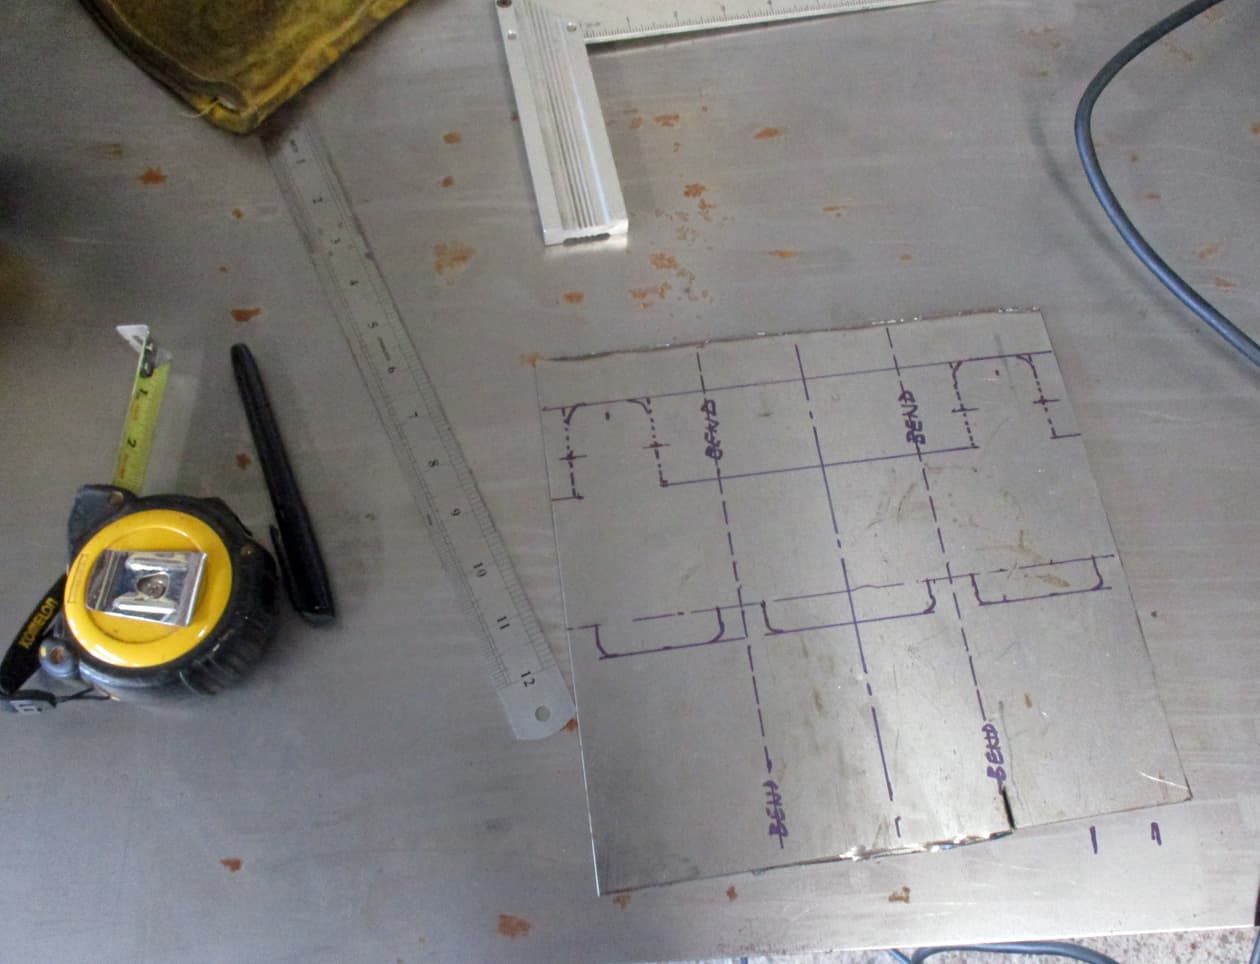
Measured up an existing one insitu. Quite difficult to do with wires all over the place and the actual holder sections are bent at an angle. The dimensions for the connection bolt holes to the battery tray were estimated and over sized so thay could be made while holding it in place.

All nicely cut out.
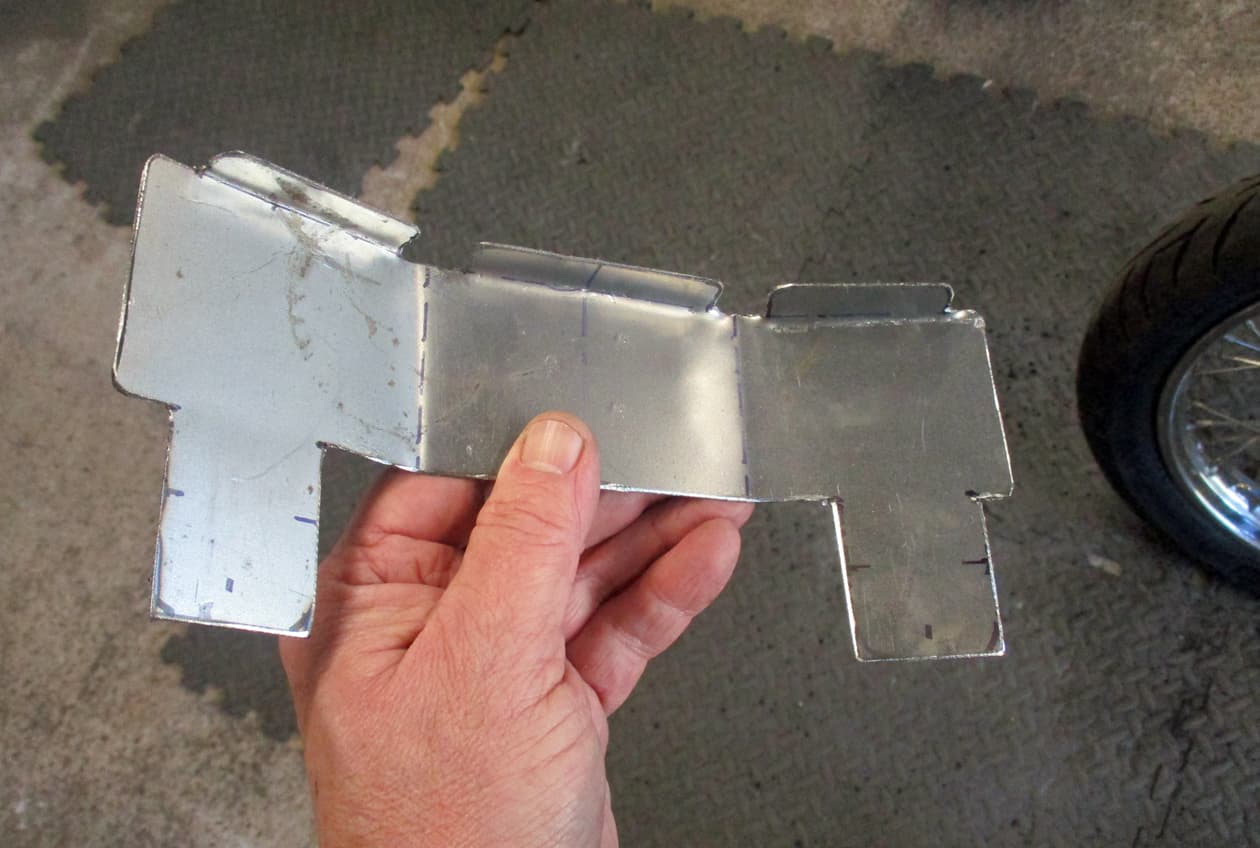
Then bent into shape by using the vice and a hammer. i had to give this bit some thought as bending the wrong part would get in the way of bending another so the correct sequence needs to be thought through.
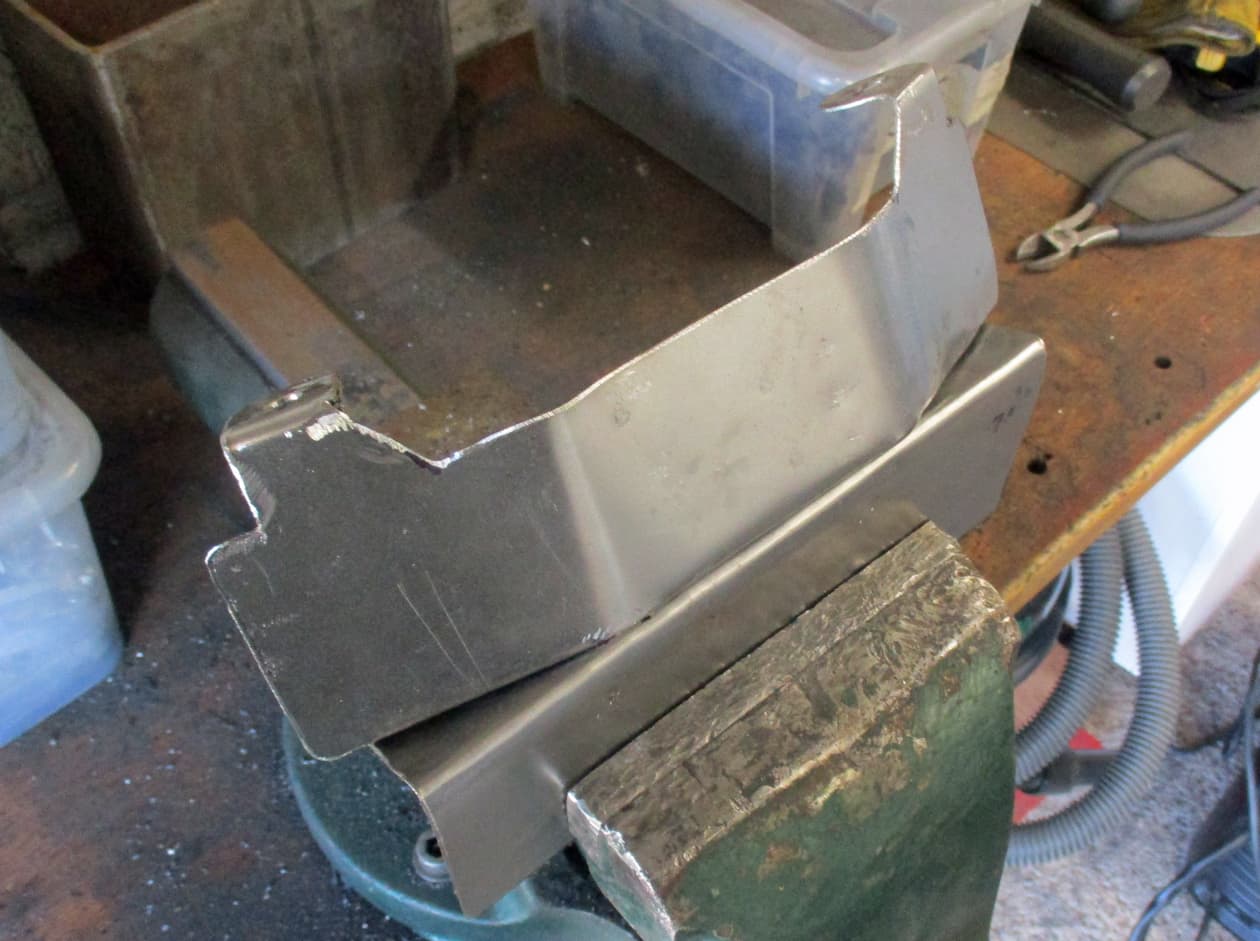
Bent the bolt tangs up last and held up to mark the actual size needed.
Cut the oversize bits off and drilled out the bolt holes.

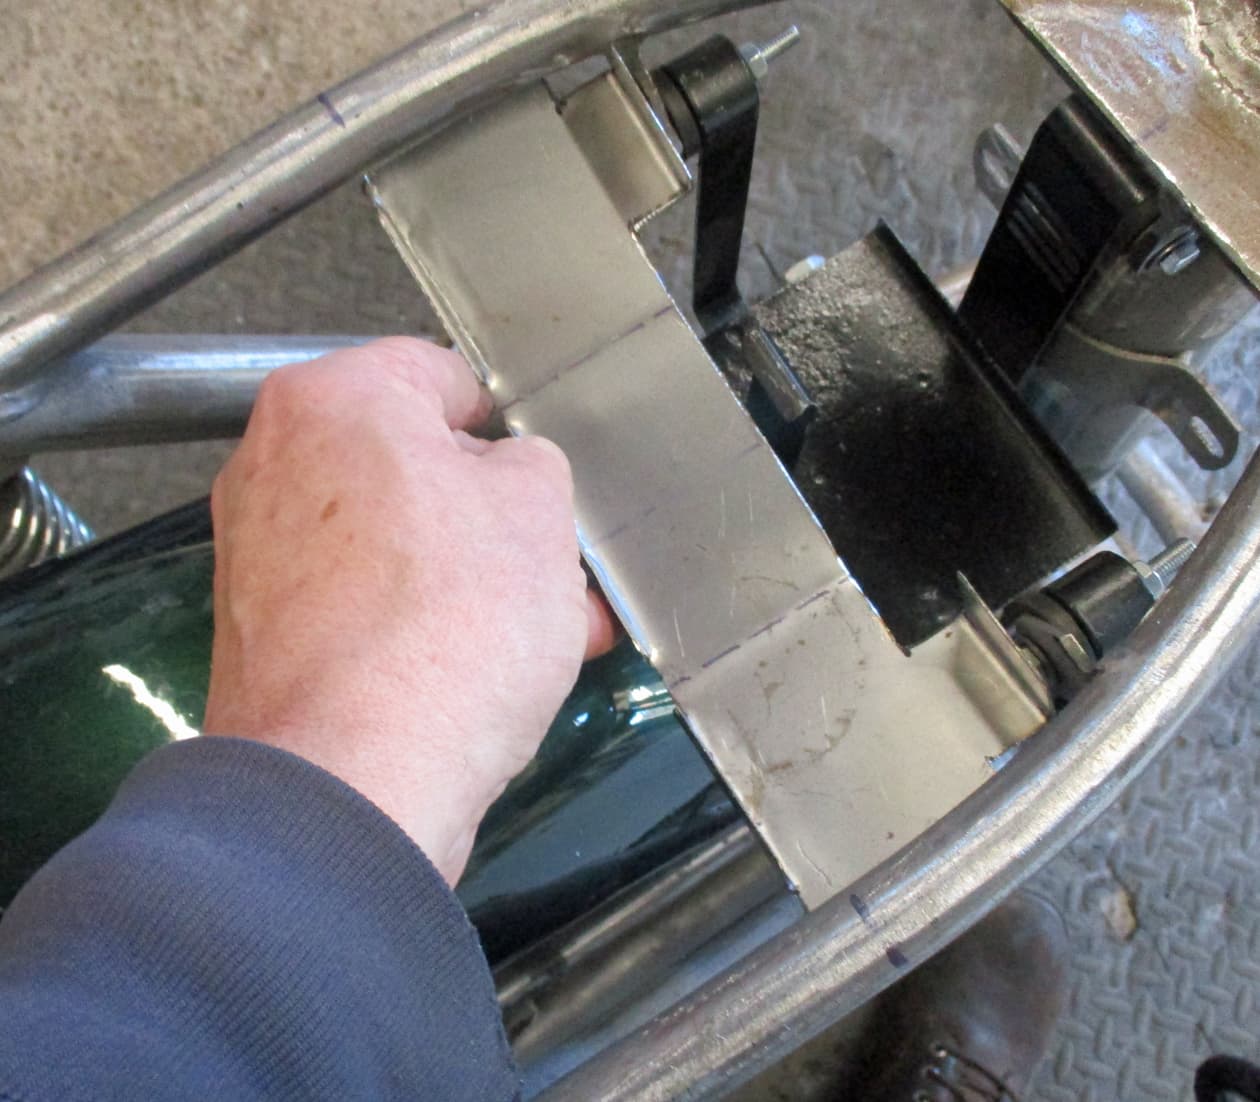
Bolted that onto the battery tray to have a look at angles etc. All looked good.
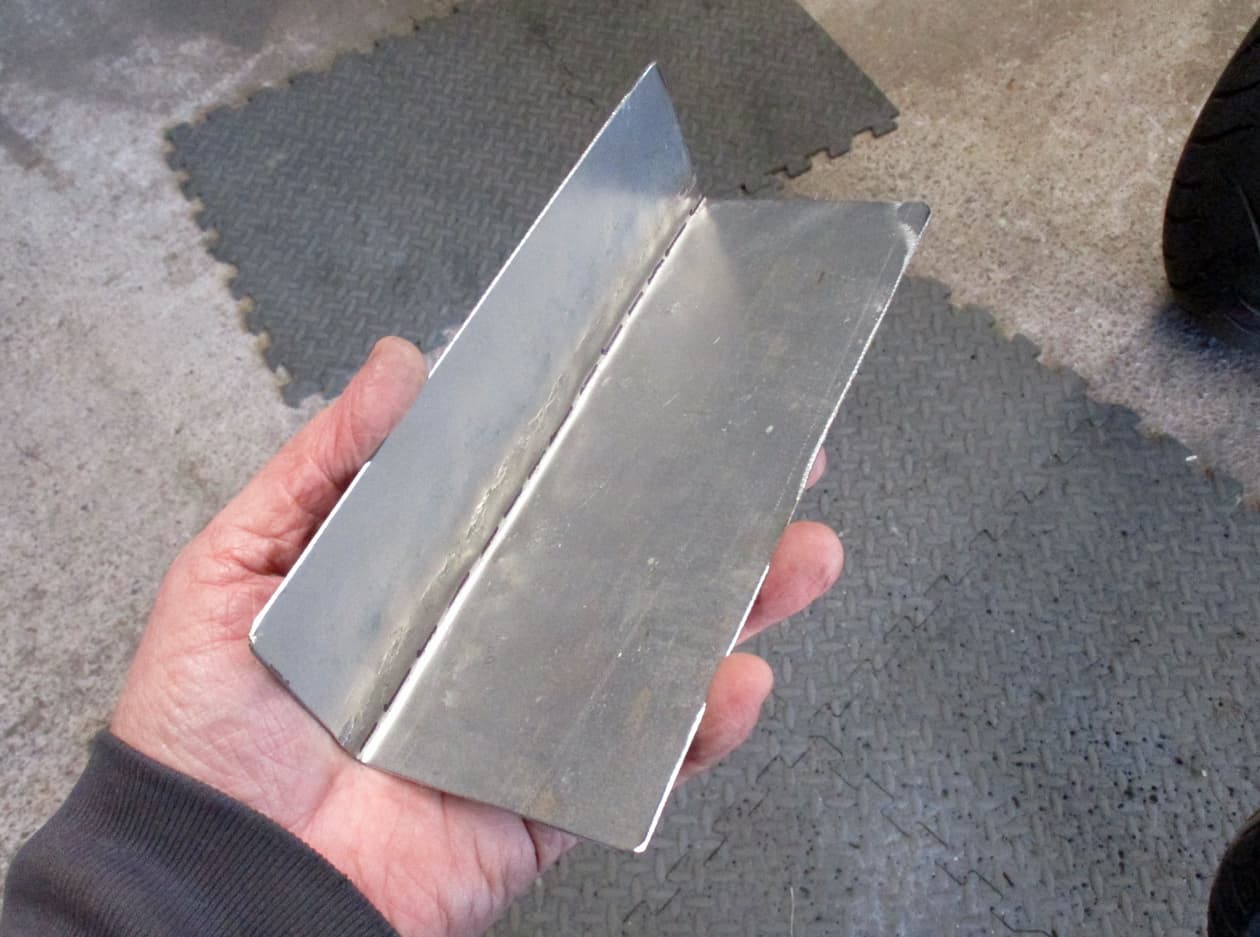
Cut and bent the back plate that bolts onto the mudguard and acts as the toolbag tray under the seat.
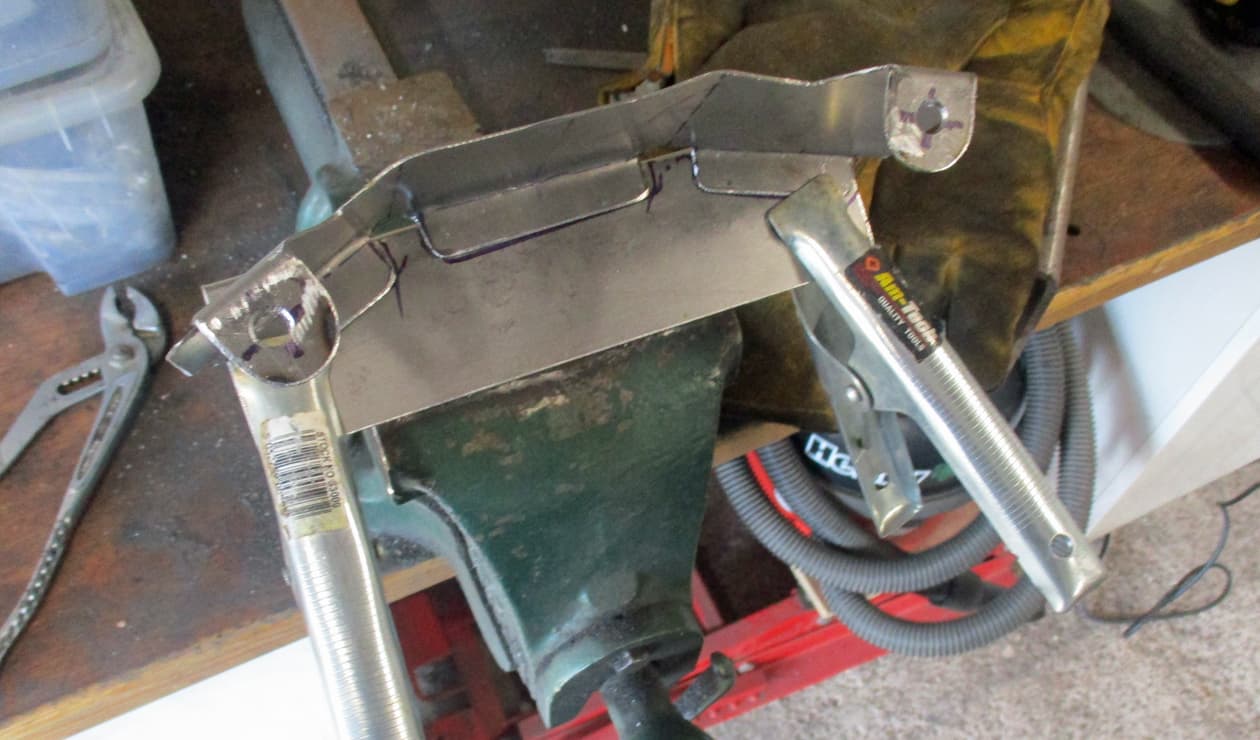
Positioned it all up in the vice and gave it a jolly good weld.
Turned it over and welded underneath too. Can’t have too many welds (particularly mine)
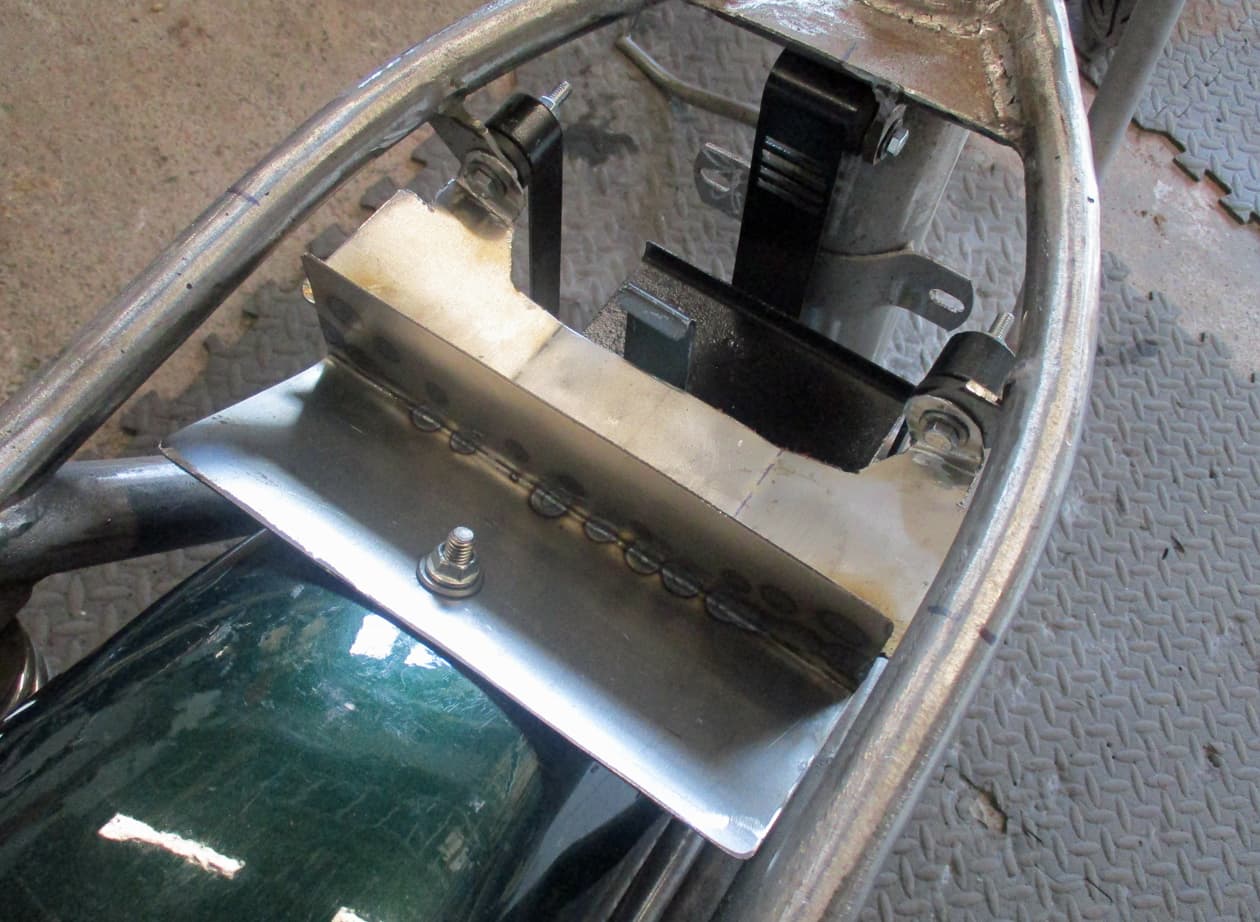
Drilled the mudguard bolt hole to suit and whacked it in. I don’t need the back brake reservoir cut out as I’ll position that somewhere else. Just got to cut the large holes for the coils now. Hmmmm… Luvly…over ![]()
10 Likes
And what did you do for the rest of the day??? ![]()
![]()
![]()

Well, that took ages. Trying to get the holes just the right size so that the large rubber grommets fit but there’s a enough room to squeeze in the coils - and keep them tight. Maybe just going for the older type T120 coil clamps would’ve saved a bit of time.
But there’s no point in doing something I already know how to do, trying something new that I don’t know how to do teaches me how to do new things. Or something like that. ![]()
14 Likes
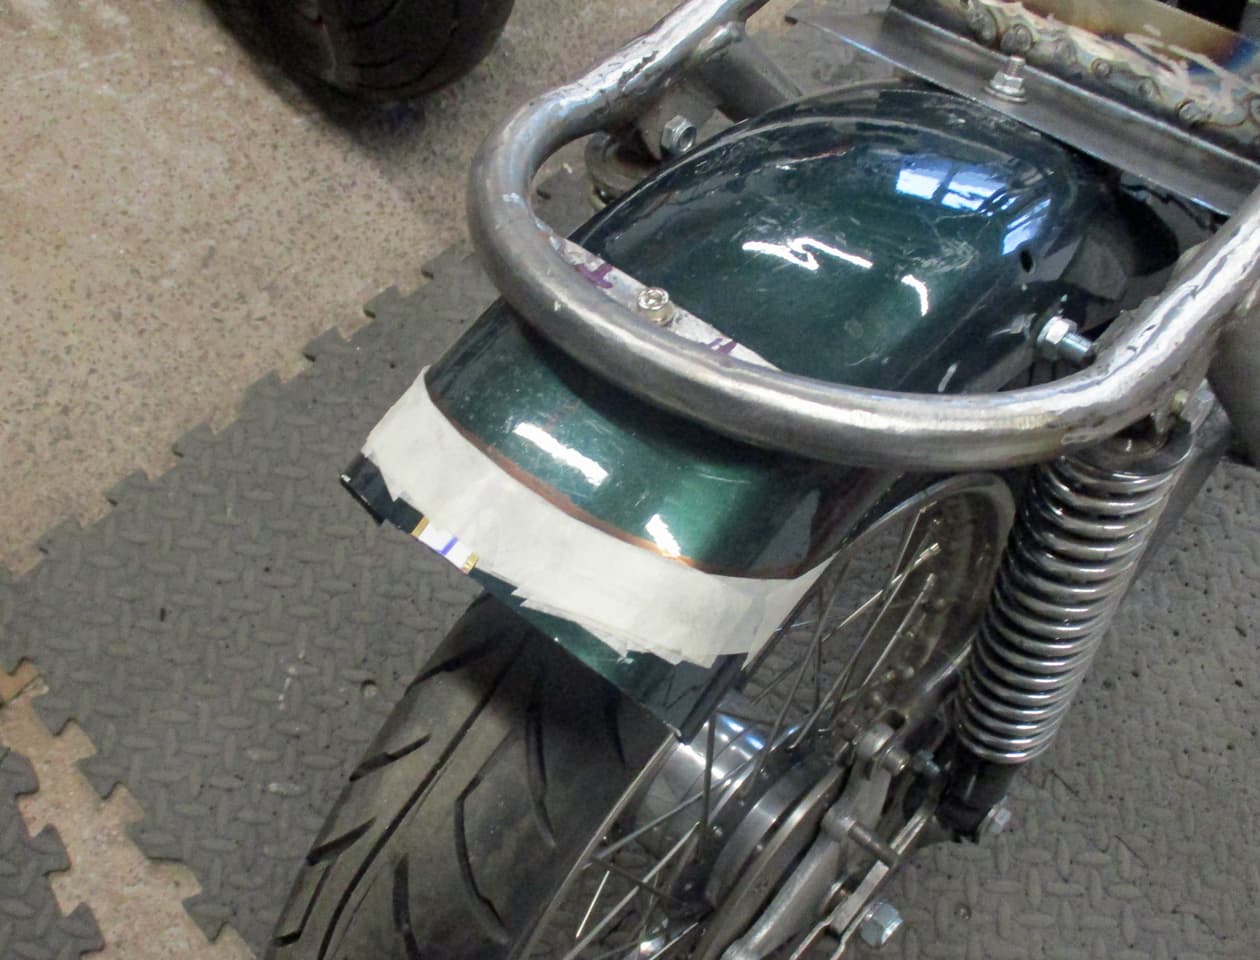
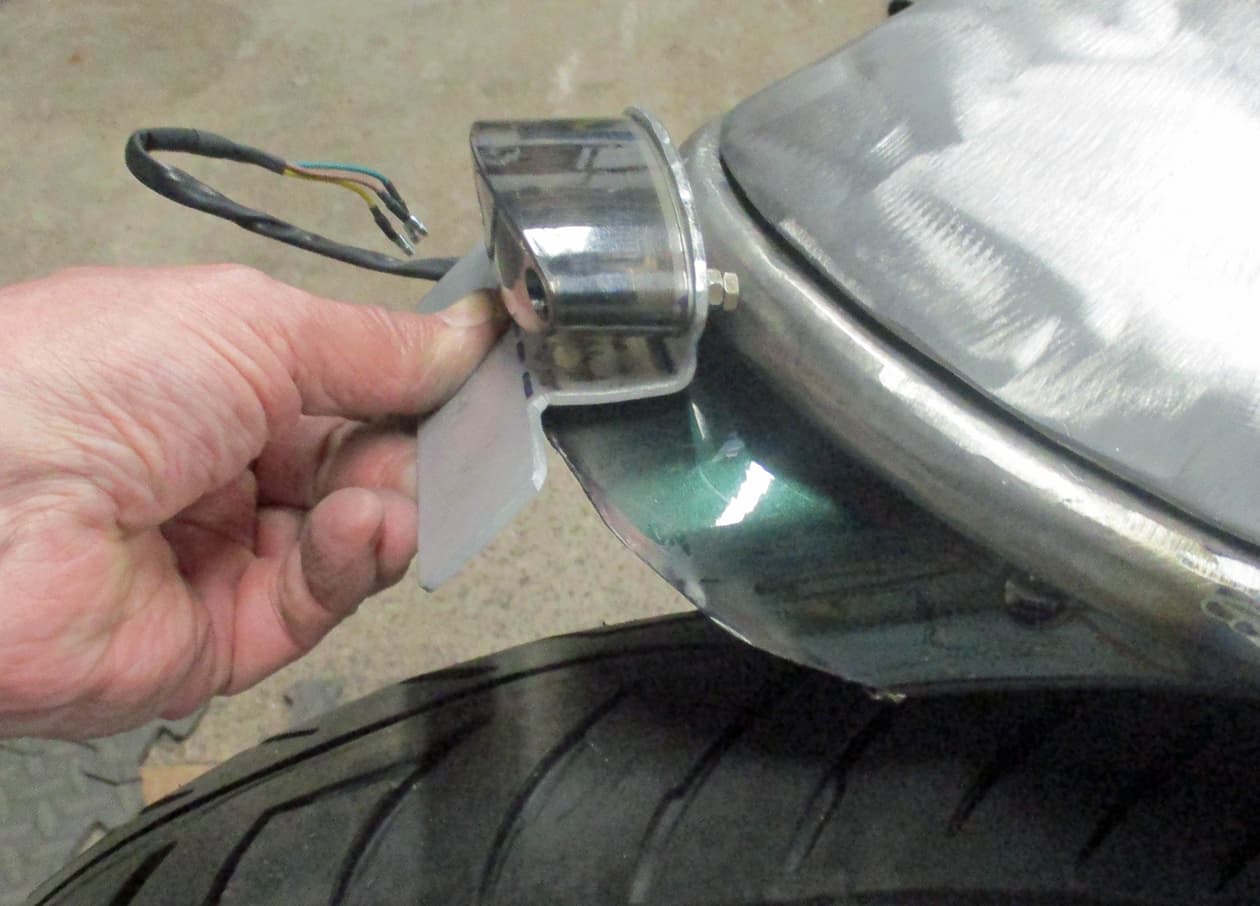
I’d thought about the back light and didn’t want it bolted into the cowled section. For one reason, the back light would need to be unplugged to allow access to the battery (although I always wire in an optimate plug so recharging/top up doesn’t need access). But also I’d like the cowl to show as I’m planning to be paint it to match the tank.
I picked out a slim sort of cat’s eye shaped one rather than the small bates type I’ve put on others as I think it suits better.

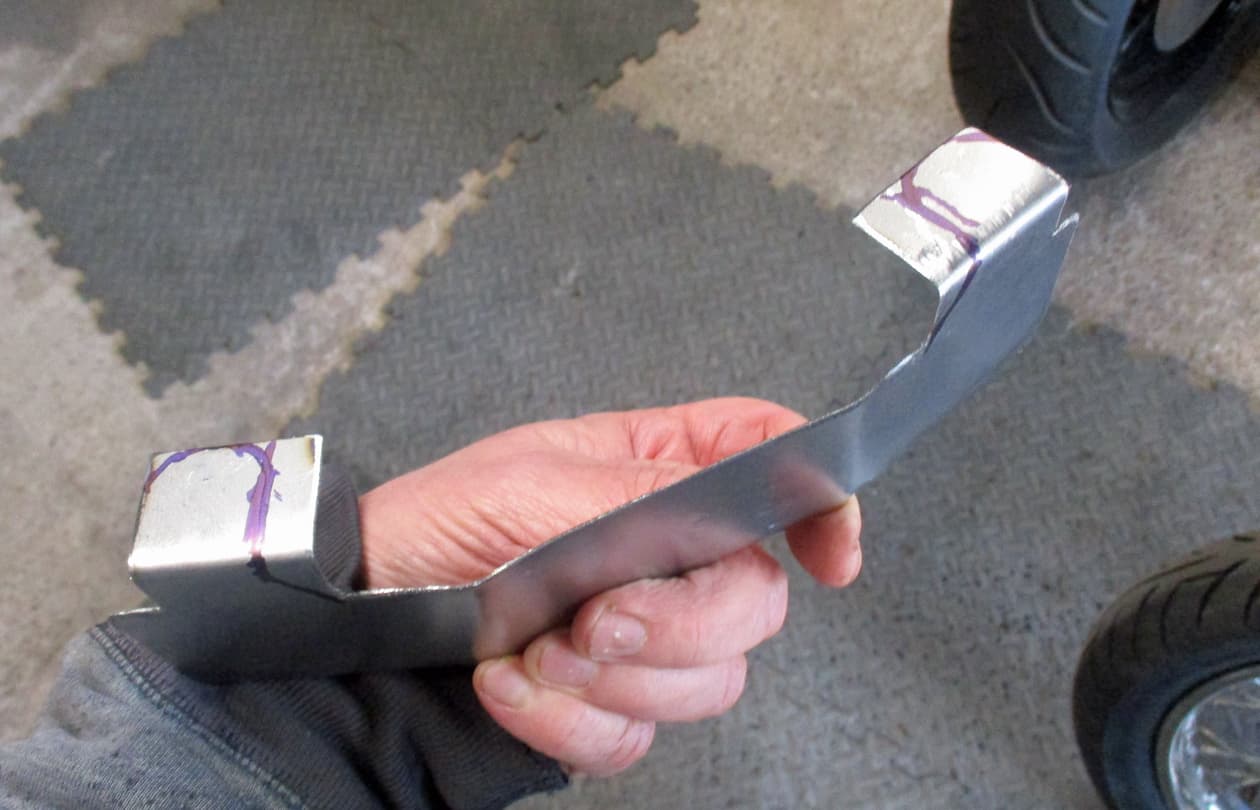
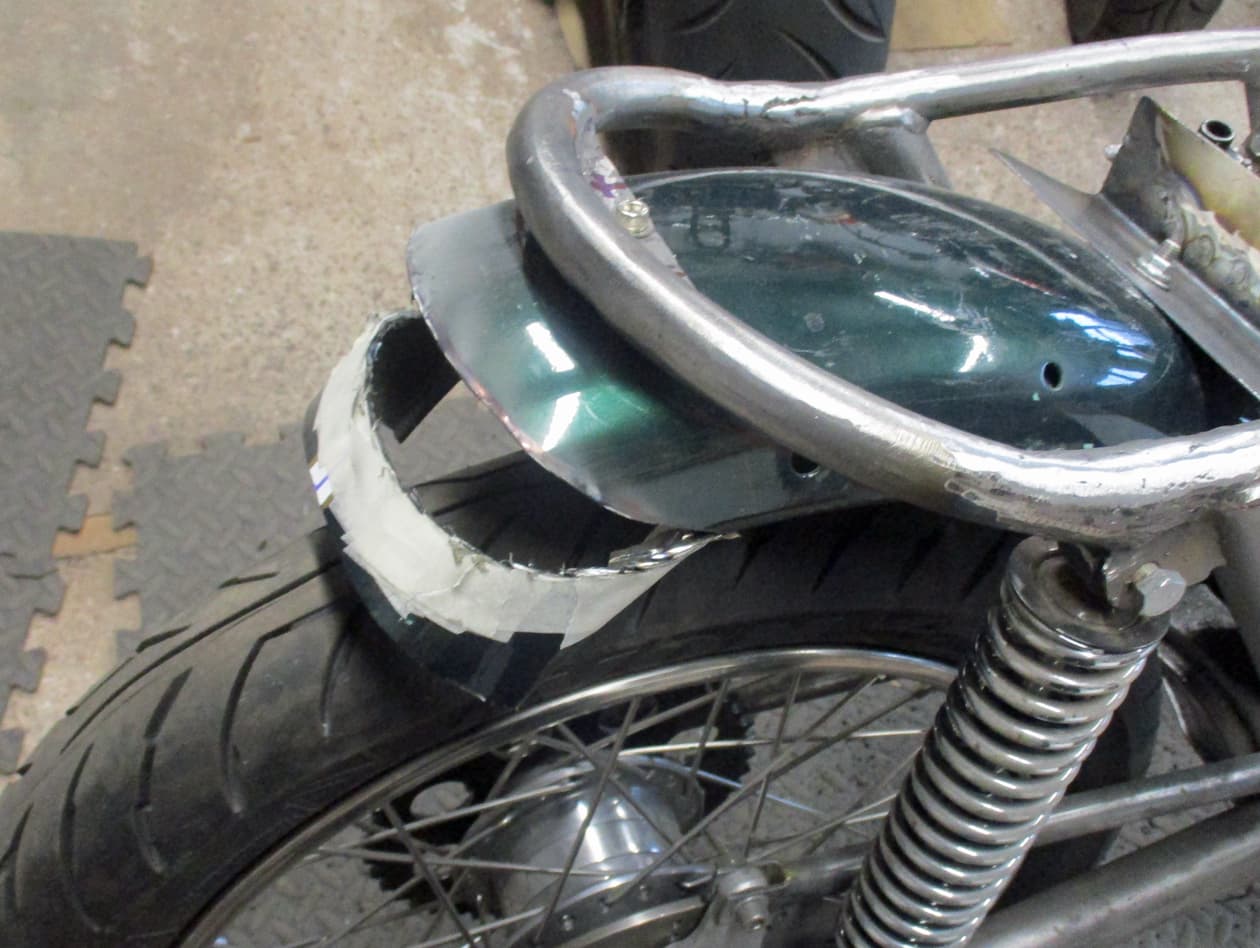
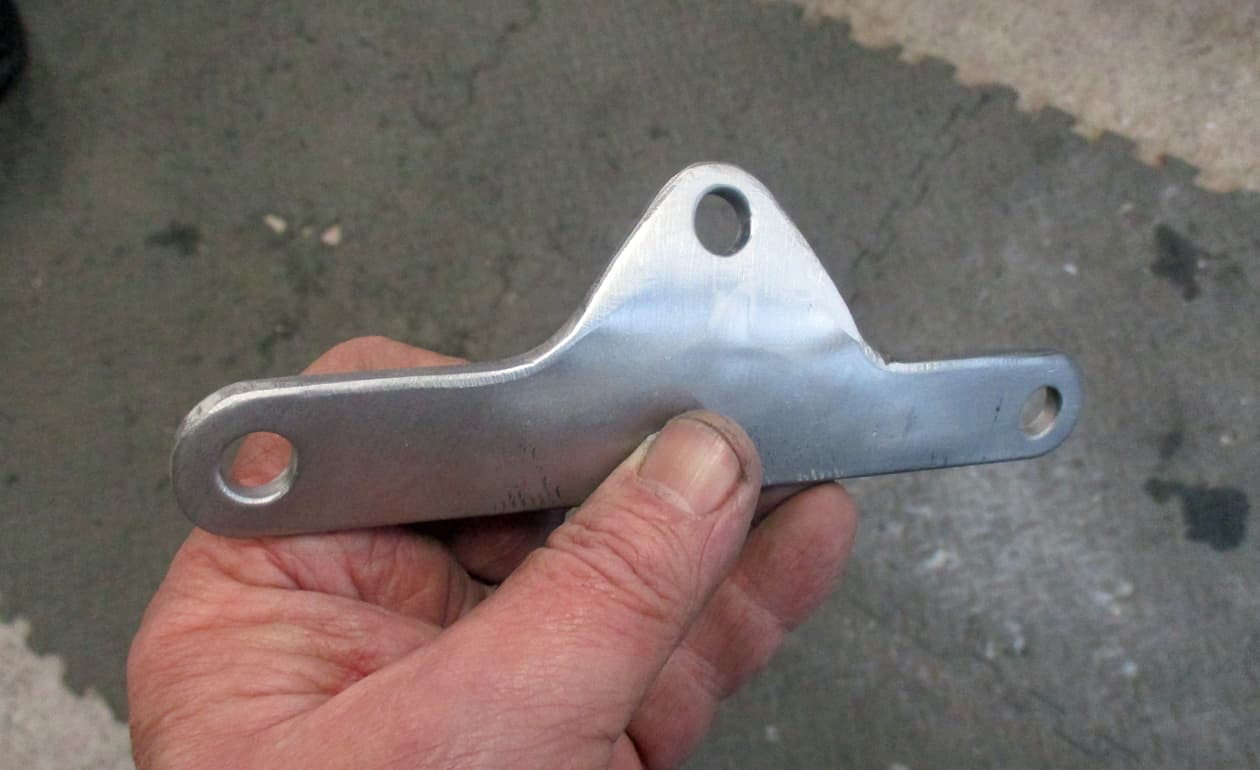
A bracket is required. It would be nice if the bracket not only holds the back light but also acts as a number plate holder. Marked out the shape onto a piece of ally and slowly cut, drilled and filed. I sort of snucked up on the shape with a file while checking against the shape of the light.
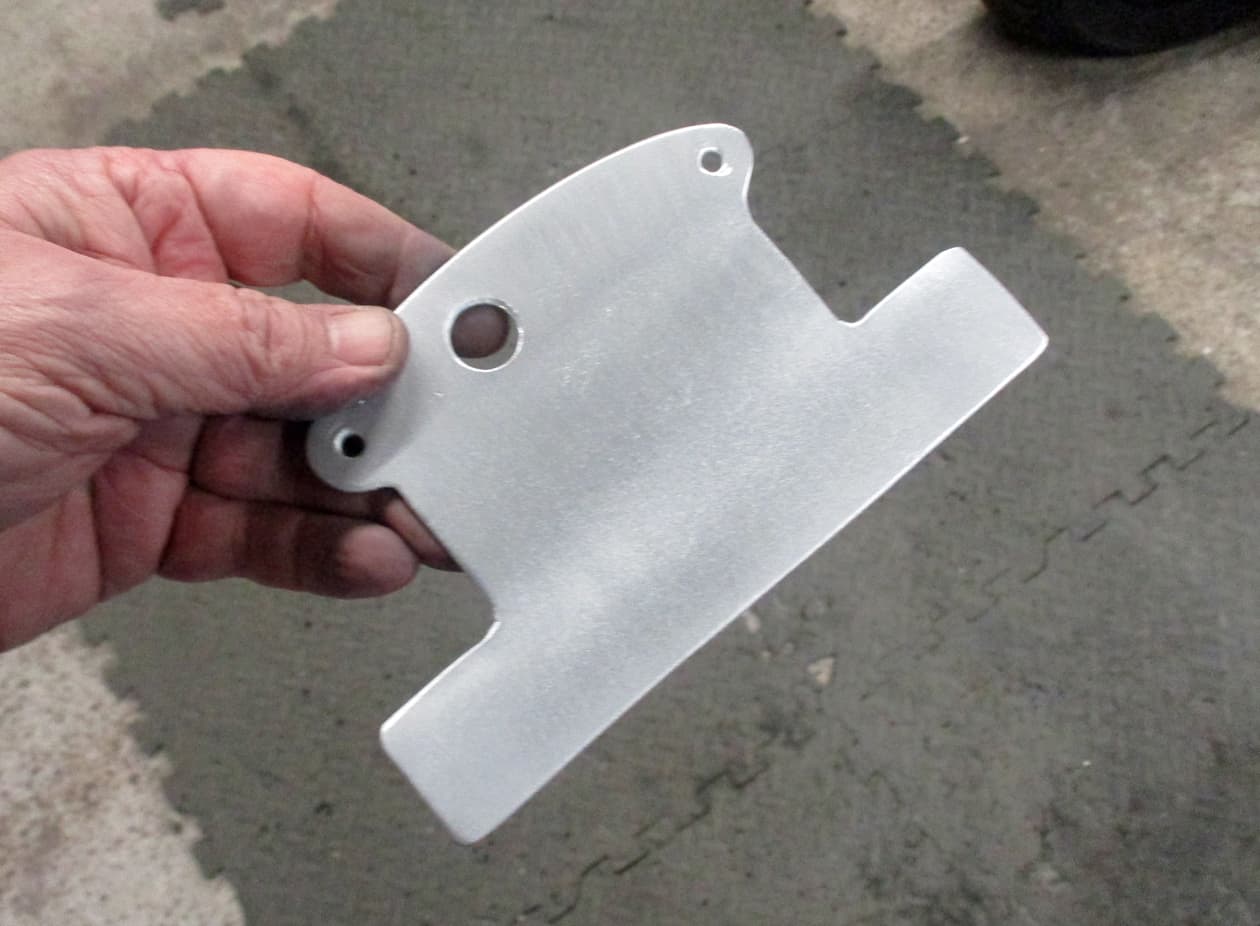
Eventually I ended up with this. Holes to match bolts and wiring.
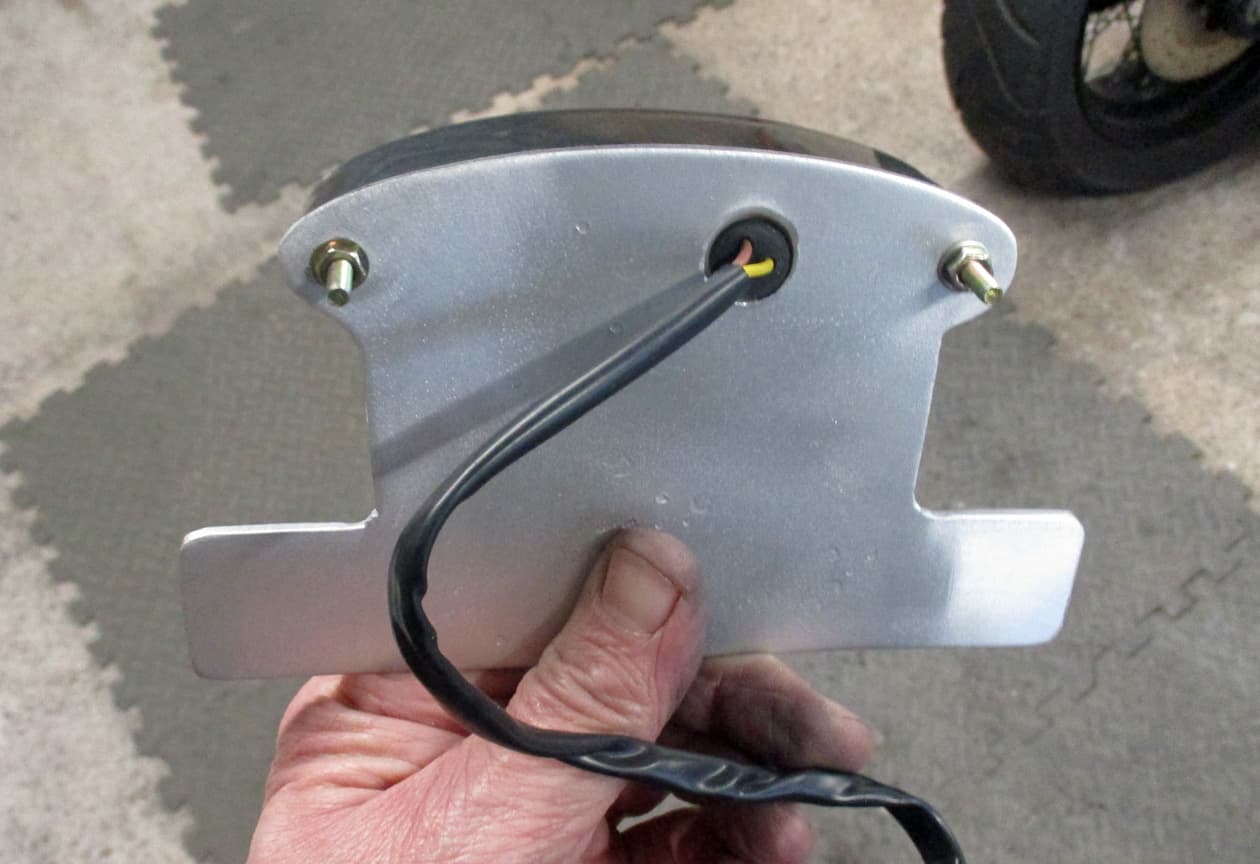
Back side…
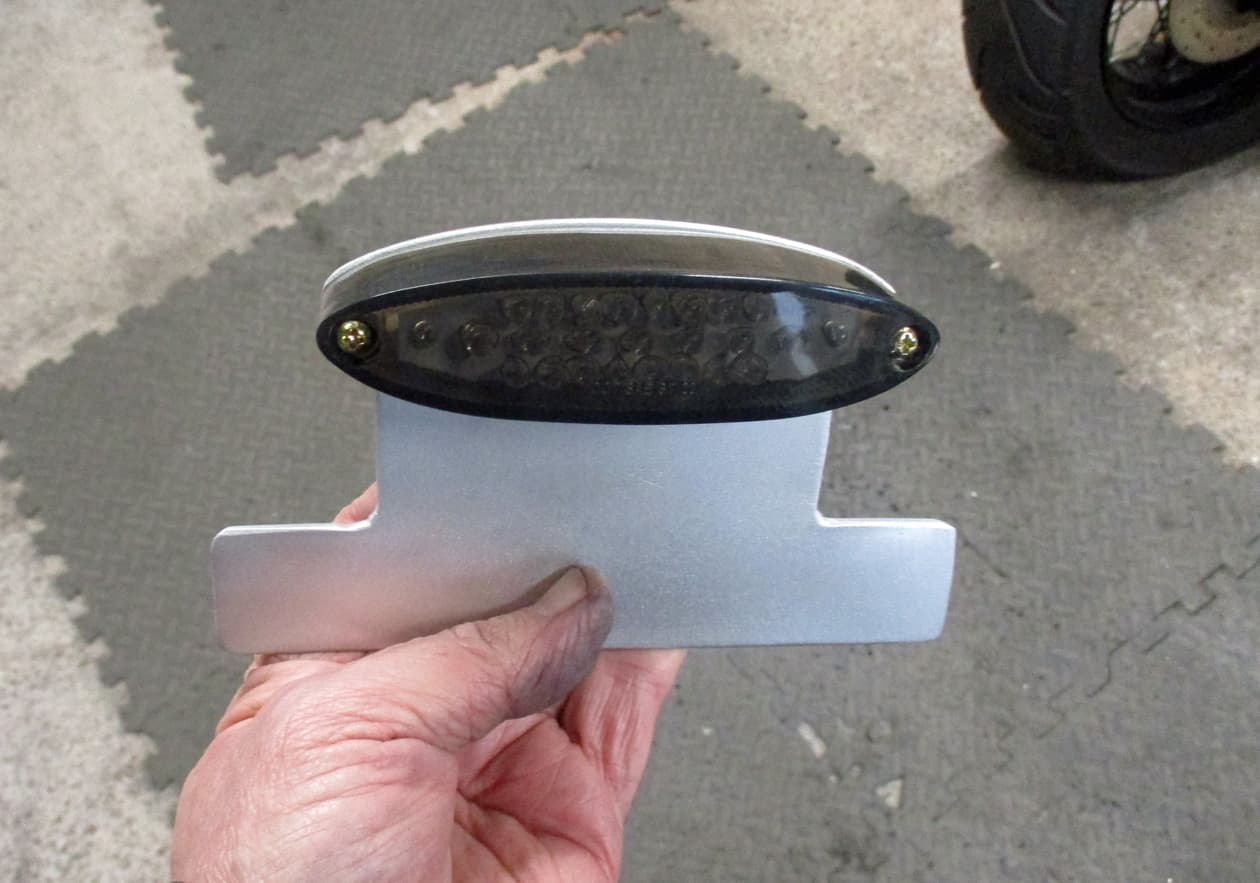
…and front. Matches pretty well. Phew.

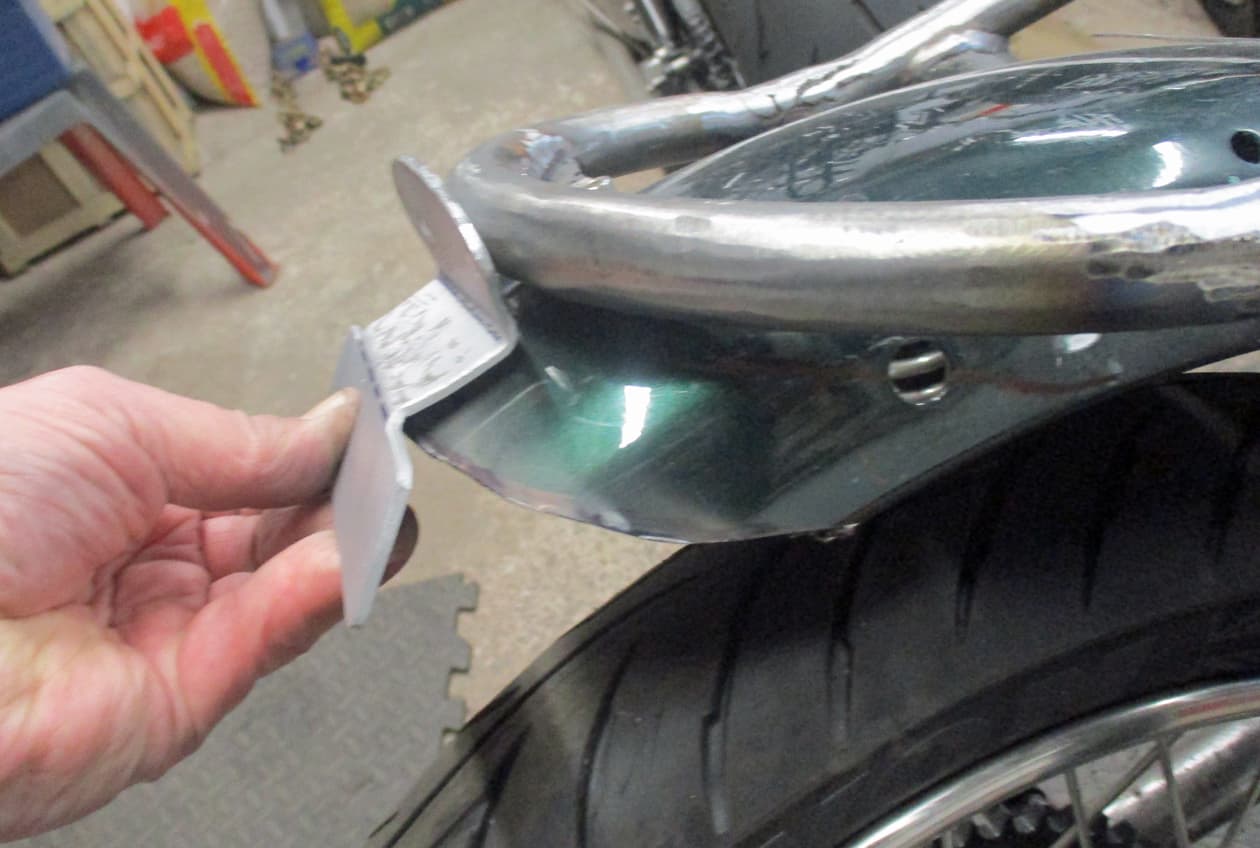
Then , after offering up to the back several times and marking did the first bend in the vice and whacking with hammer.
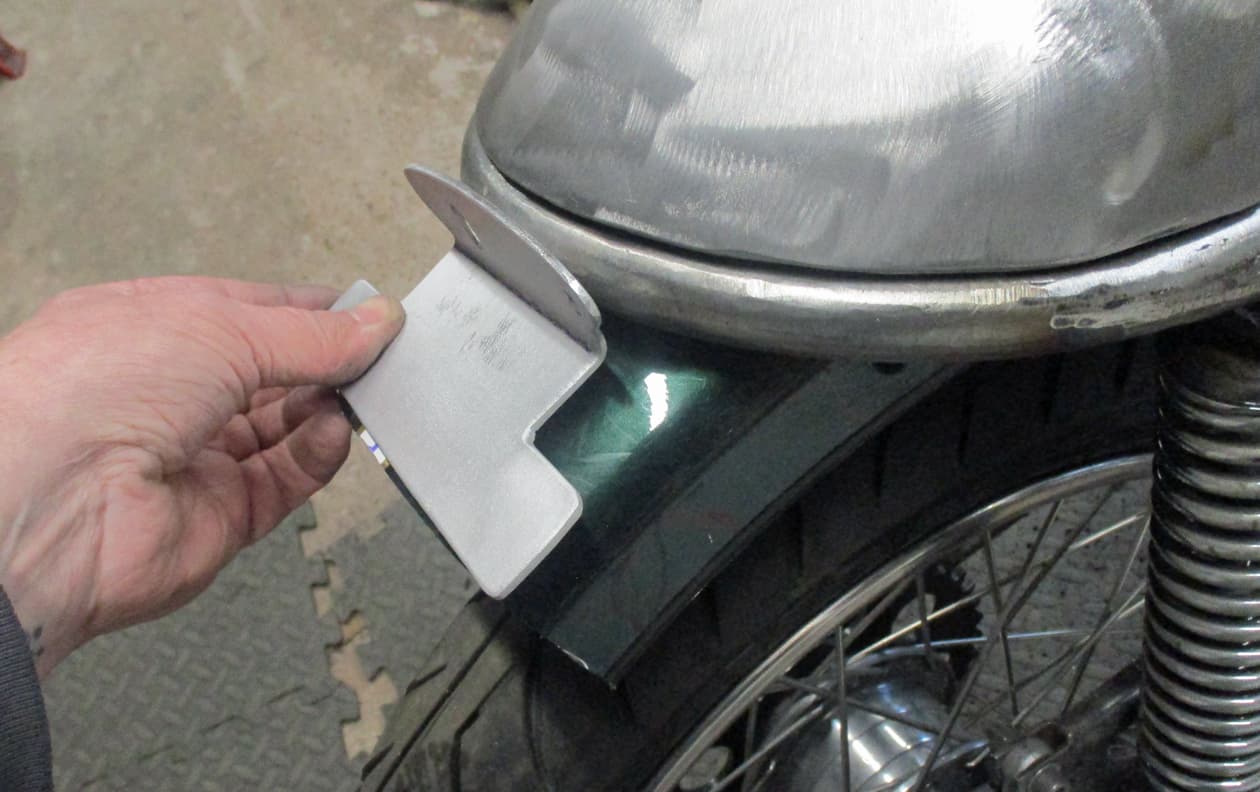
Offering it back up to the bike allowed me to mark the back mudguard to cut. So then the second bend can be made for the number plate.
Once marked with a felt tip. Use some masking tape to show up the edge better for cutting (it’s quite difficult to see any line with sparks all over the place and it’s easy to go wrong with a cutting wheel)
Lots of little straight cuts taking time to eventually cut all the way through. These thin cutting discs are easily broken if twisting while trying to cut. They can sort of explode quite violently so it’s essential to use goggles. The damage these blades can cause is really severe so be bloody careful.
Then offered up the bracket again and made the second bend. The estimate for the required bend has to be considered with how much the back wheel will come up when riding on it and hitting a bump. The number plate can easily disappear if it catches on the tyre.
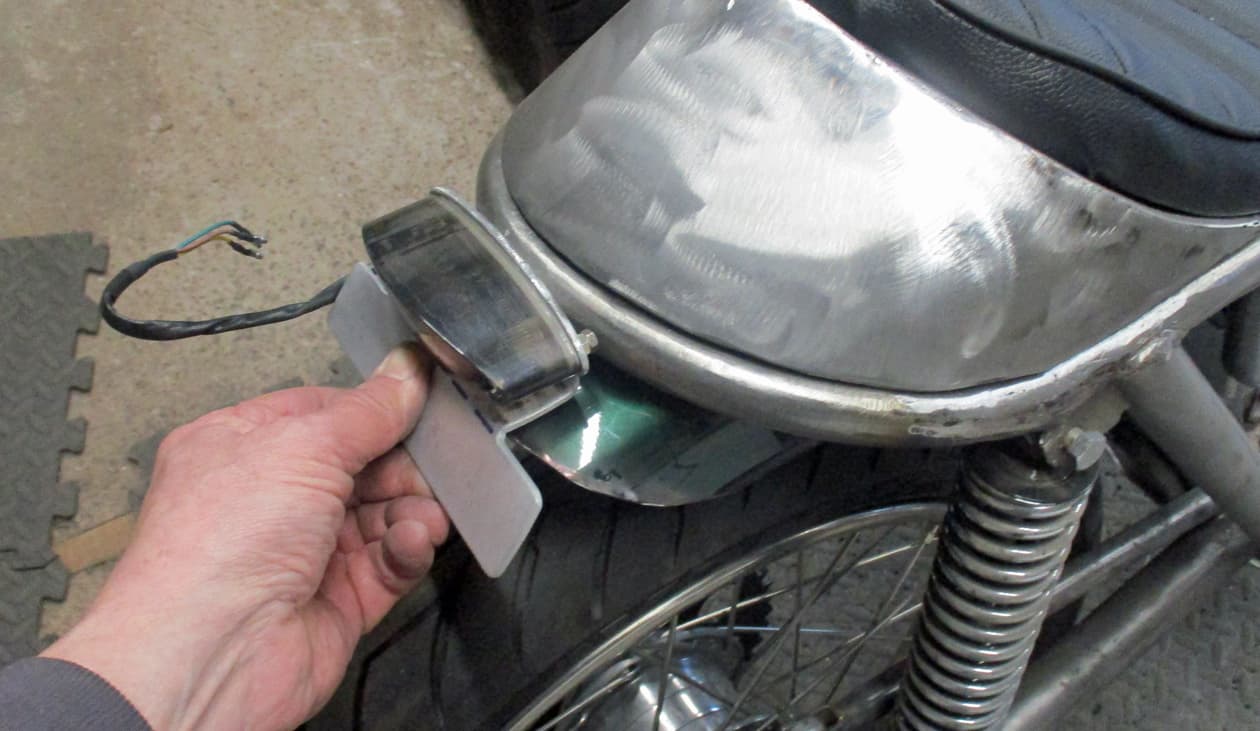
I think that’ll all bolt on nicely. I’ll think whether it needs a bracket welded onto the subframe to bolt to or, as there’s one already inside the loop, just bolt it straight to the mudguard. Hmmmm. …thankyou…over ![]()
14 Likes
We are not worthy ![]()
Thats really tidy work… nice ![]()
1 Like
Had to get the paint off of the old mudguard, which takes ages and covers everything in dust. A few old sheets over everything helps. Until you take the sheets off and shake them, so go outside and shake them all over the washing line instead.

Centred everything up as best as I could, drilled and bolted. Another hole will be drilled to take the wiring under the mudguard.
Then sat and drank tea while I thought about the next job. Probably mounts for the front light and speedo.
Those tyres are gonna come off with the rebuild, think I’m gonna try a pair of groovy Dunlop TT Trailmax.
Cosmic…over ![]()
8 Likes
Front light bracket, innit…

Making this from proper thick mild steel (5mm or so - it won’t vibrate) and will paint on the rebuild. Took a bit of cutting out.
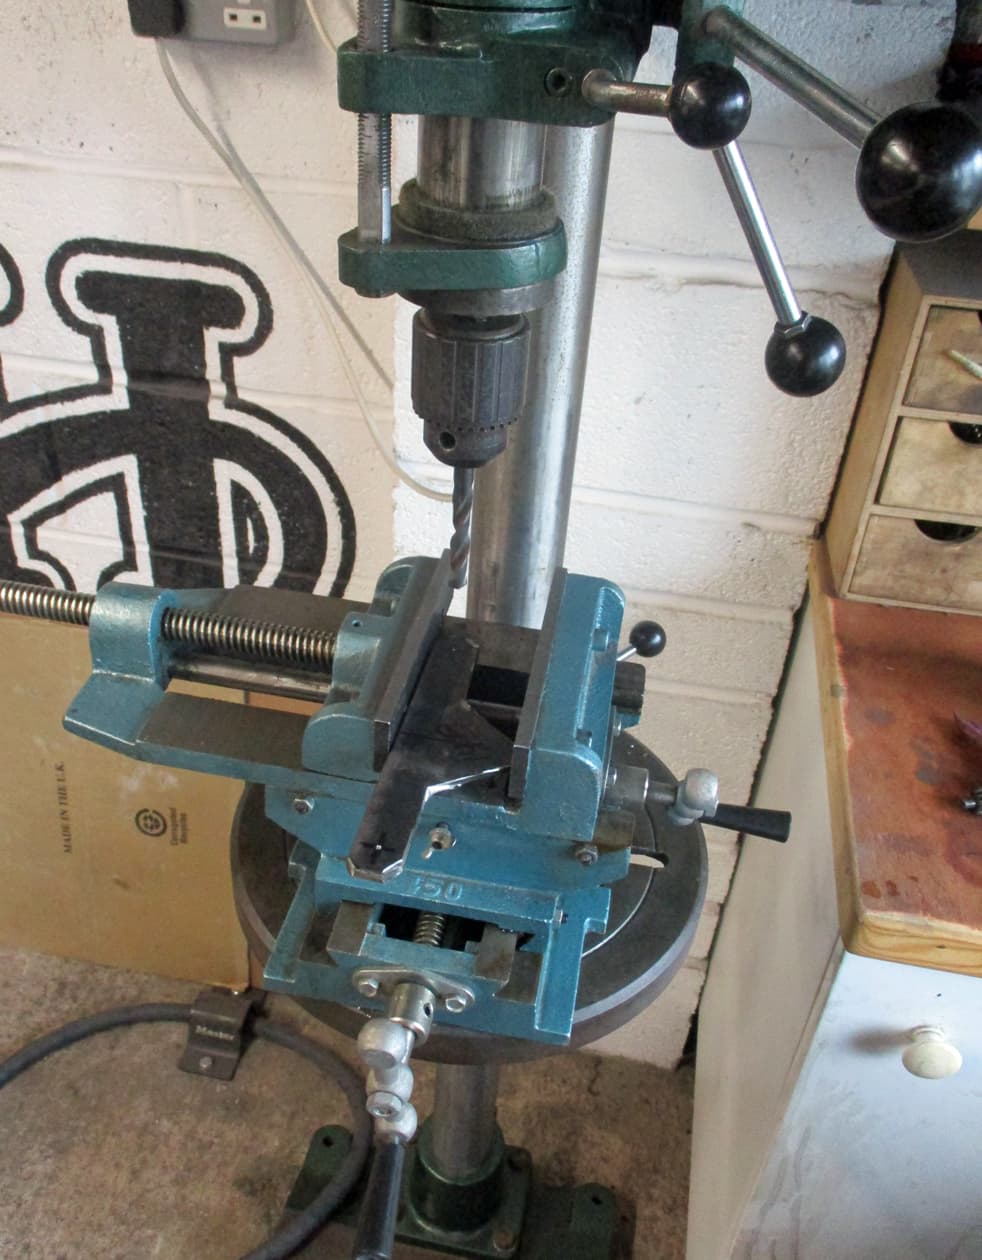
I’ve had this for ages but haven’t really used it. Blimmin 'ell. It takes a bit of setting up but goes through stuff like butter and also puts the hole exactly where it’s wanted. I’ll be making more use of this no doubt.
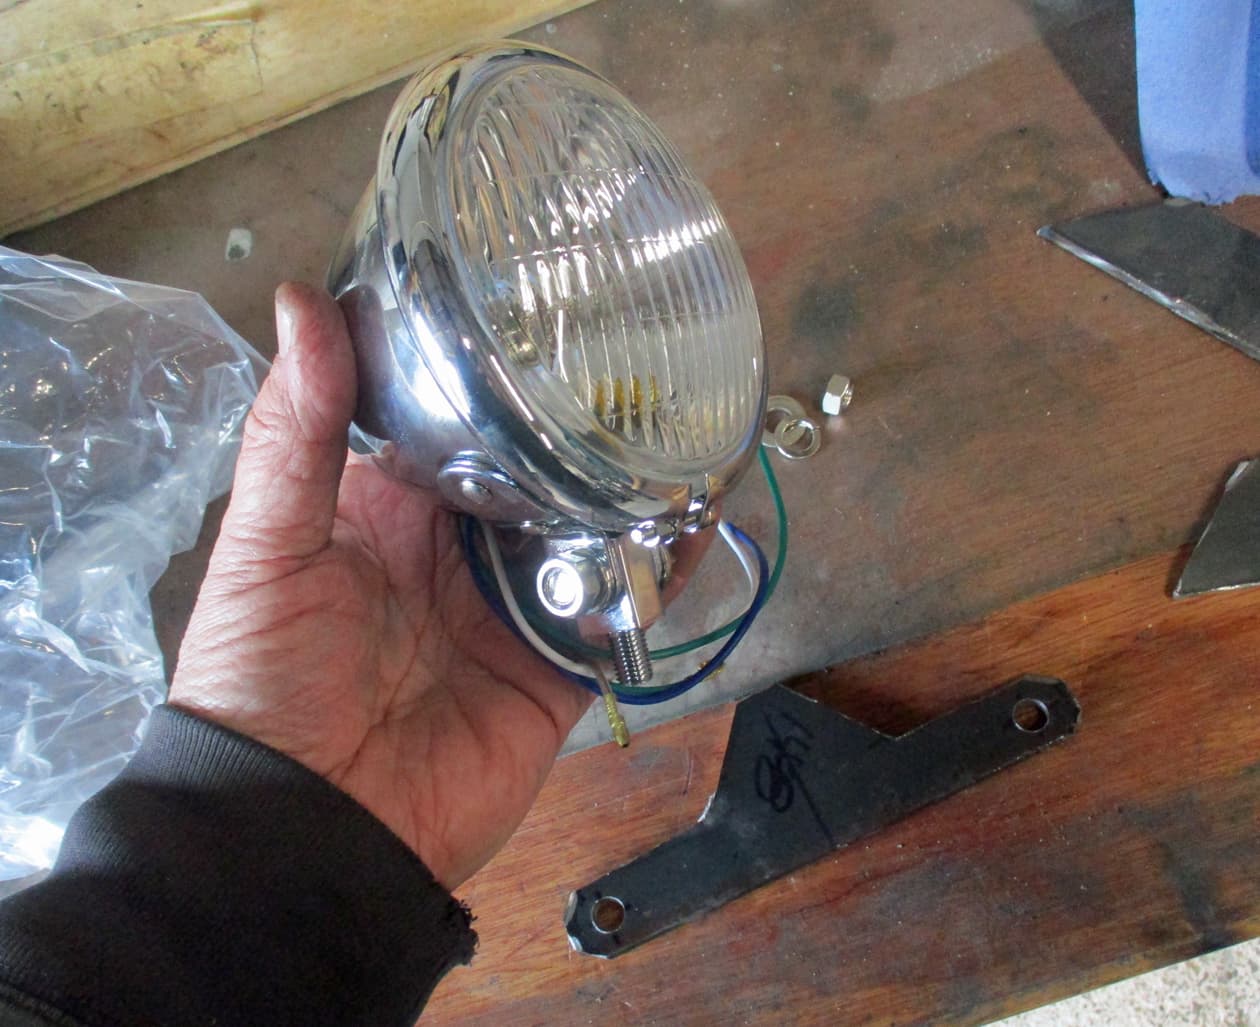
Nice little 4 and a half inch Bates headlight. I’ll wire in the oil warning light on top when I get to that bit.
Much filing and bending, phew
and on with some old bolts for now. I’ll renew all bolts on the build.
Sorted. Thank you, welcome, over…
11 Likes
I think we should arrange some sort of celebratory unveiling when this one is finished. ![]()
3 Likes
Maybe crack a bottle of brown ale on it as it’s launched !
1 Like
Sounds like a great idea to arrange a forum meet up. ![]()
8 Likes
It’ll be a while Chaps but 'spect we could sort something. Ya’ll could try kickstarting for a change and a ride round on something with less horsepower than your mobile phone. Yeah, why not, I can buy everyone a cuppa…

Measure up, cut, drill and file a bracket…

To hold the speedo. I’m going to have to remake it as I’d run out of the required thickness of stainless and those ‘horns’ for the previous clock cluster will have to come off.
10 Likes
Ok, so, jeez, yes…remade the headlight bracket in slightly thicker stainless steel. Just the back brake to sort and we can move on.
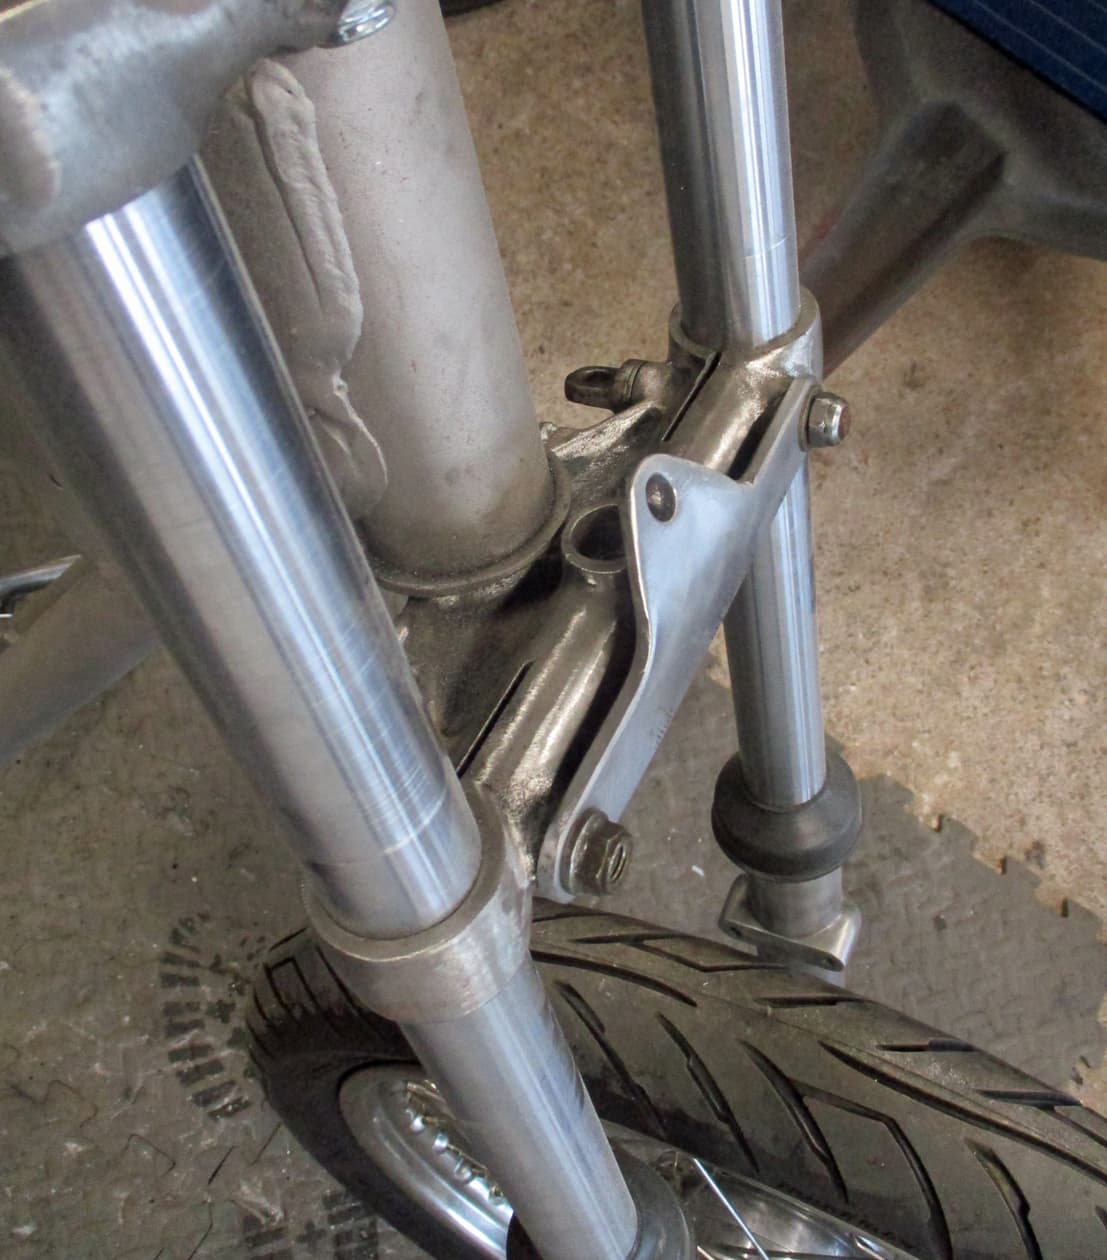
I’d like to squeeze in a fatter tyre but the original brake master cylinder is a fat cylindrical thing (matching the original front one), it’s 'orrible and may rub the tyre so…we’ll bin that and try to get a more modern one to fit.

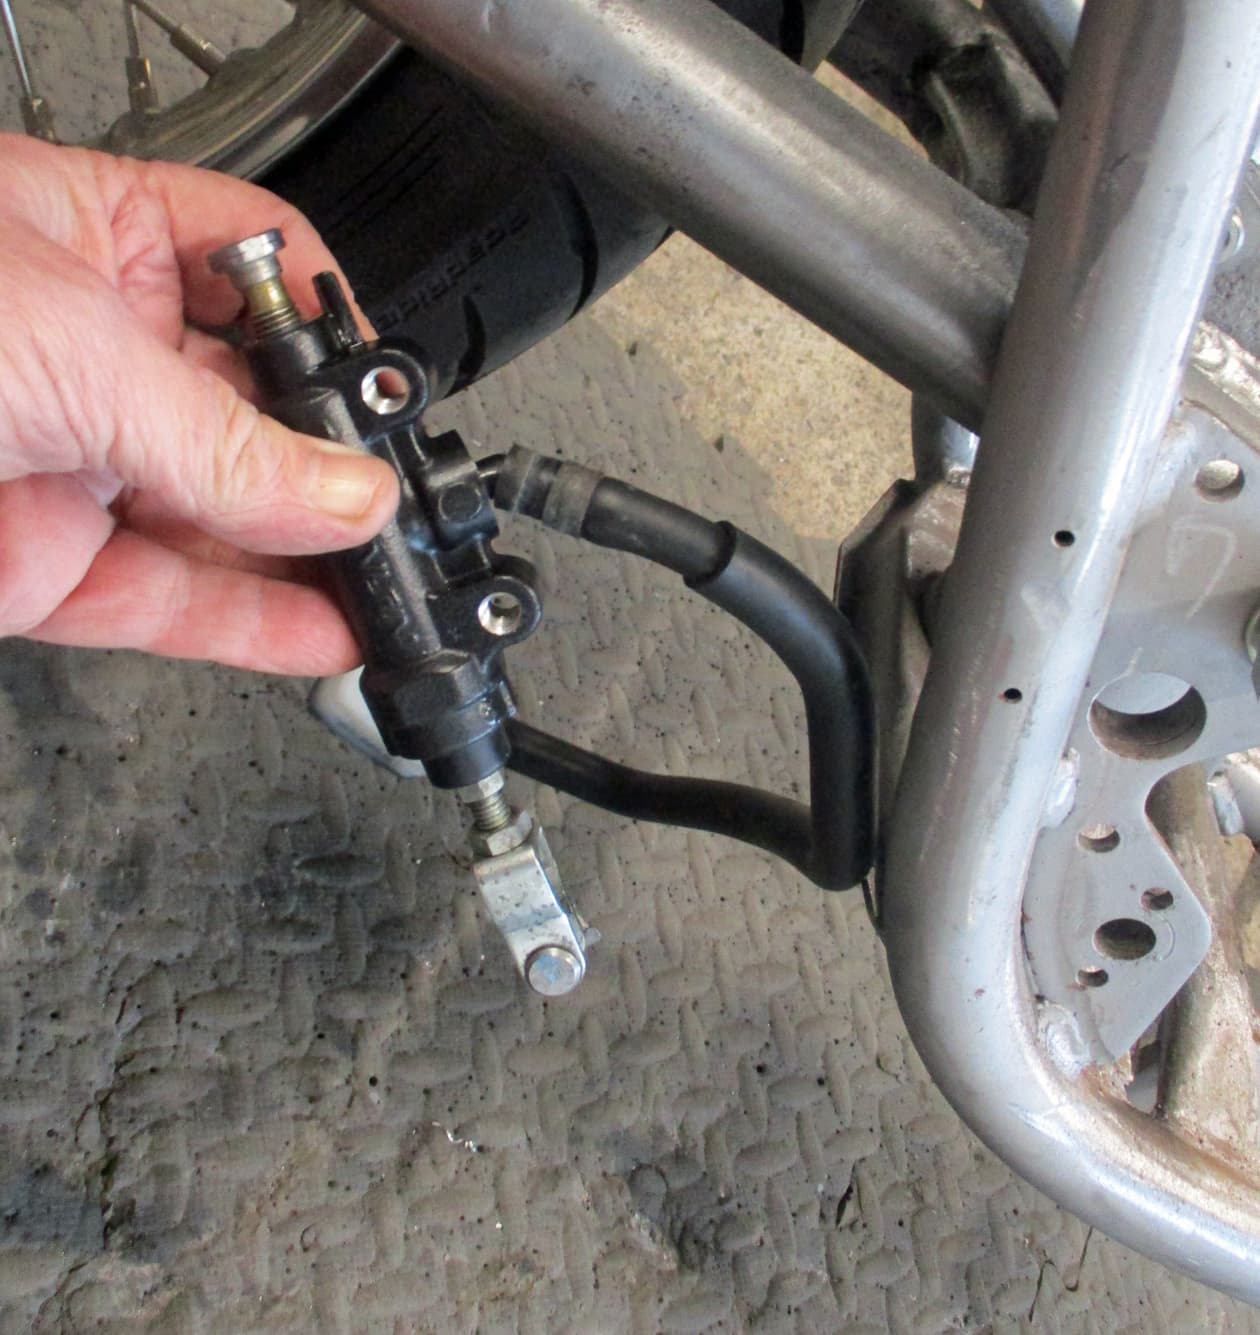
Here’s a more modern one. It’s a Nissin and it’s off of a Triumph Thruxton. So keeping the Triumph thing going.
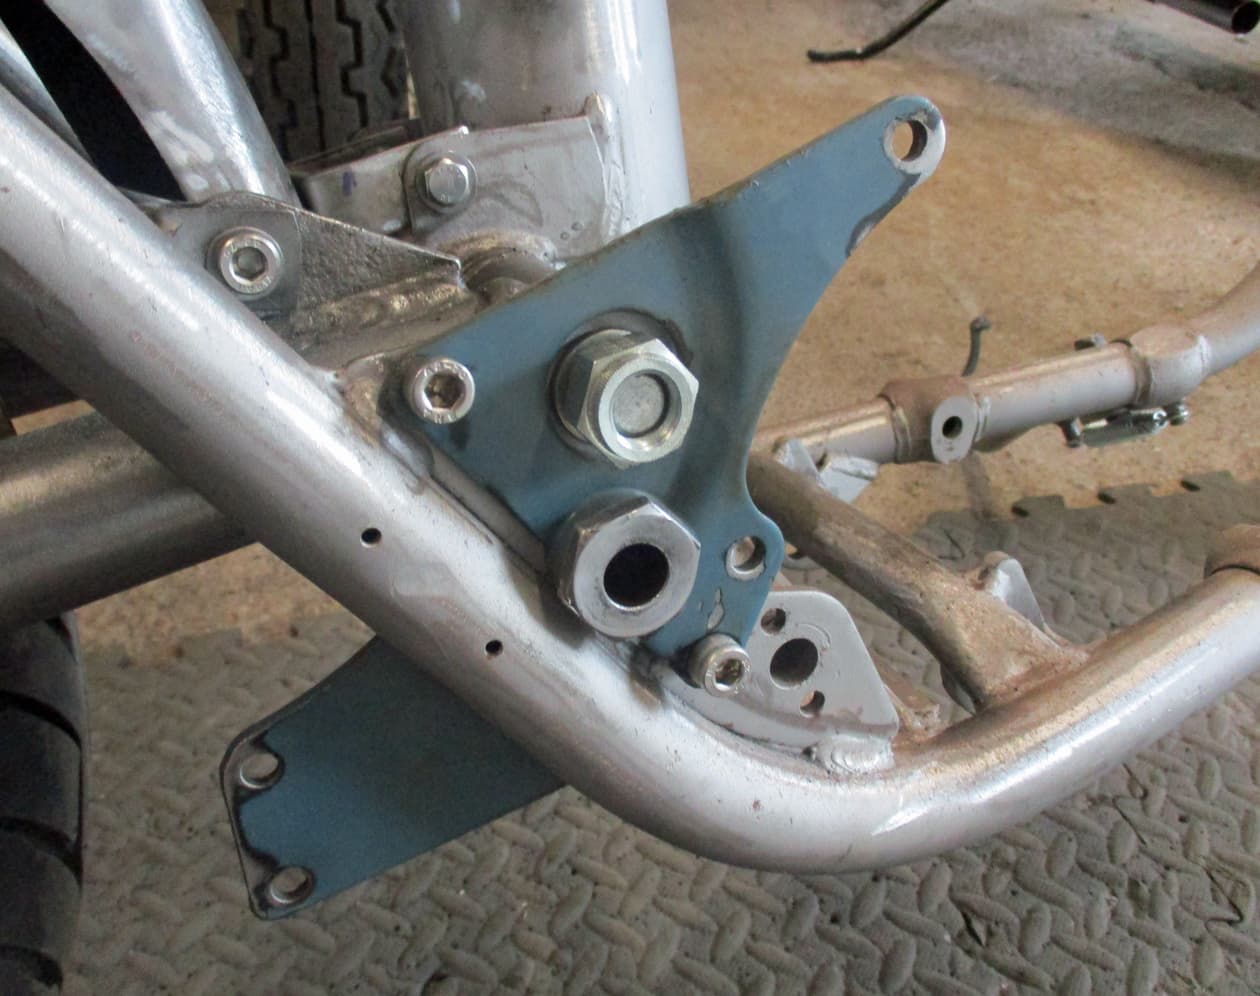
I’d like it to fit around here somewhere. The two small holes in the frame are where the original back brake switch fixes. And it’s where you’ll see most back brake cylinder conversions go. But a spring is needed to pull the brake lever back down. Springs look a bit out of place dangling under the cylinder so I like to use the existing original spring and lever that is hidden behind the frame.
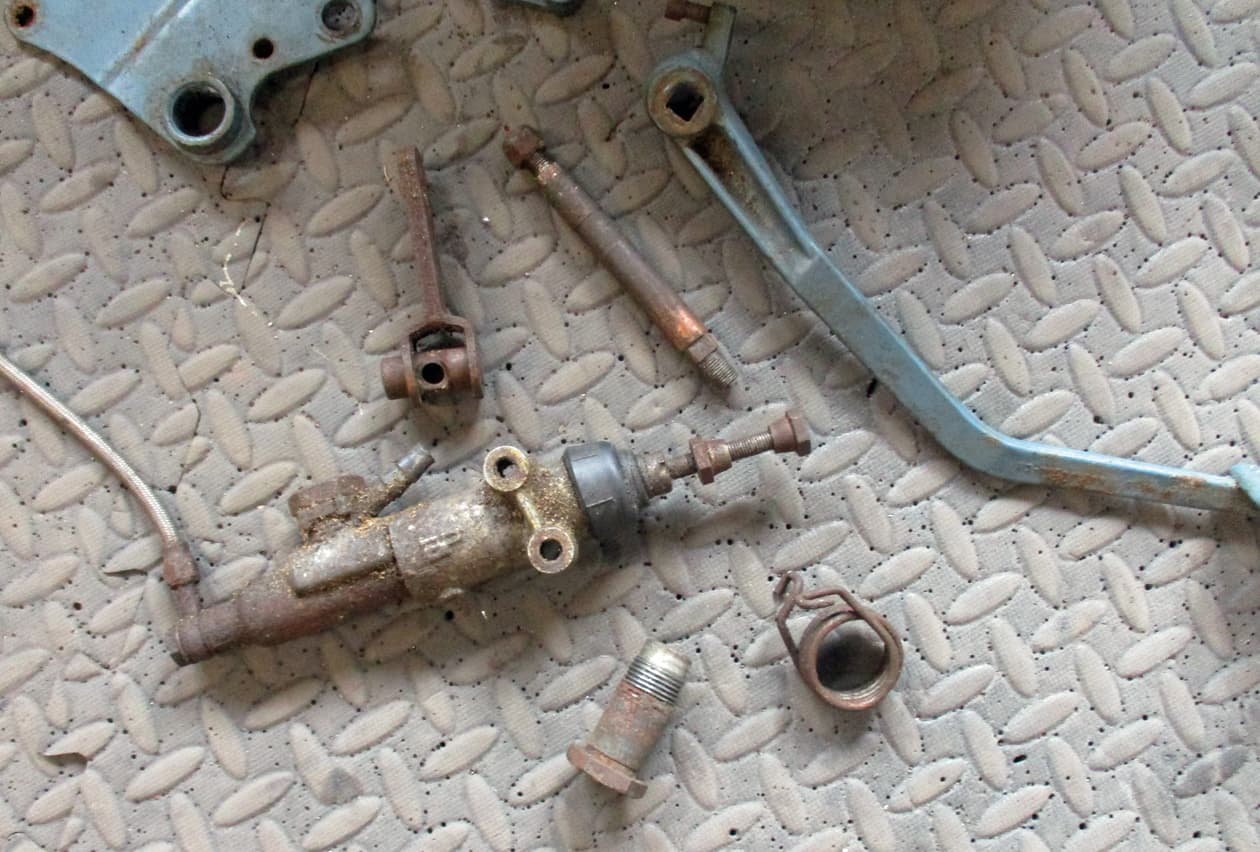
These are the original parts. Took a bit of digging around in the ‘bike in a box’ that’s been under the bech for a while.

I’ll order new parts but these will do to sort the first build and cleaned up ok. Note how the brake spindle has taken on a copper look. I assume this is due to the copper slip being on it for years in a shed.
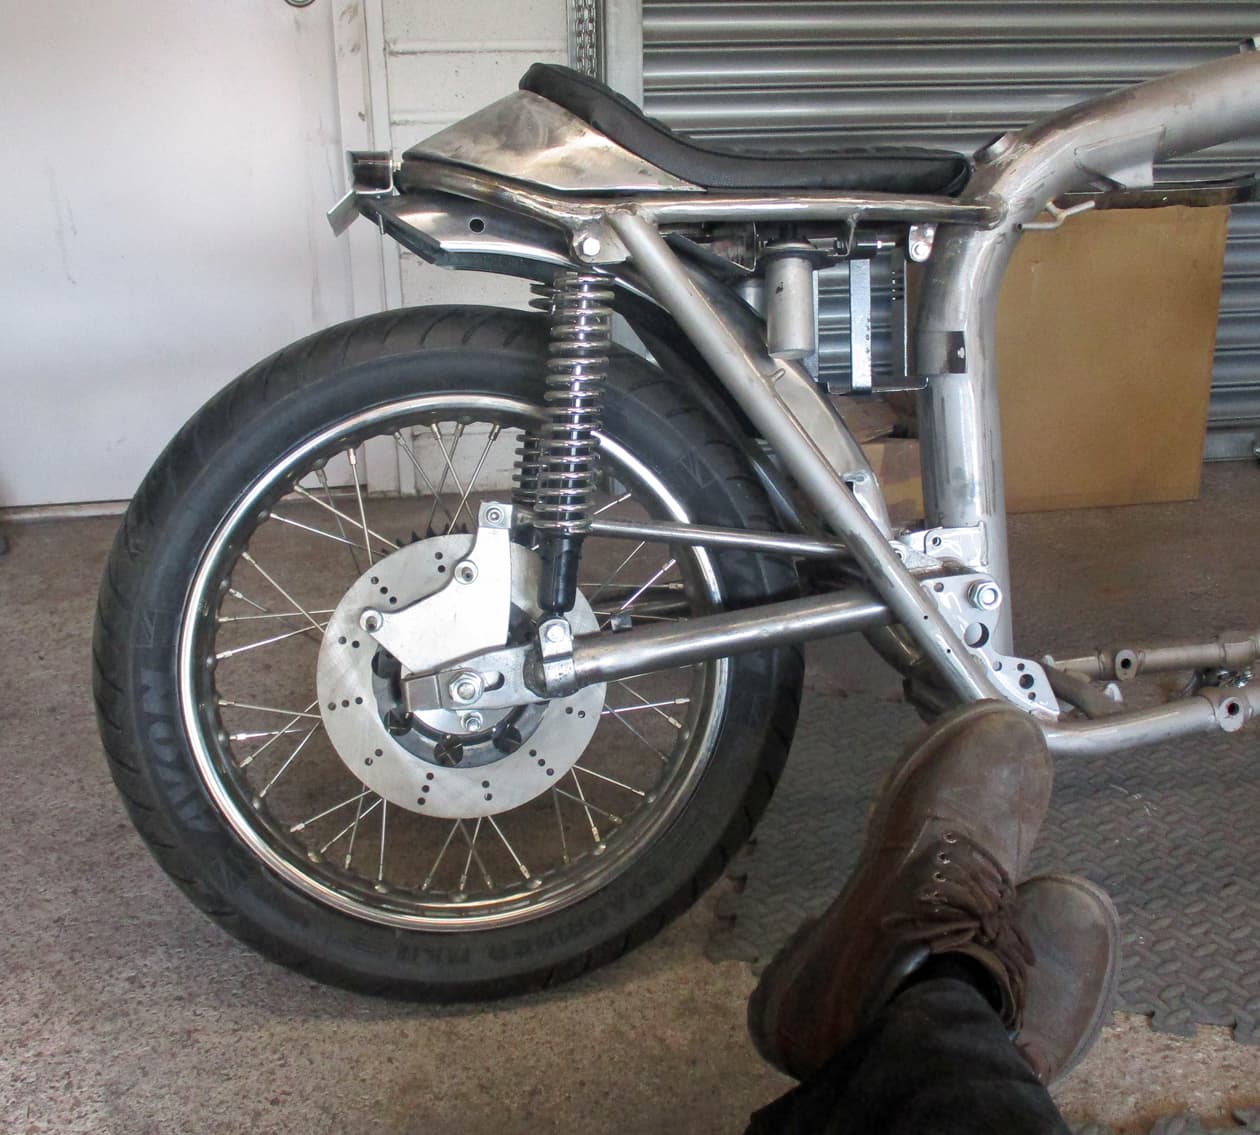
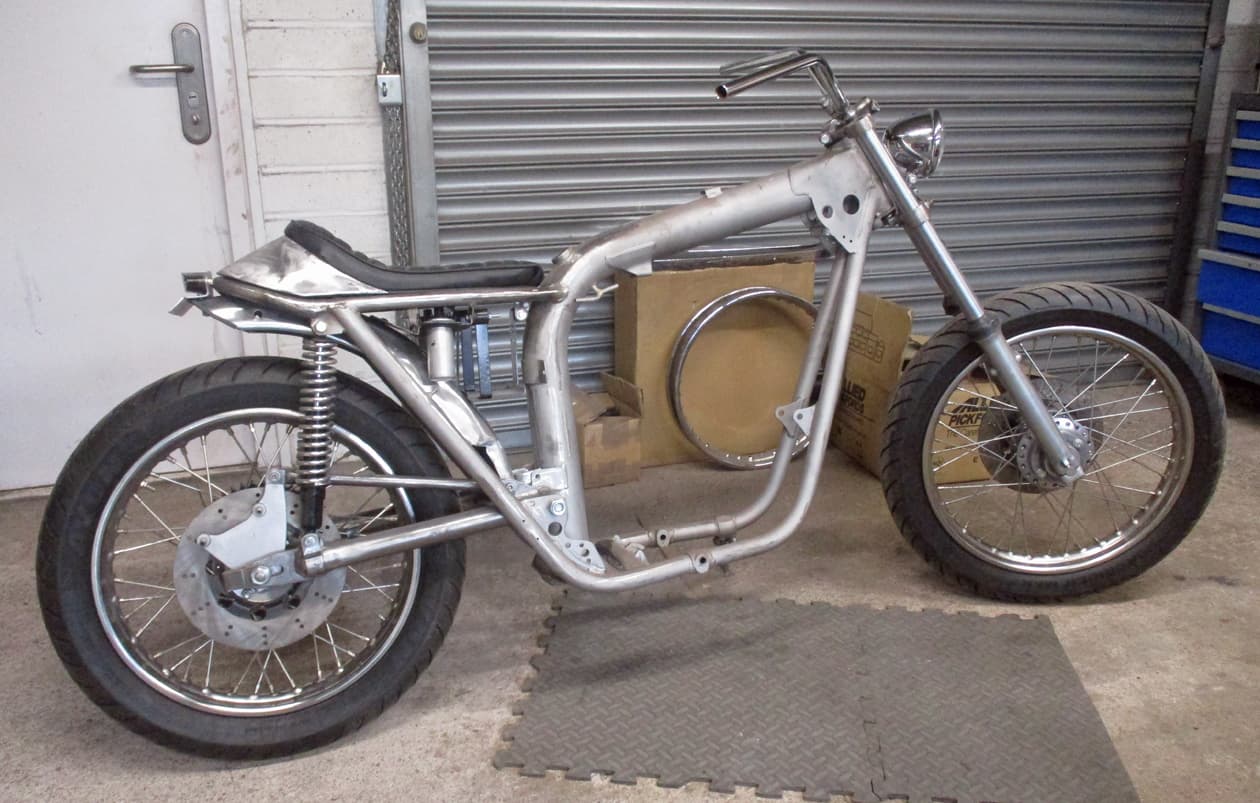
Engine mounts held temporarily so a trial build run can be carried out to figure out the layout.
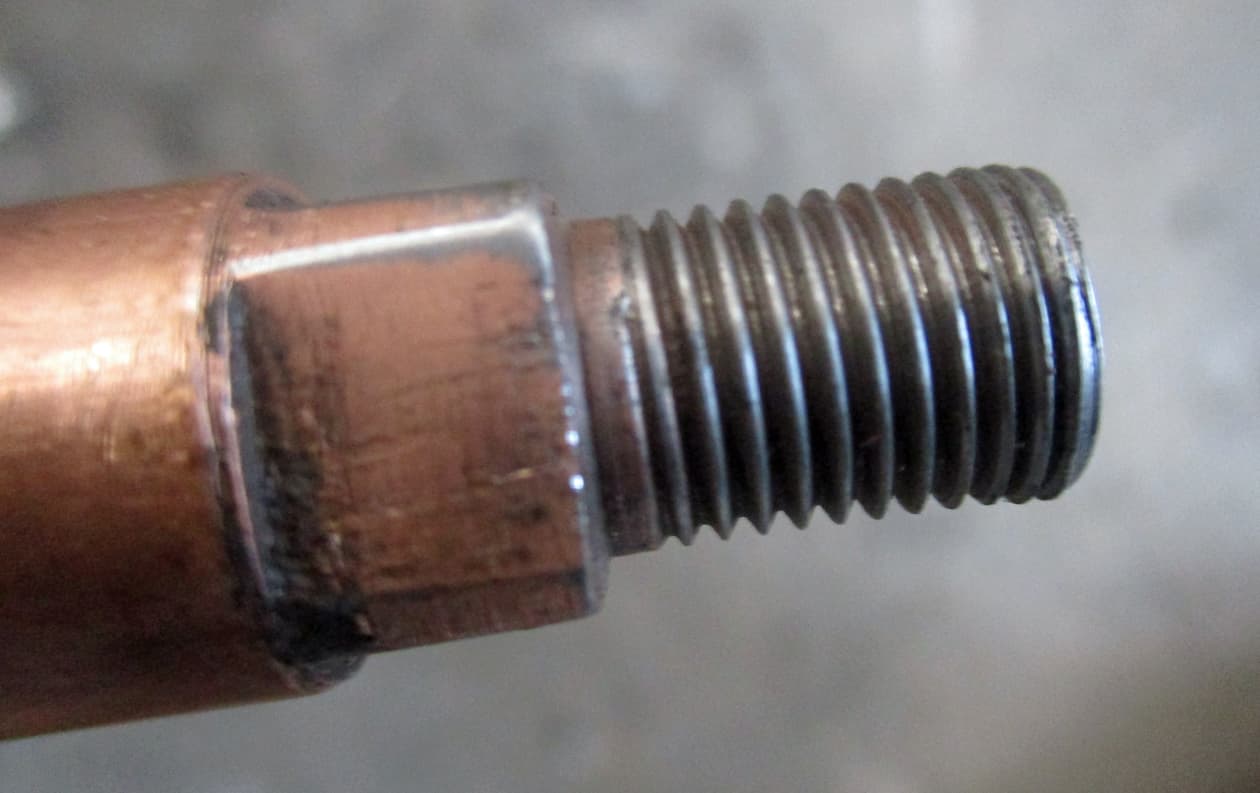
Nope, the thread is buggered. Some heavy handed sod has mullered the thread on the spindle when getting it out during the dismantle. So that held me up for a while.
This is where a parts book comes in handy as I couldn’t check that the thread was the same as the other end by just threading on a nut.
Turns out it is the same size - 3/8 by 24 UNF.
UNF is Universal National Fine and 24 threads per inch. There is also UNC which is Universal National Coarse but that’s all a thread on it’s own.
So get the tapping set out and re cut the thread so the nuts fit. Sounds simple but with the end splayed with the hammer it needs to be filed down until the die can be pushed over to recut. Takes ages farting around.

Inner bracket and brake lever all bolted on as seen from underneath. I’ve left the spring out as it’s a bugger to get on and I’m only trying it all for fit.
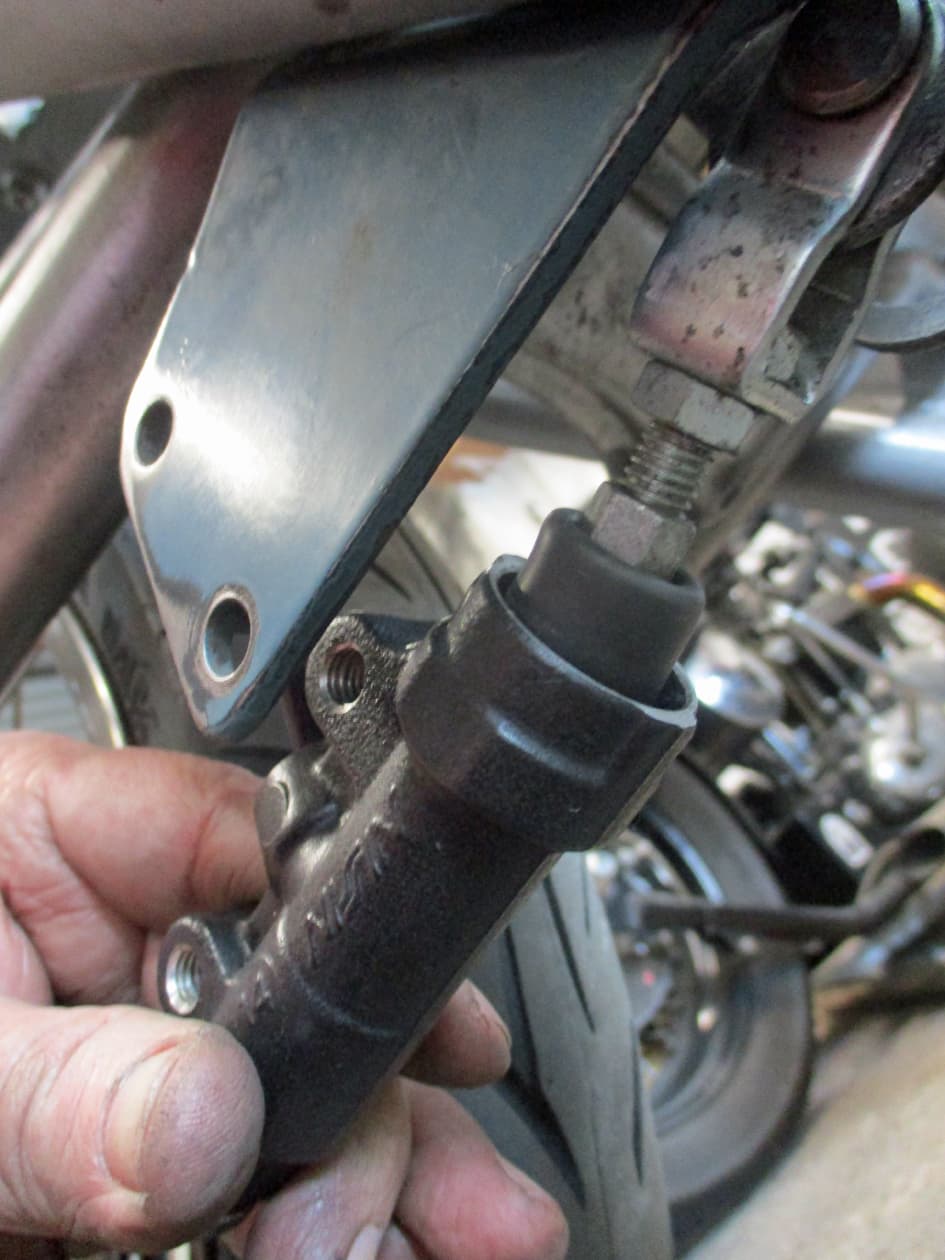
Here’s the master cylinder linked into the bracket
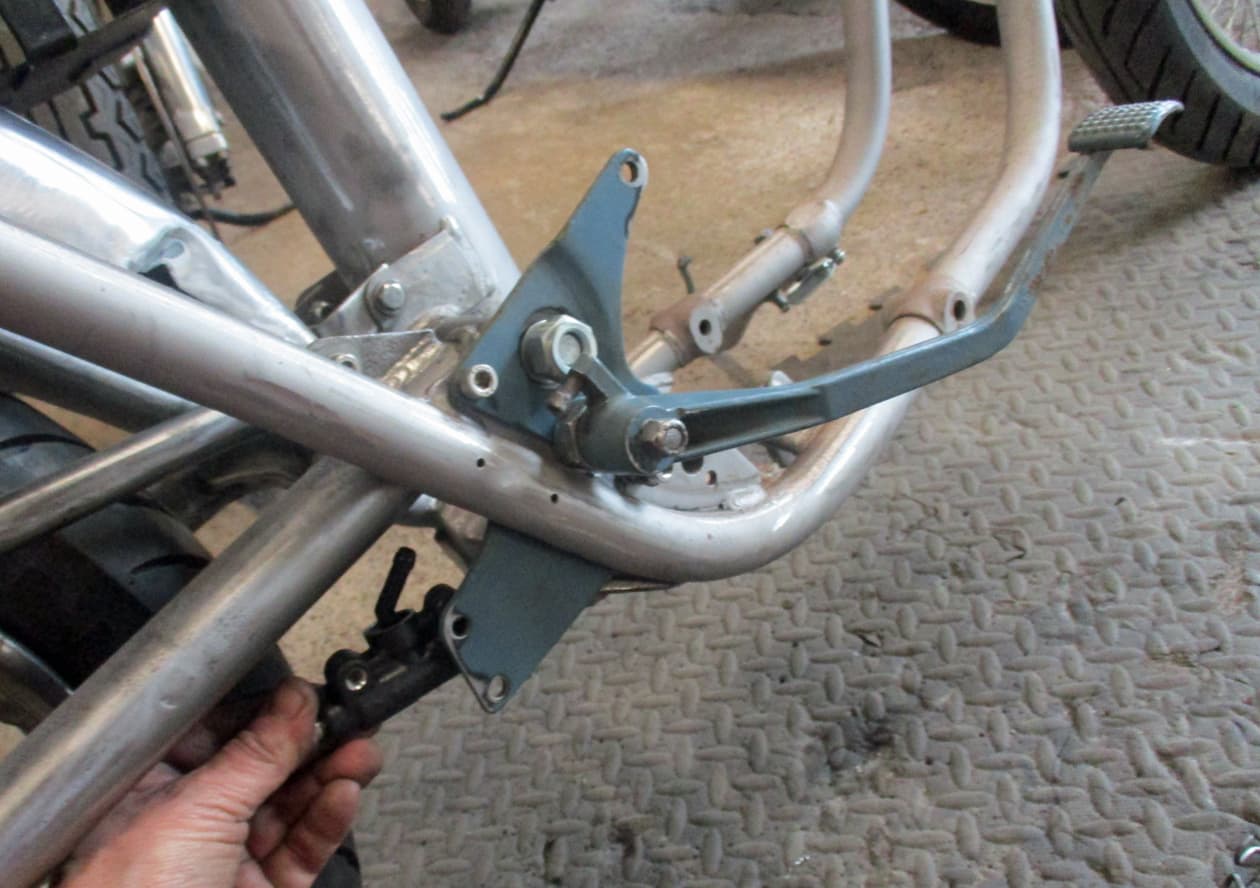
So it’ll be positioned about here to align with the existing bracket that’s bolted to the frame. It’ll need a bracket made up to suit - which I’ll get on with any time soon.
Thank you, welcome, over… ![]()
![]() by the way, I hear the Hammers may be returning as the council have backed a plan to let them race again at Thurrock.
by the way, I hear the Hammers may be returning as the council have backed a plan to let them race again at Thurrock.
Every Friday night, Speedway. Bit far to go now tho - “Give us a FIver” ![]()
![]()
![]()
![]()
![]()
10 Likes