Speedmaster 1200 Swingarm and Suspension Bearing Replacement

As my marathon servicing episode is about to turn into a marathon rear suspension and swingarm overhaul I thought it best to start a thread on that topic.

Day Six

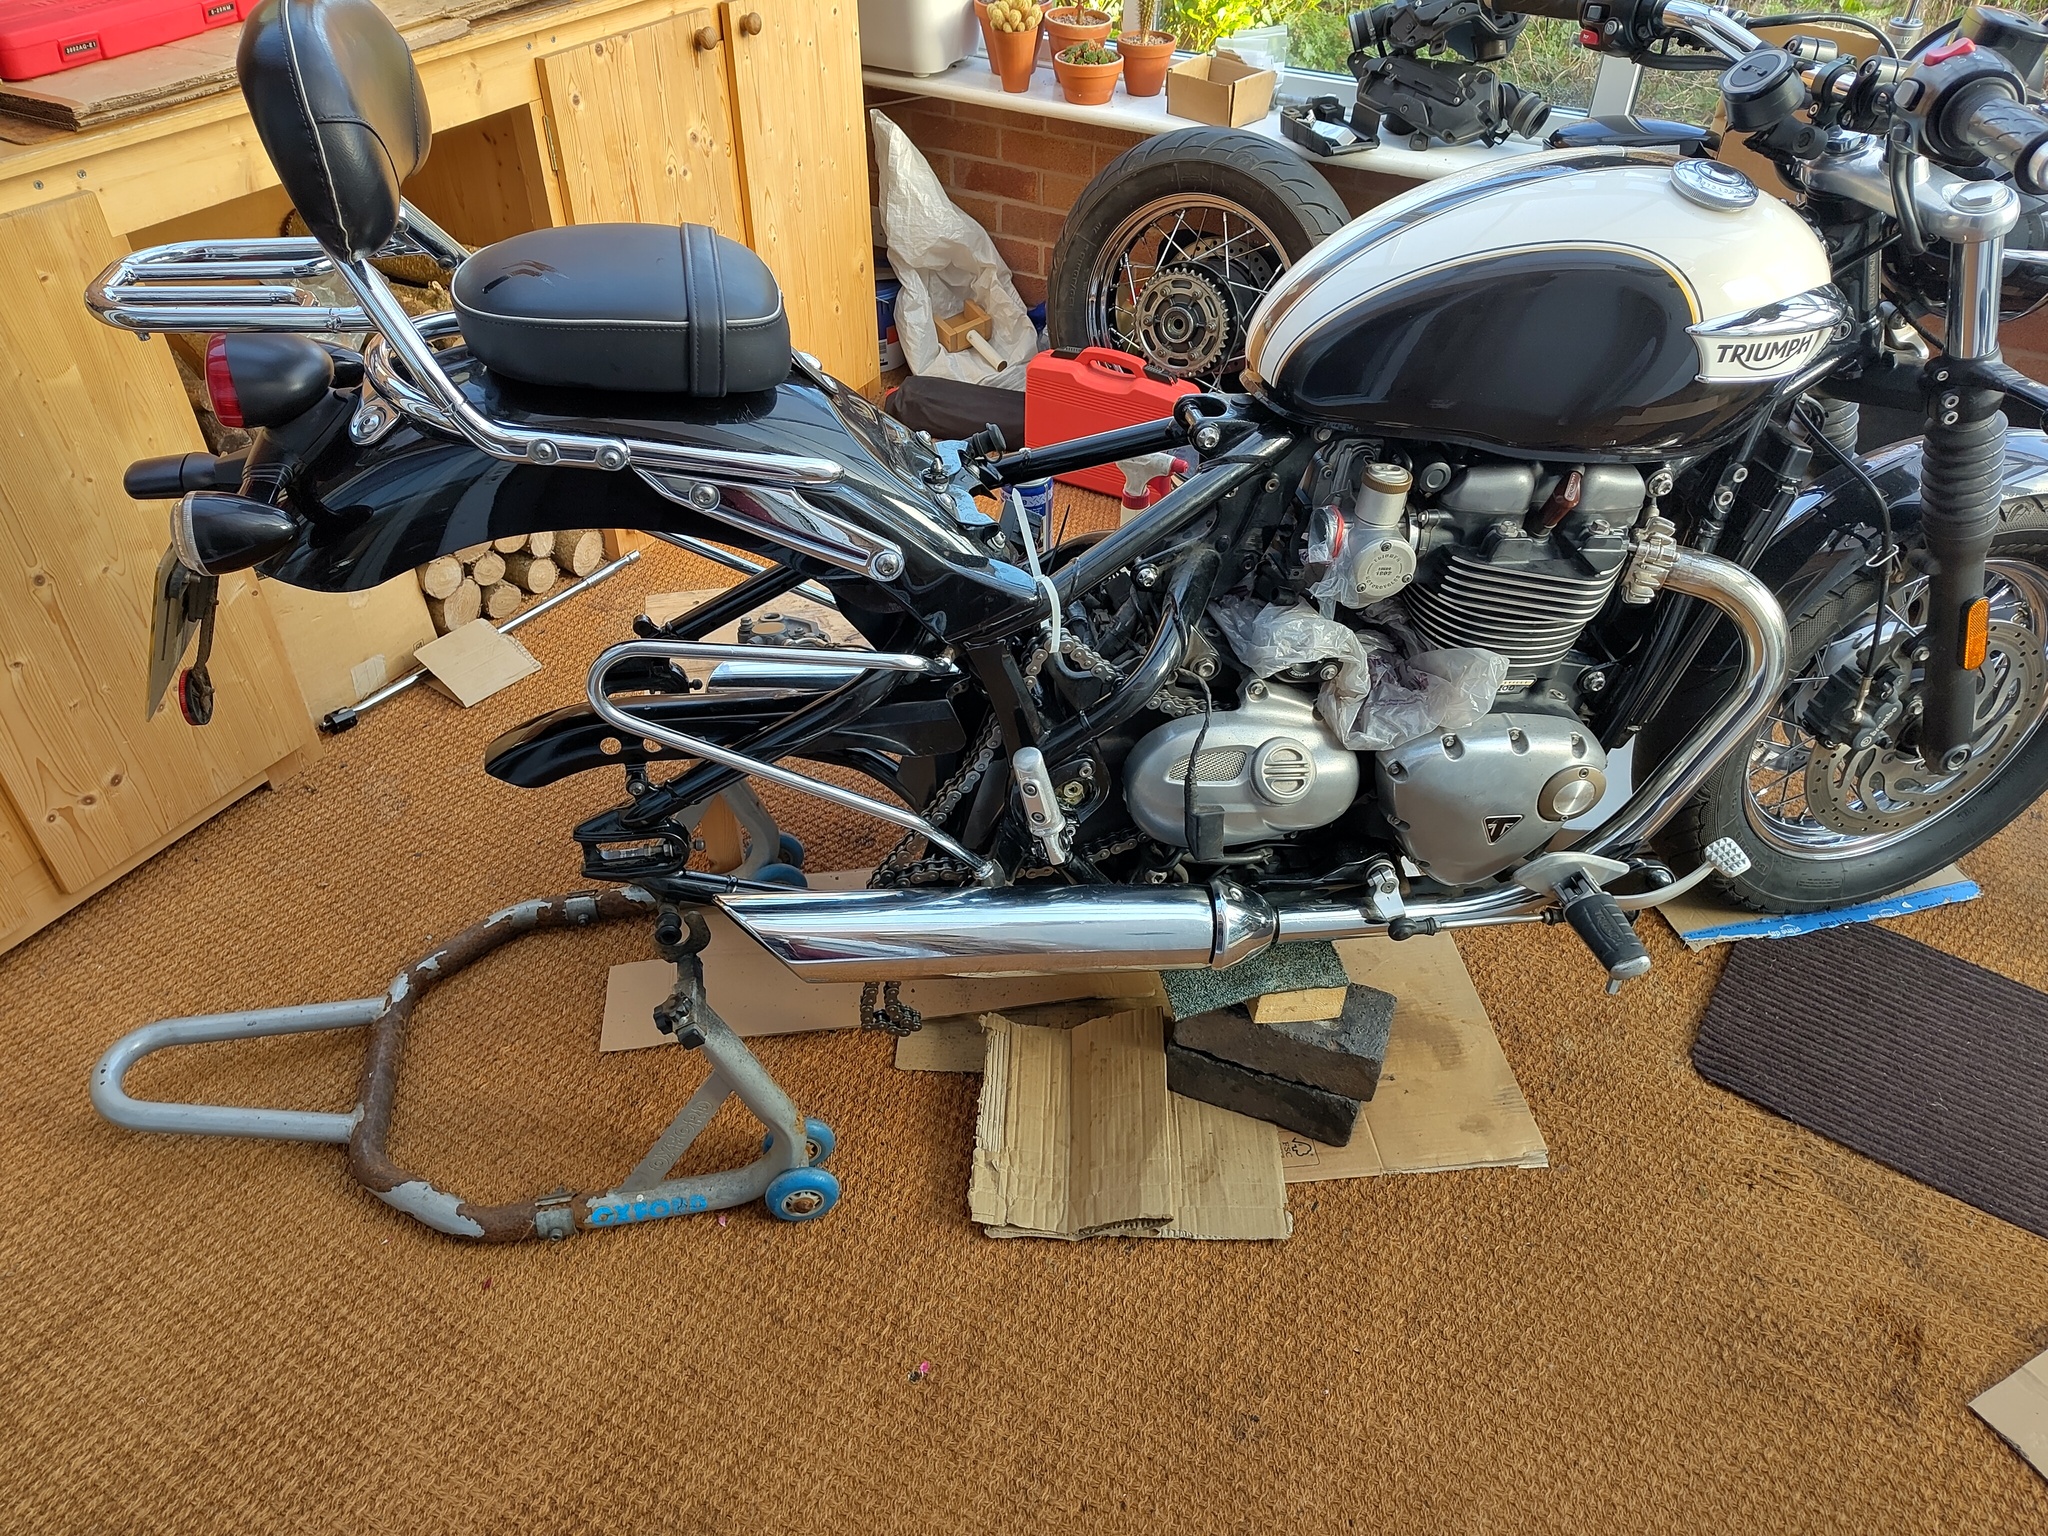
On day 5 of my servicing I removed the airboxes to get access to the rear suspension linkage intending to at least clean and lube it, but today I decided that after nearly 80,000 miles it needed to come apart for a thorough examination and probably bearing replacement.

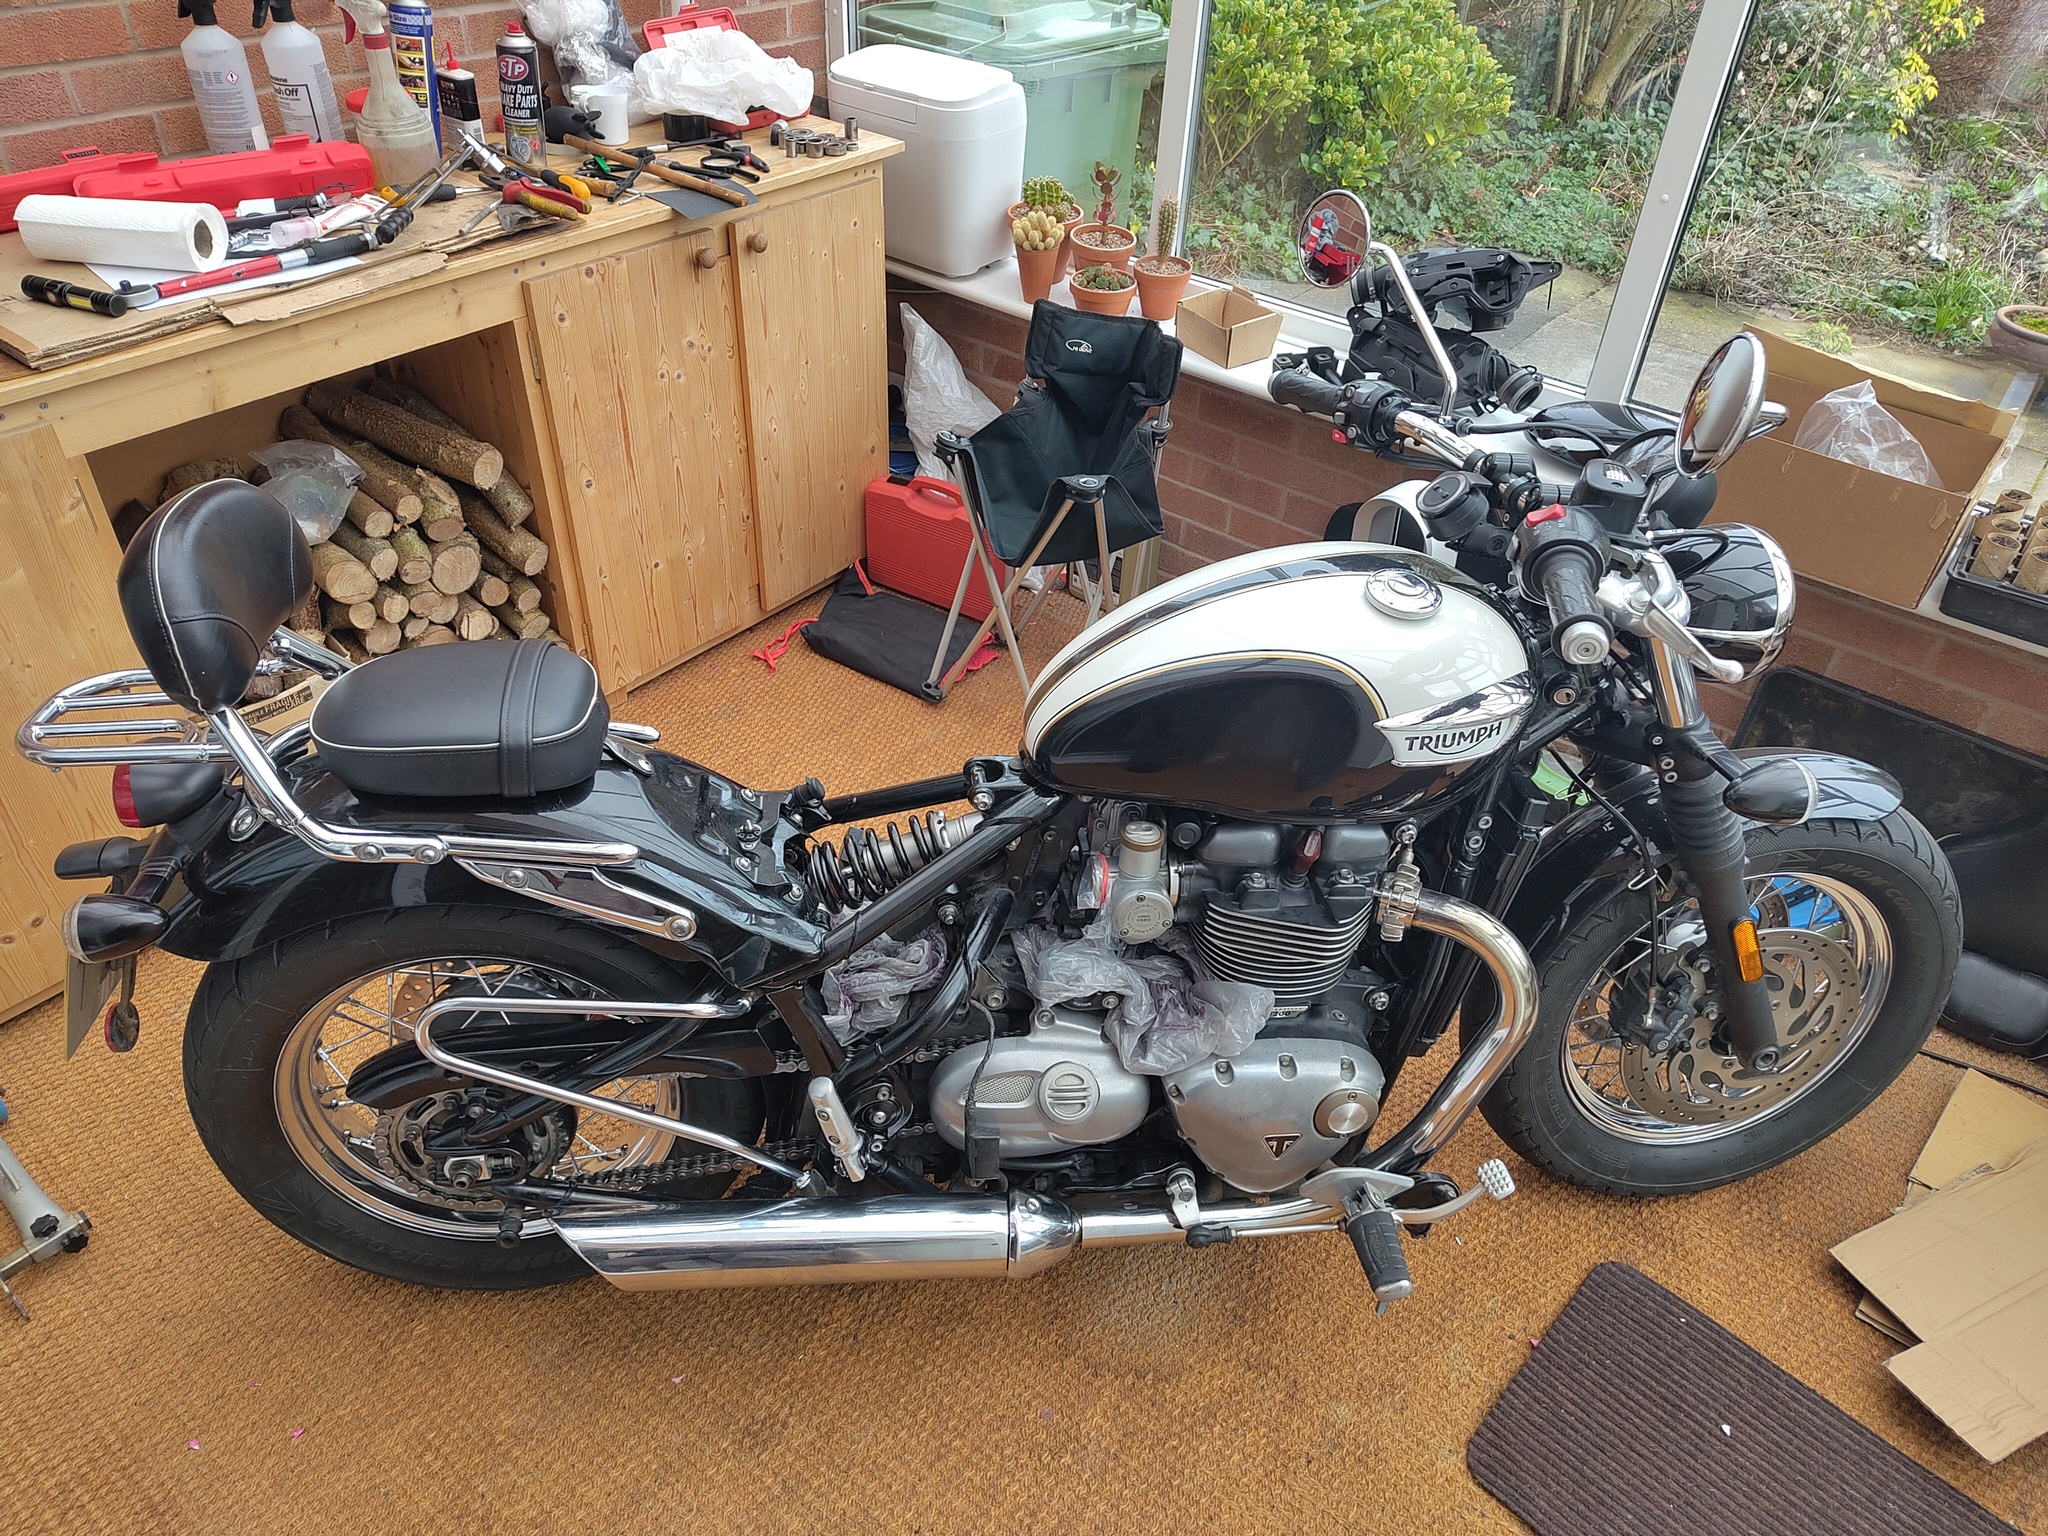
First thing to do was to clean all the muck off to get good contact with bolts, but not before stuffing several plastic carrier bags under the linkage to protect all the sensitive electronics underneath it.

Bike was currently supported by bricks under the front of engine and a paddock stand at the rear. So before I could disconnect the rear suspension I had to move the bike’s weight to the front wheel by moving the bricks to the rear of the engine. Making sure that the support was still just in front of the oil filer to about damaging it.

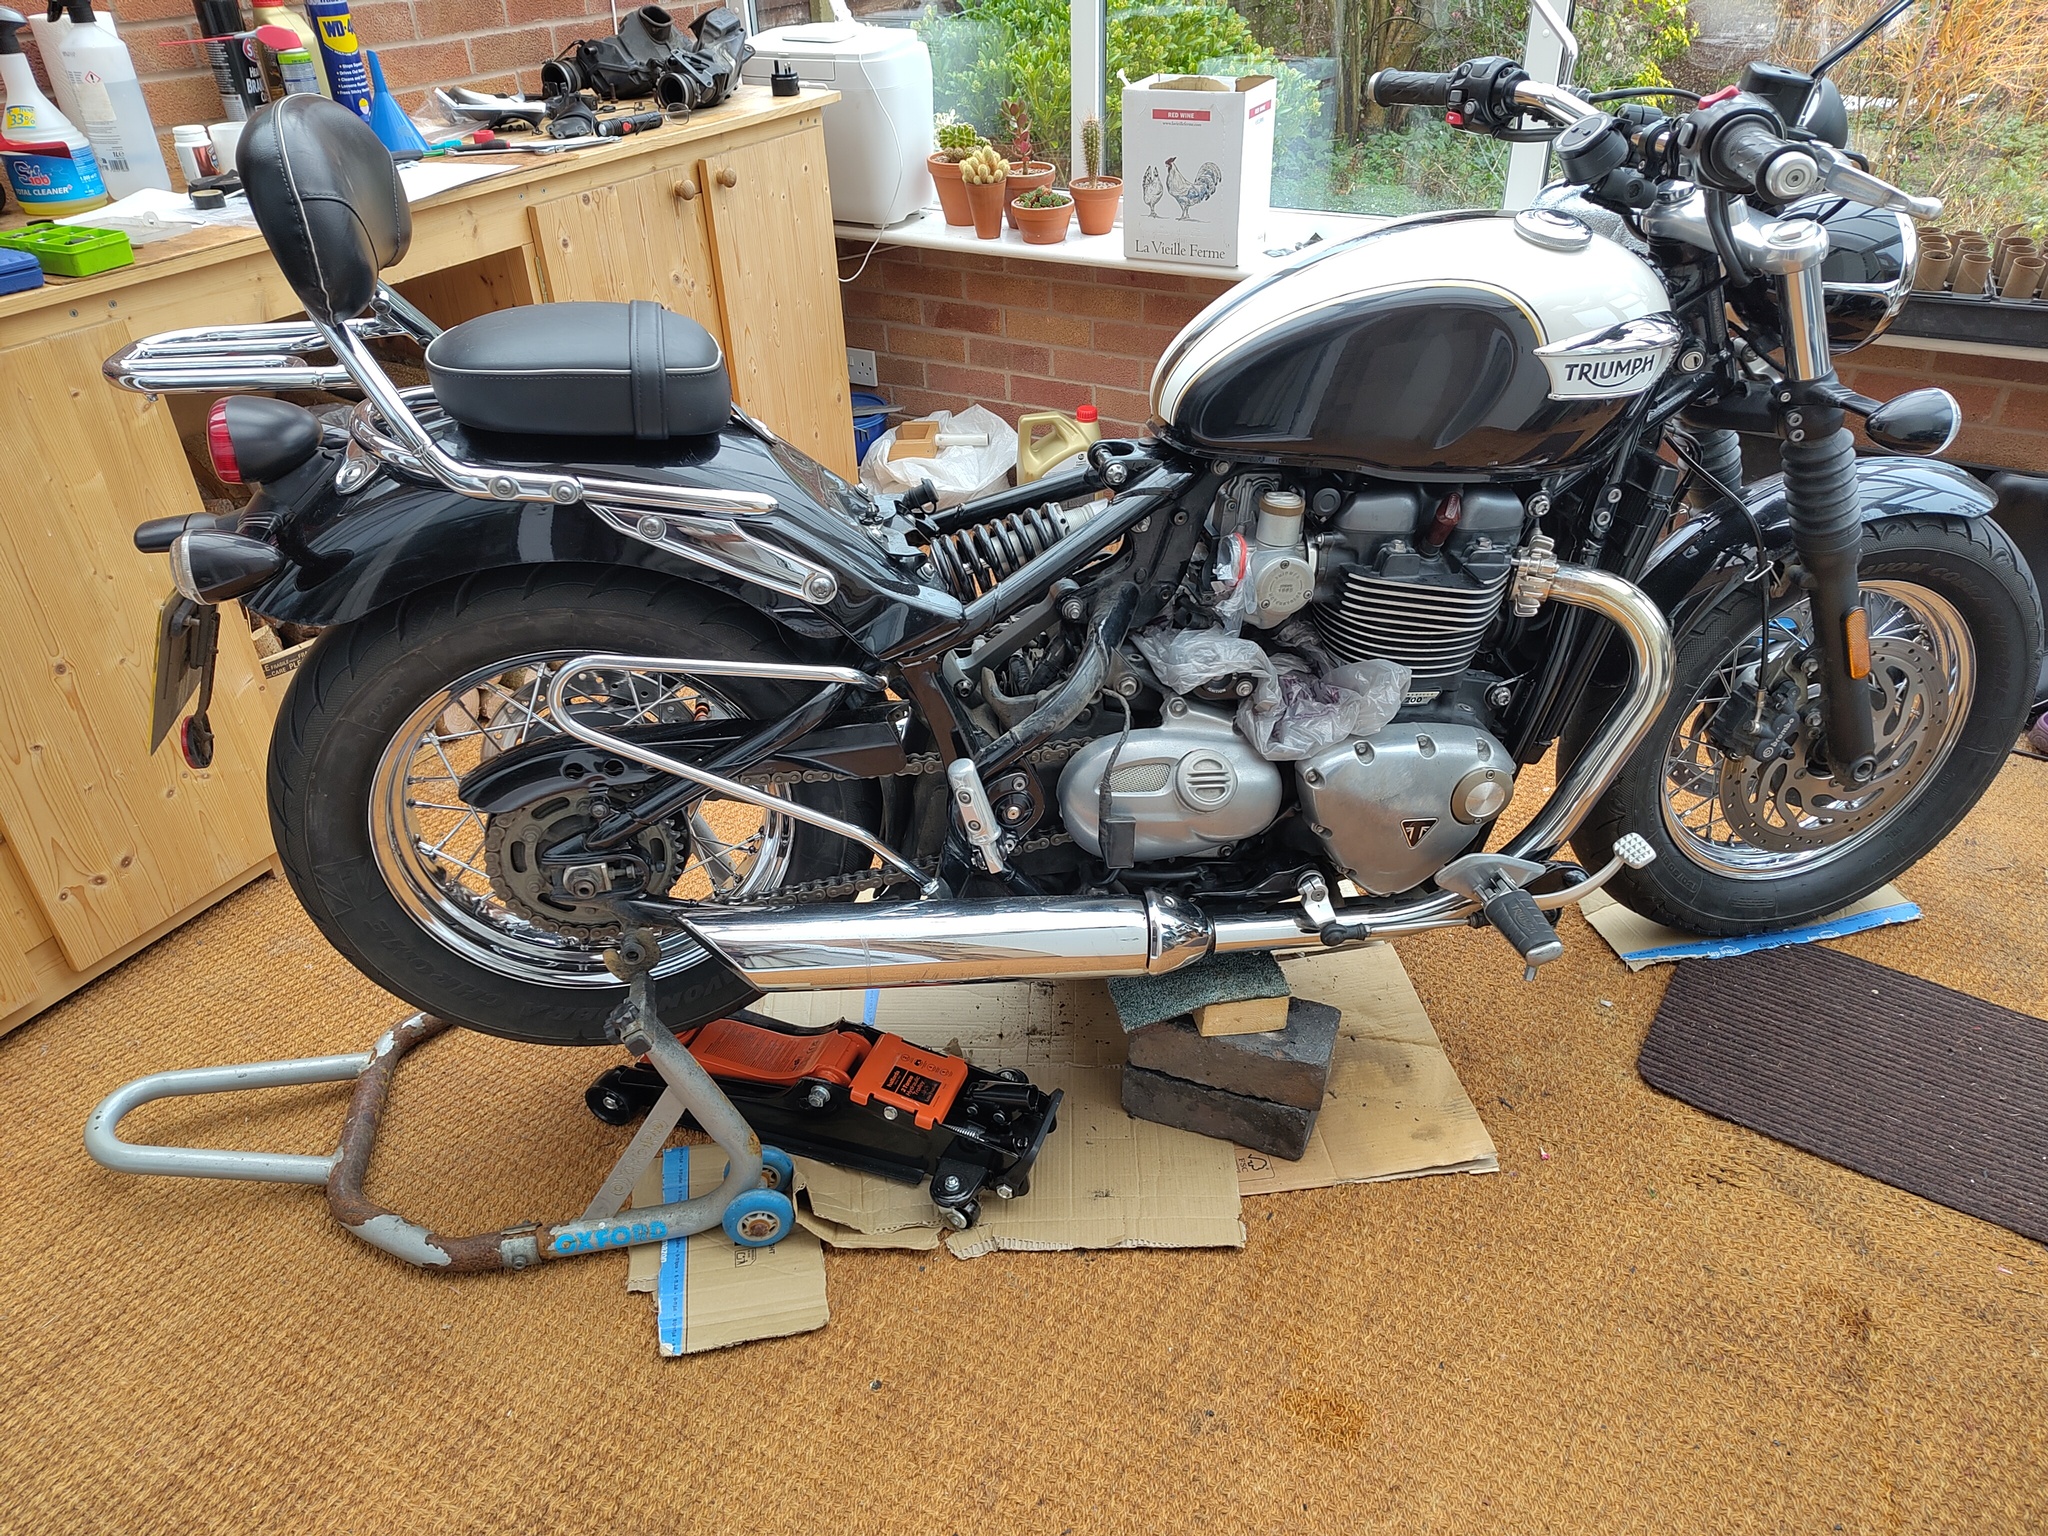
Whilst bike weight was on front wheel I kept the paddock stand at the rear so it could later take the weight of the rear when the suspension was disconnected. This is vital because if the rear swingarm is allowed to drop the first thing it hits is the ECU! (I suspect that this accidentally happening on previous bike work lead ultimately to my ECU failure.)

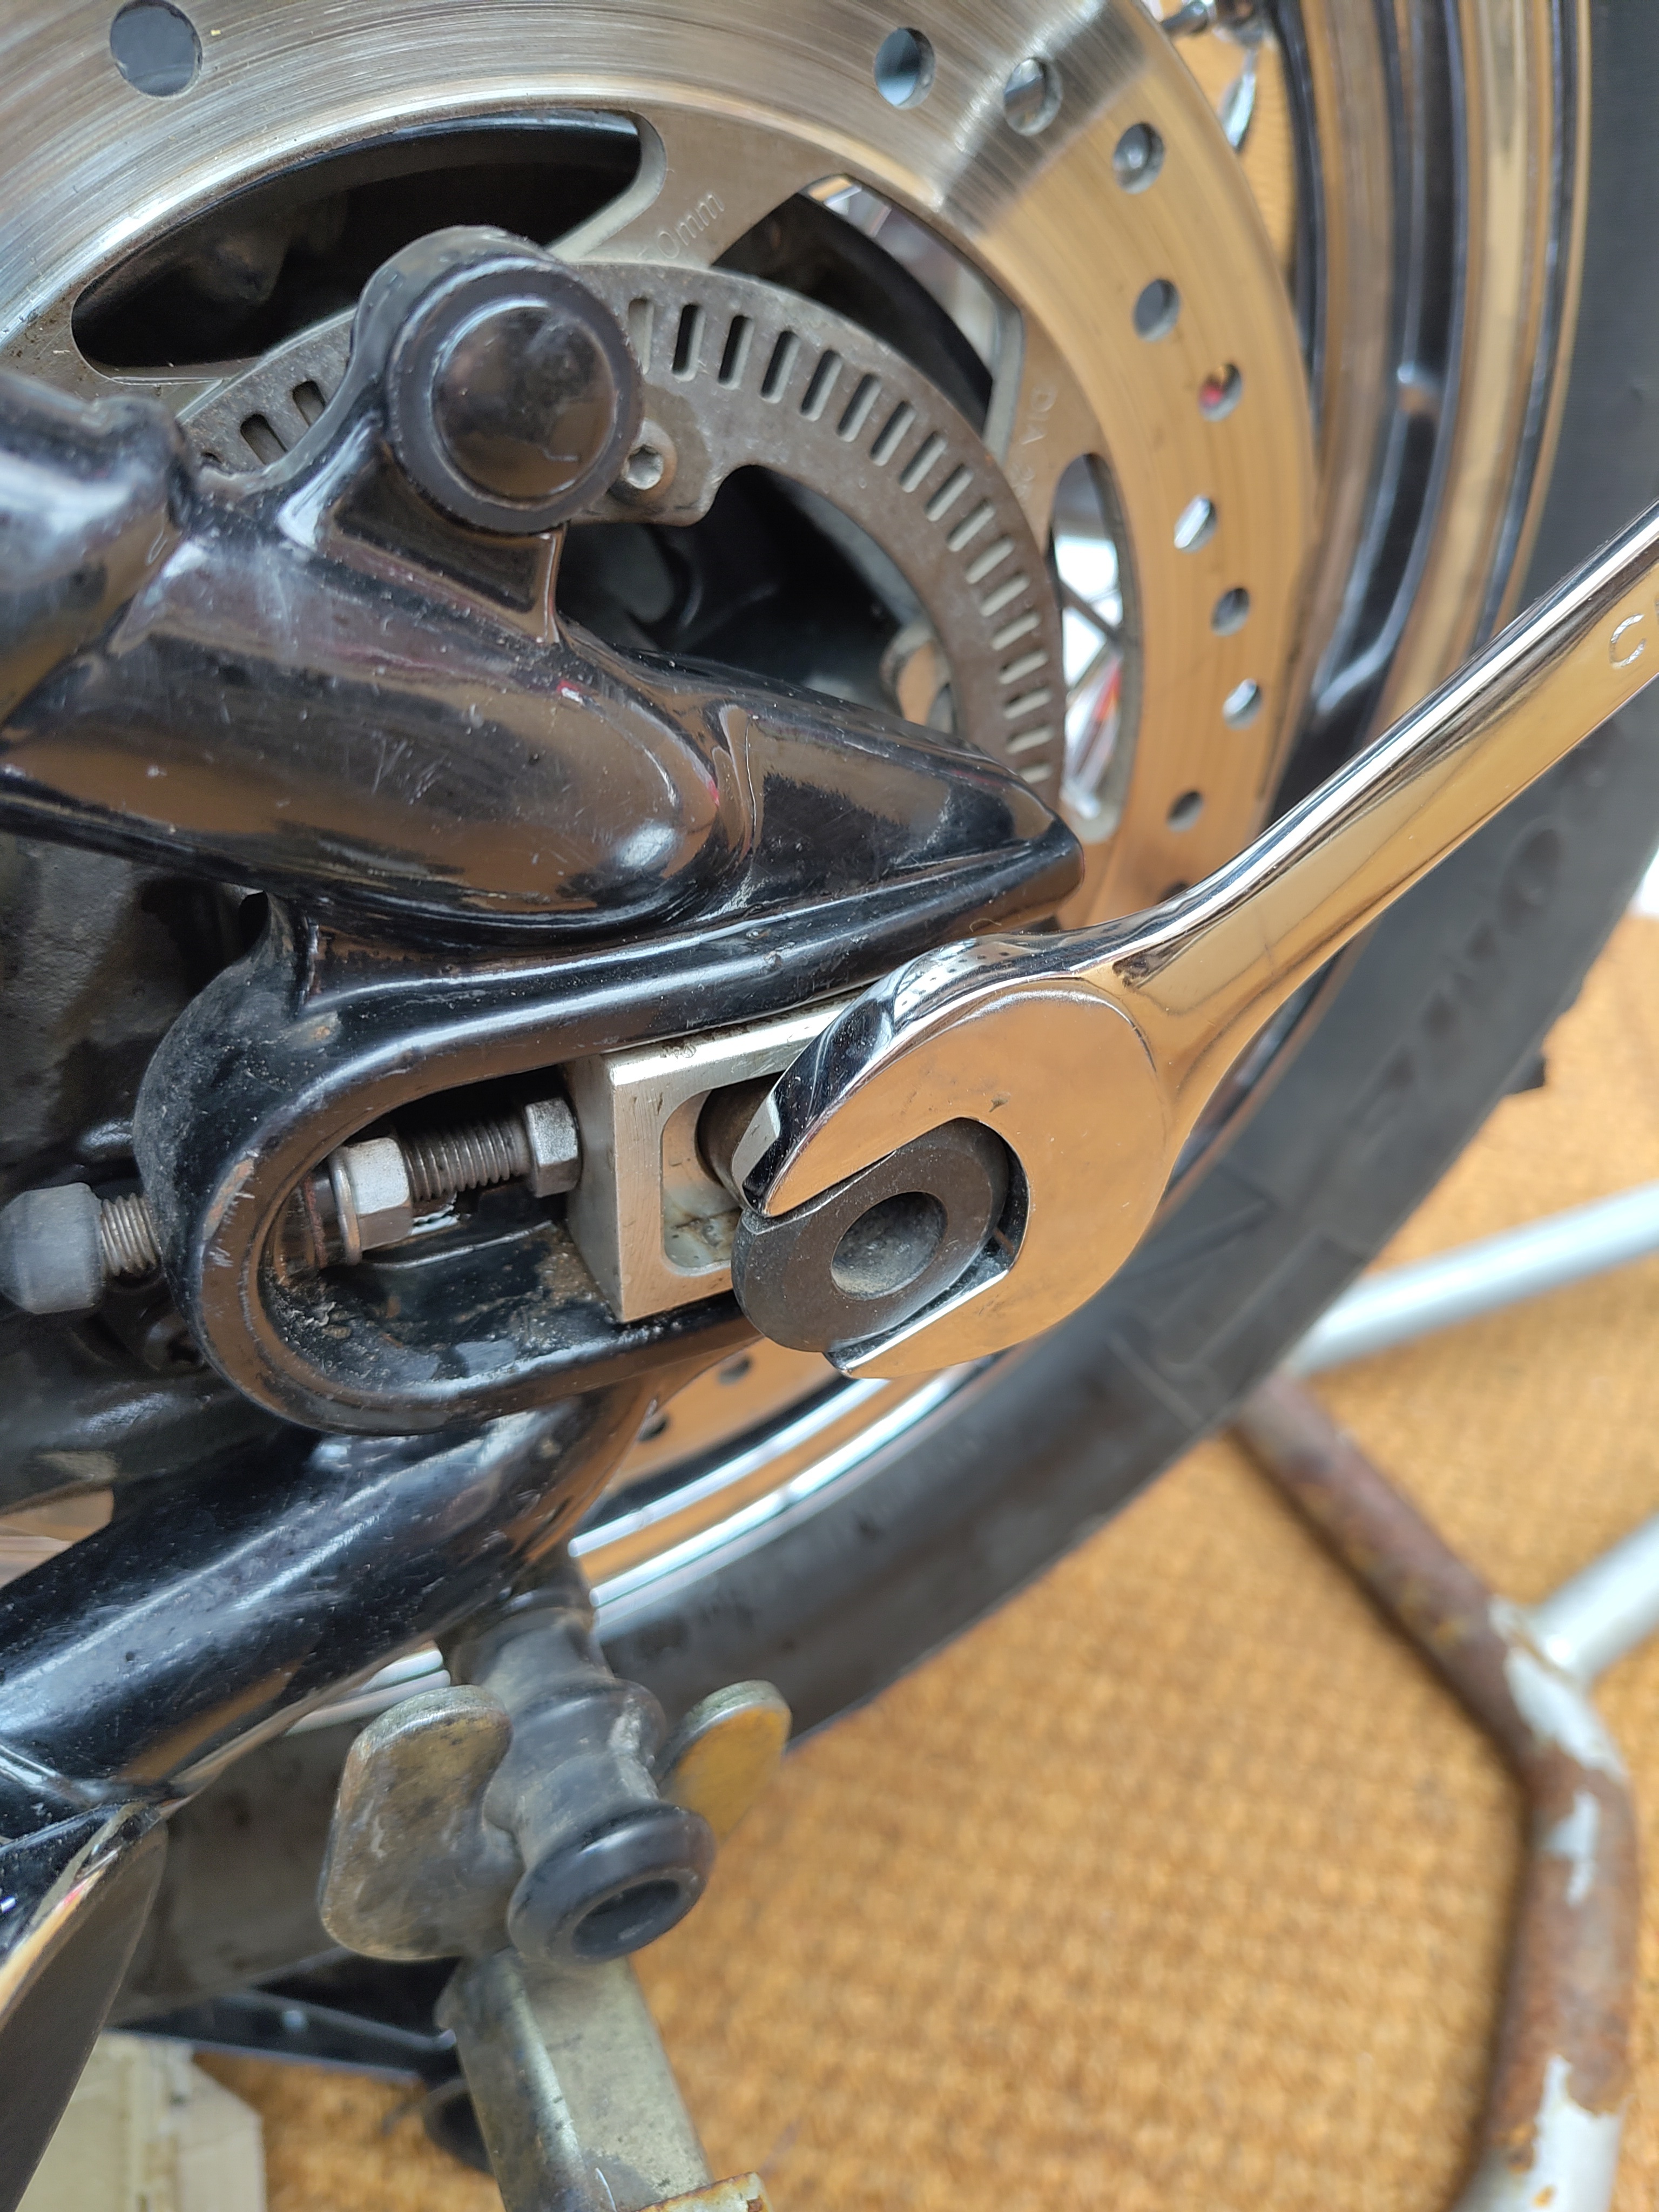
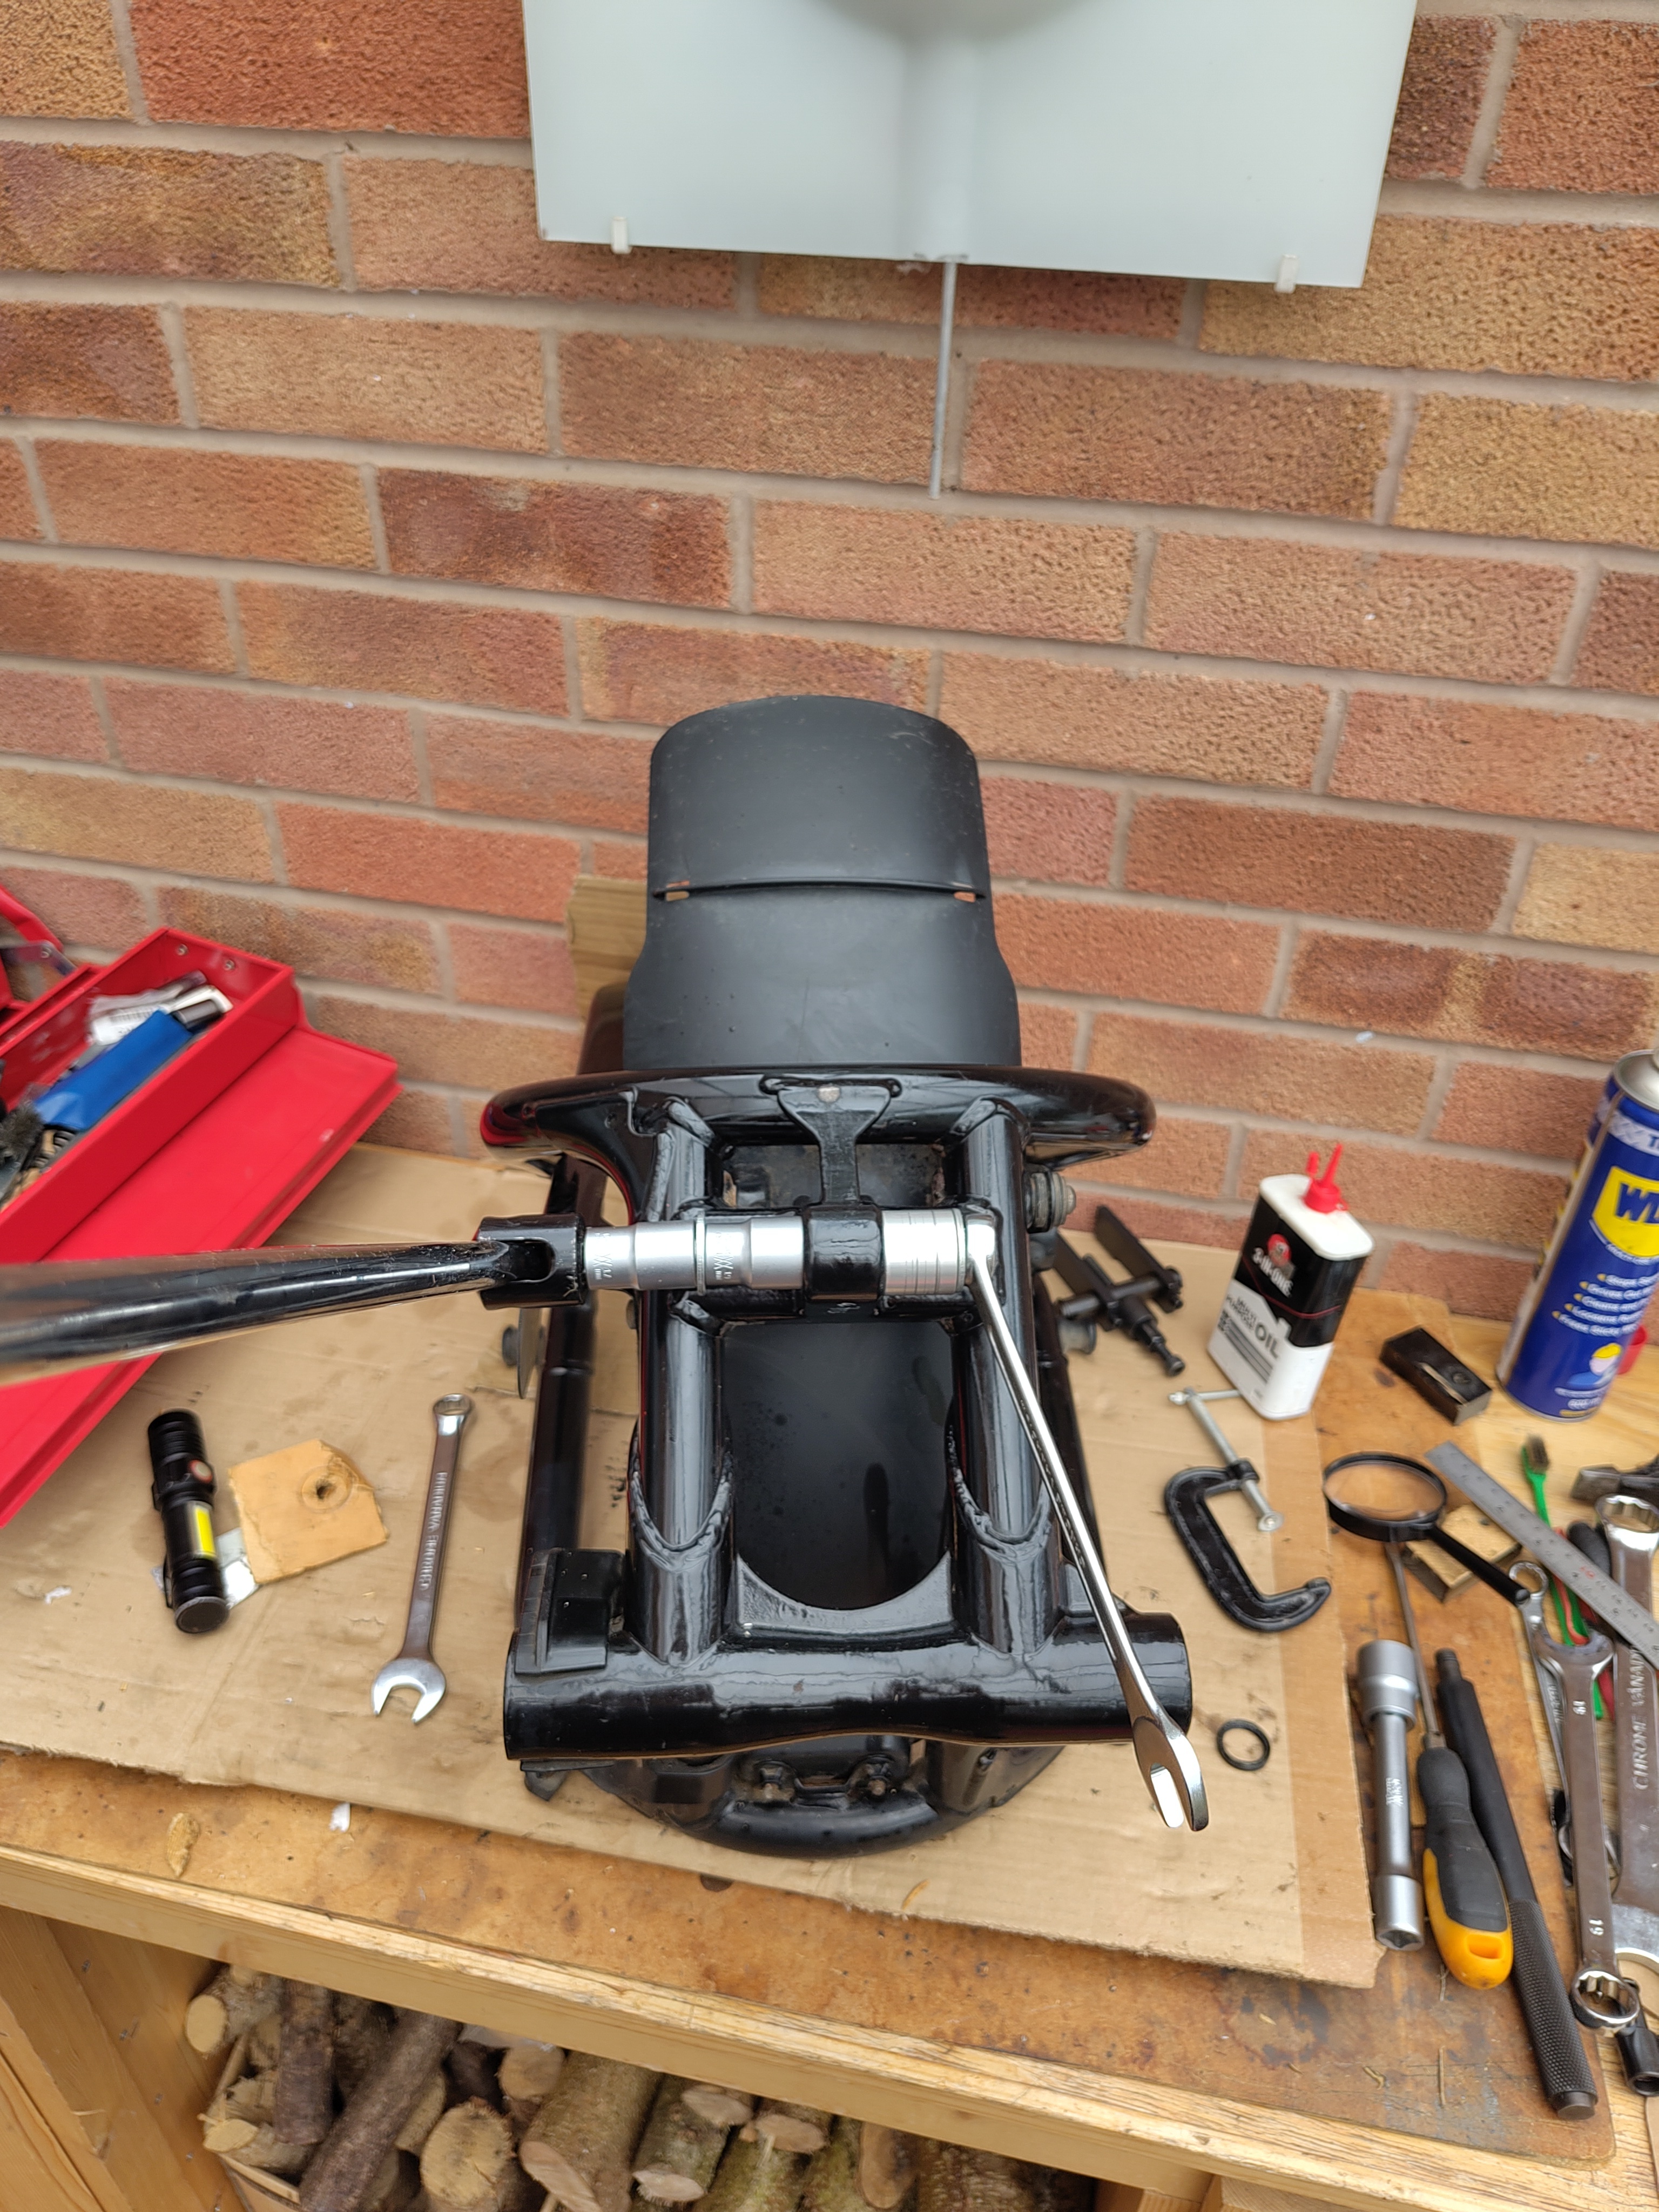
Now to start disconnecting things. First thing to do is loosen the bolts on the suspension linkage where the rear shock and the swingarm connect, then completely remove the nut from the shock’s bolt. Even with the airboxes removed there is very little space to turn nuts because of the rear mudguard.

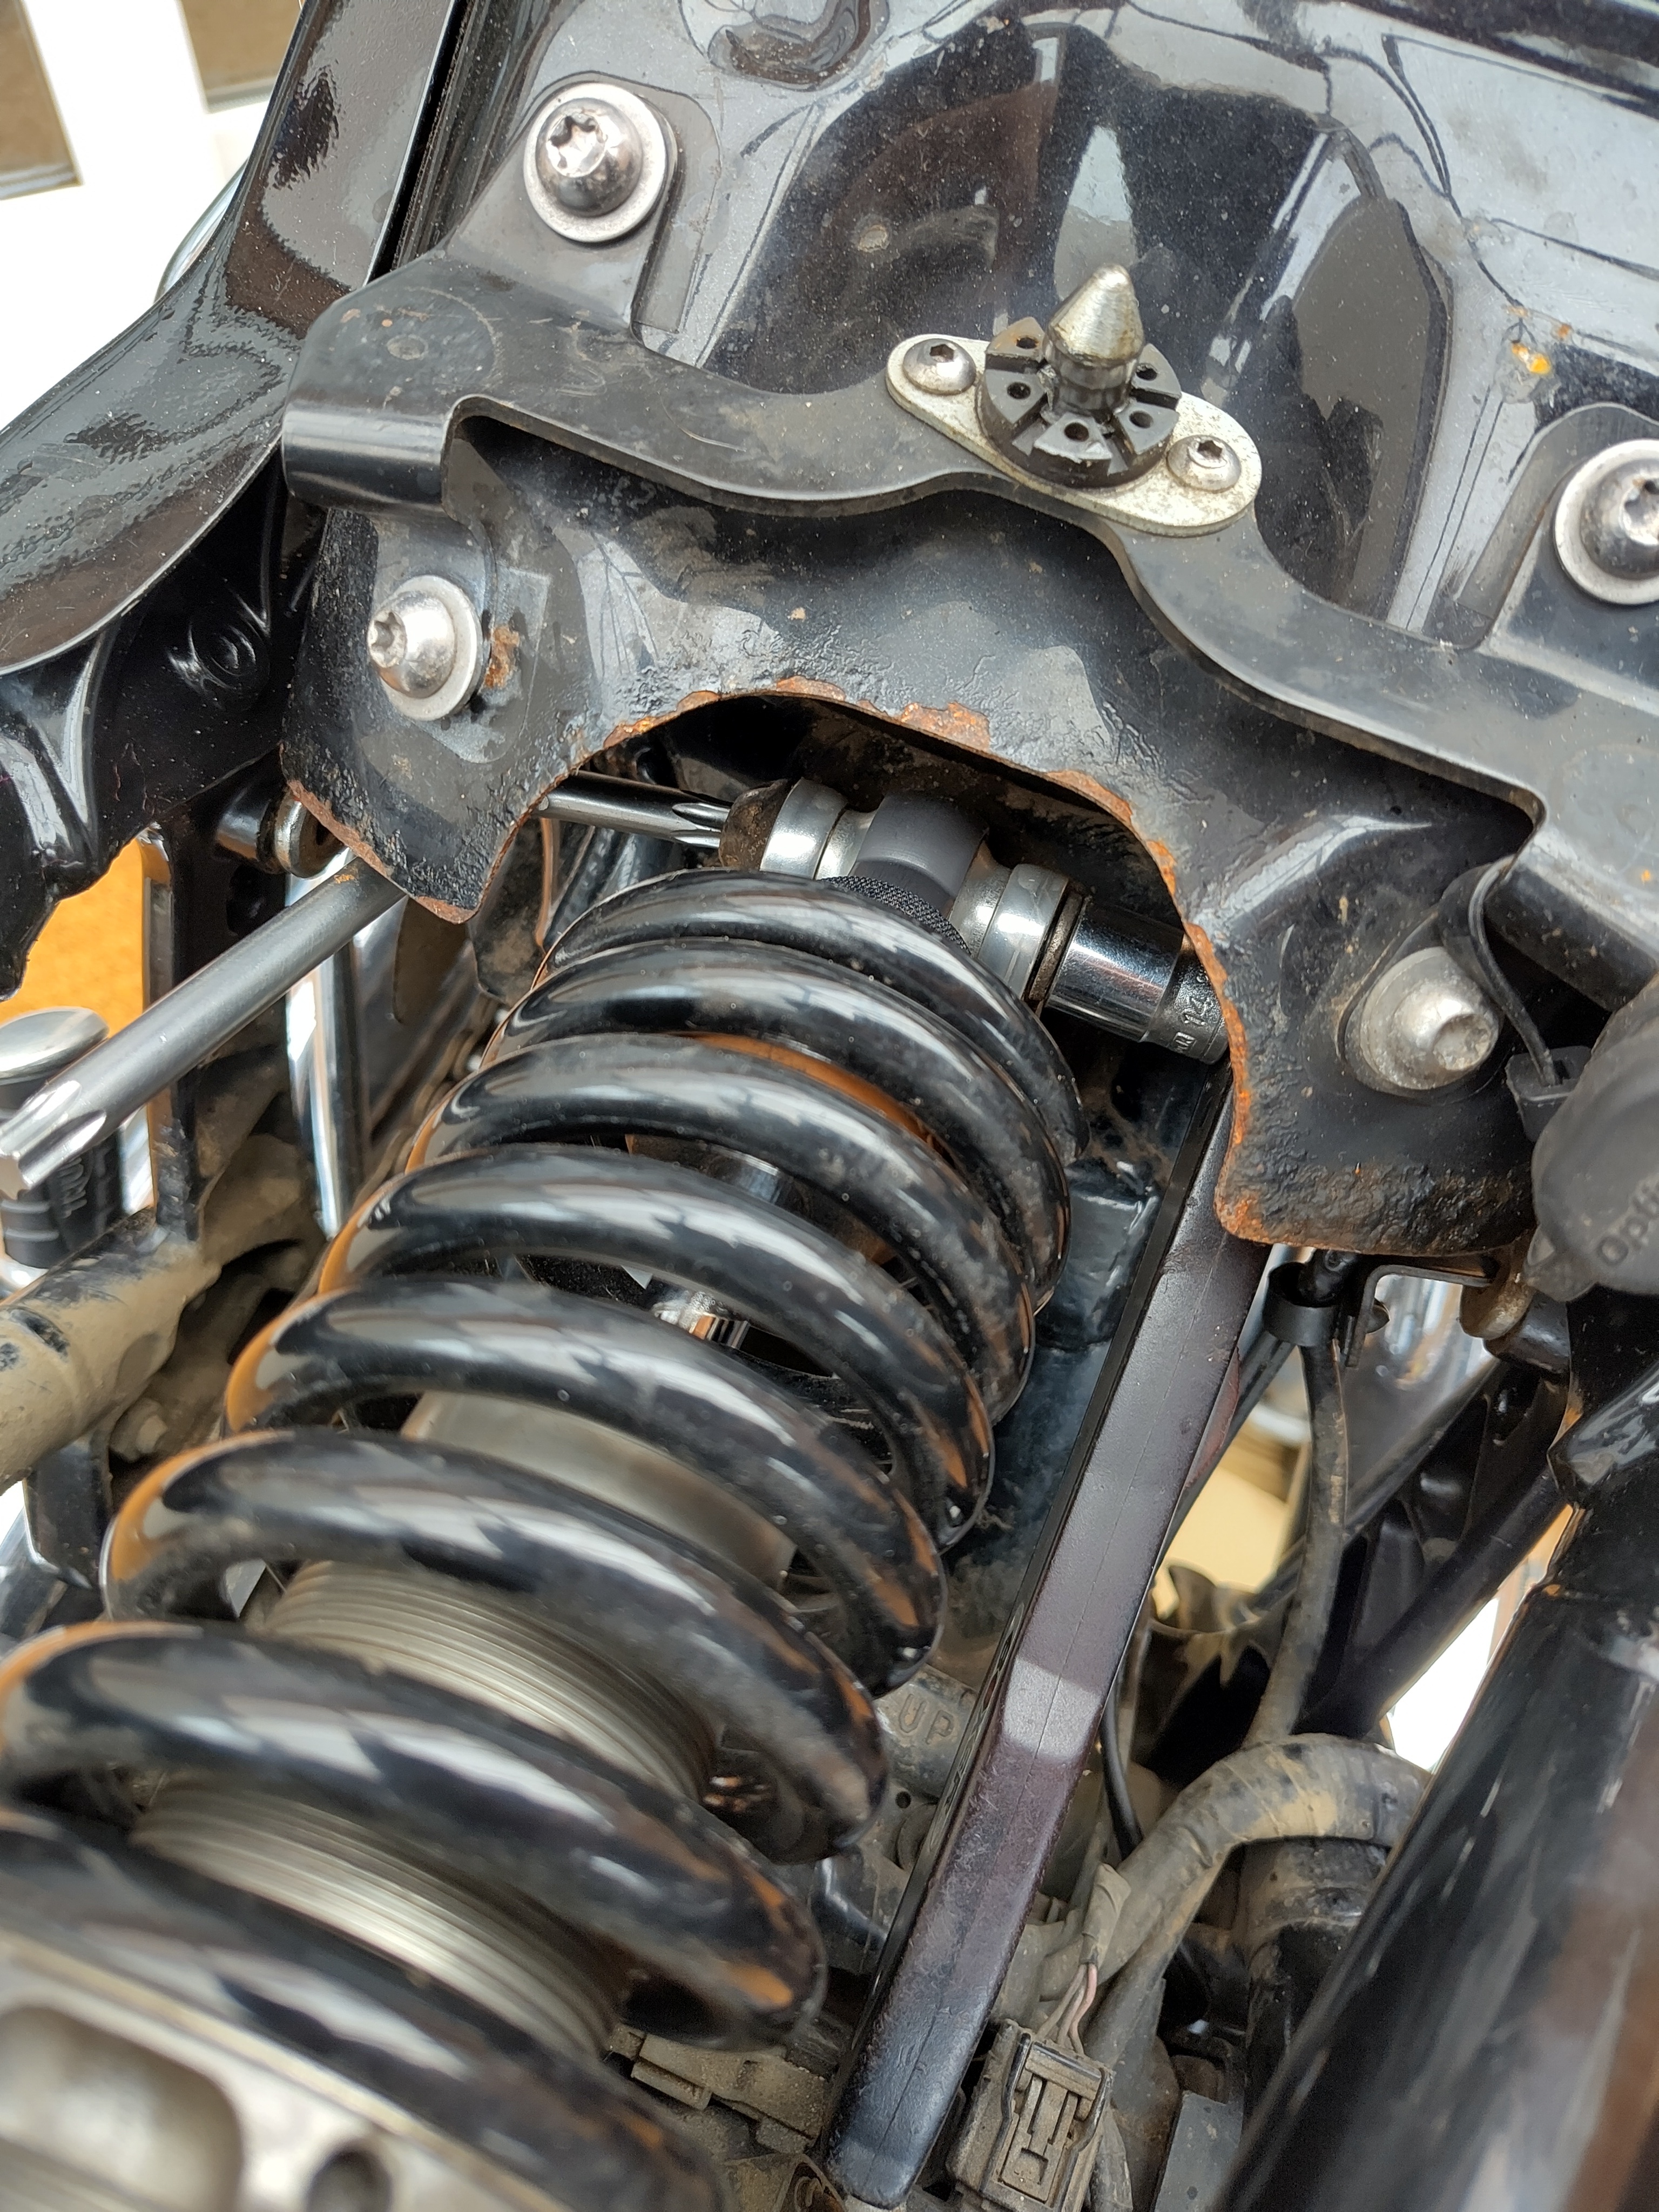
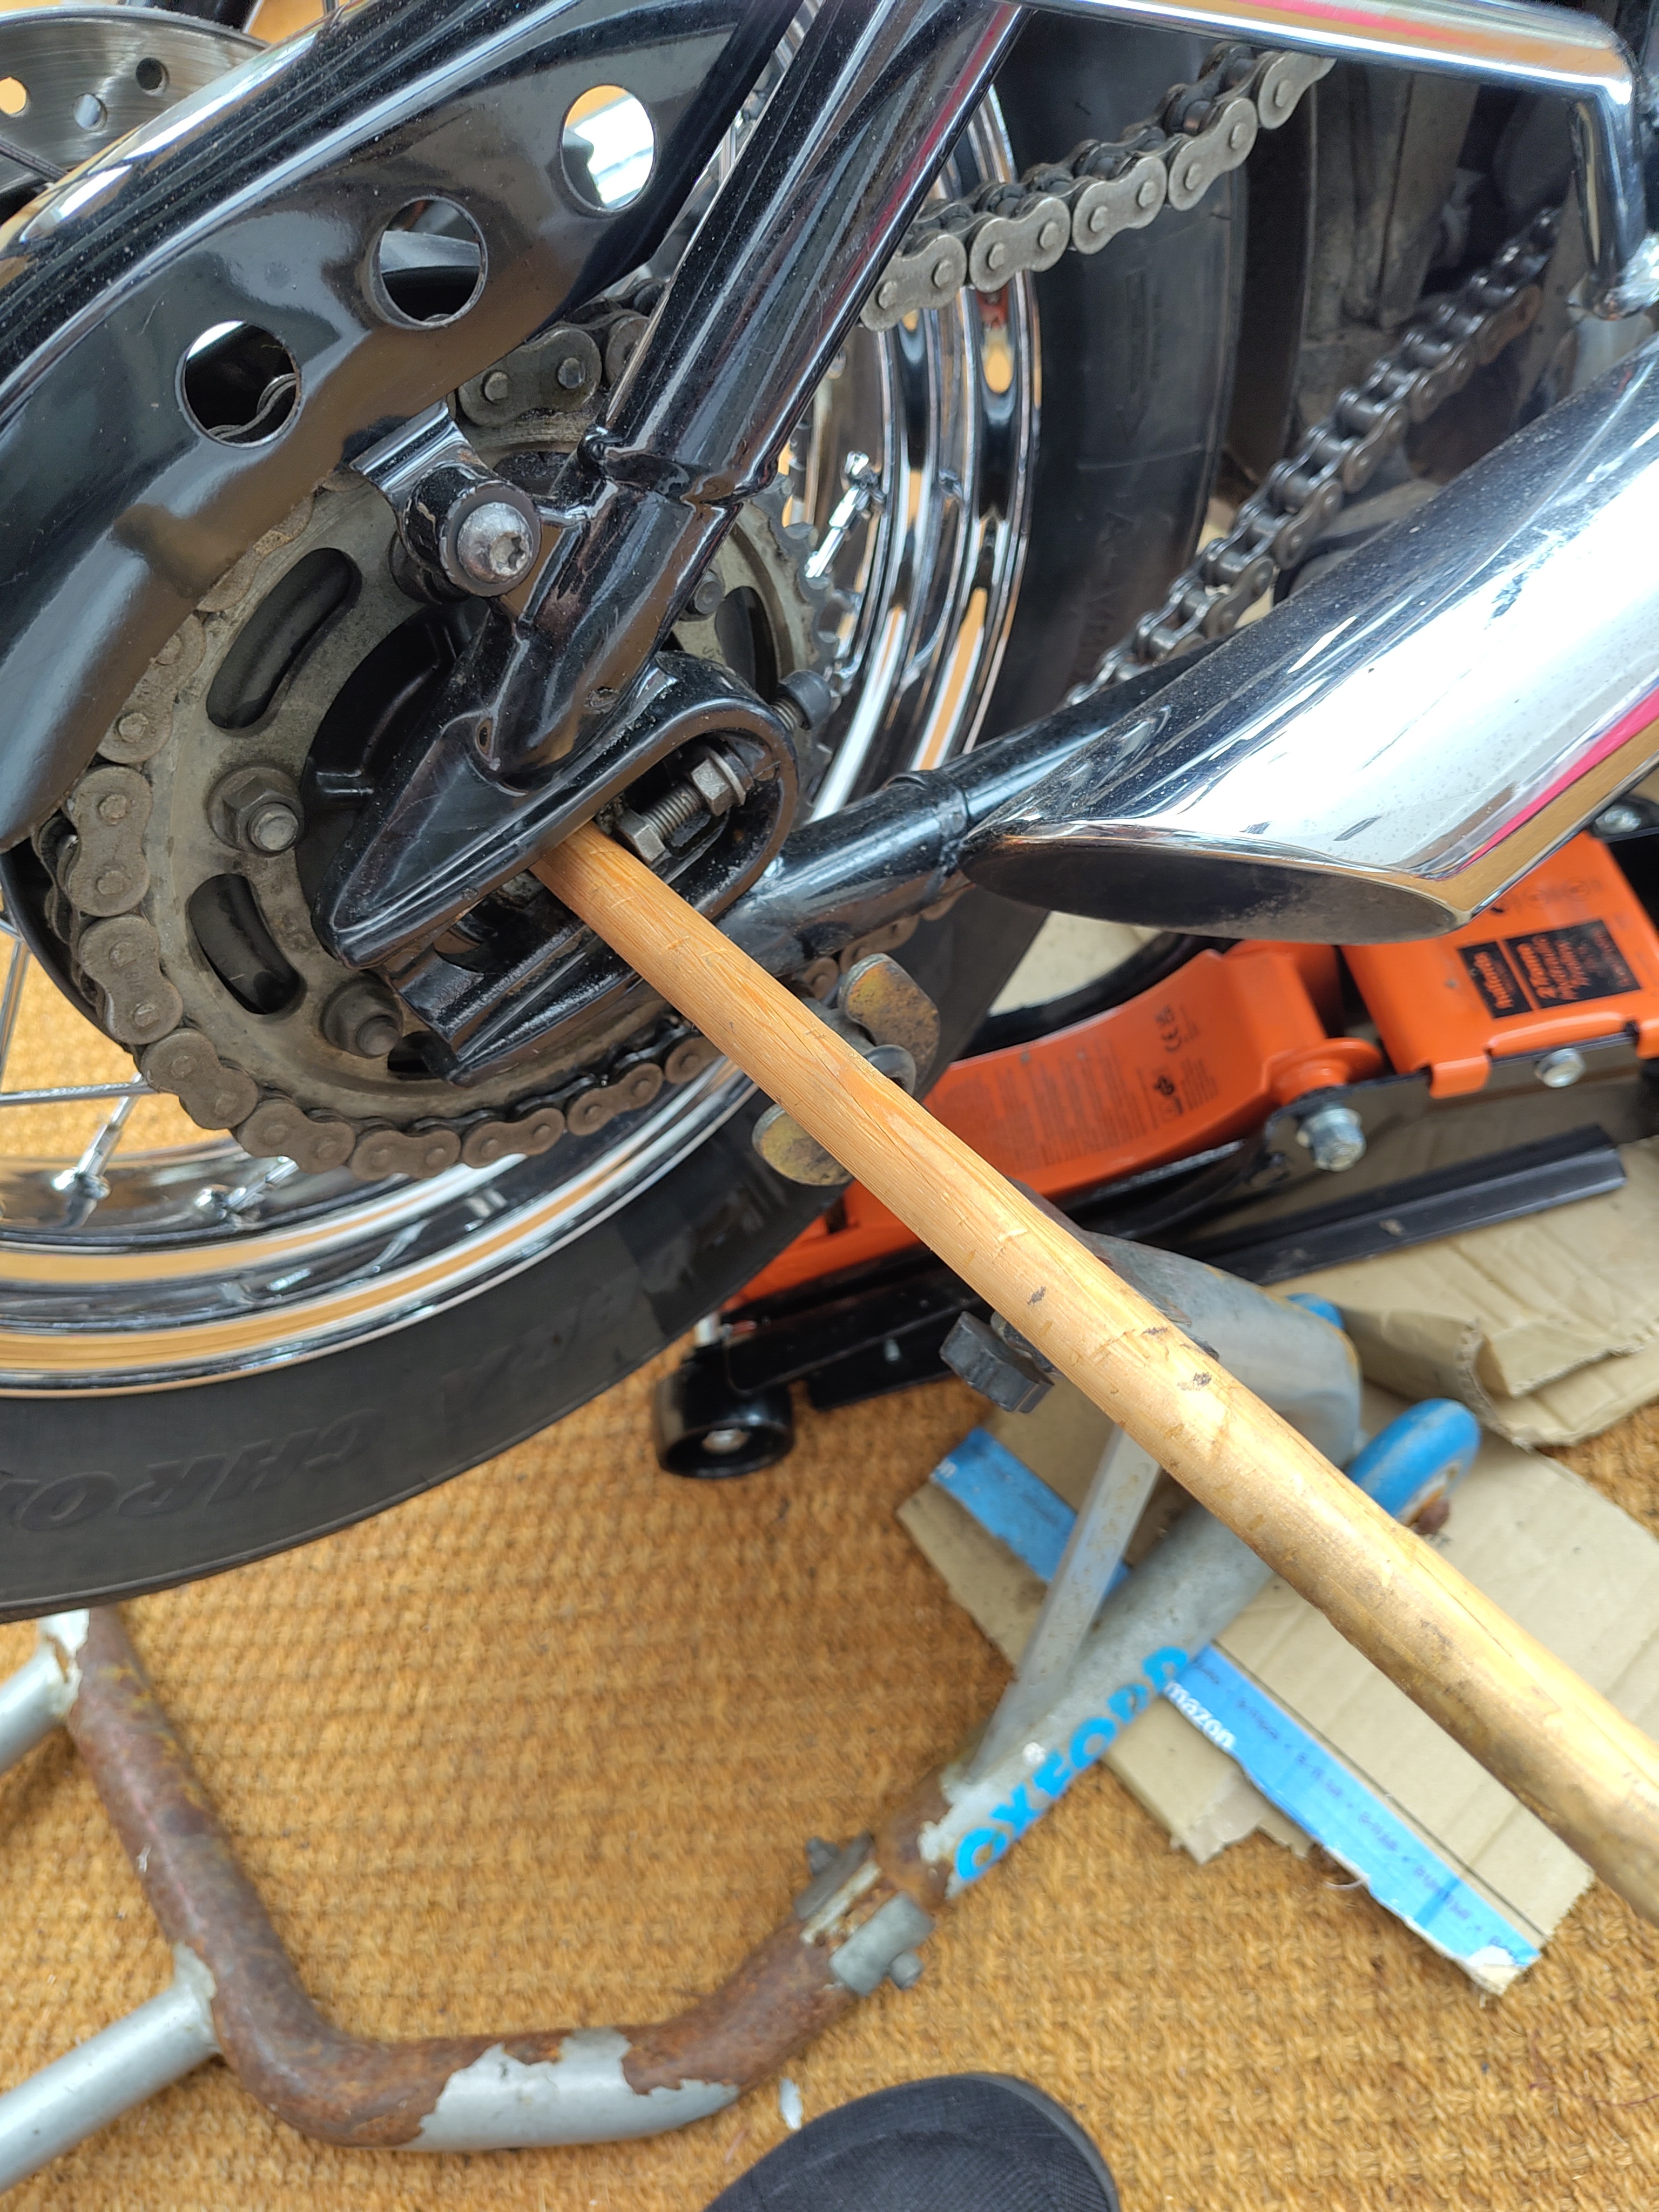
The weight of the rear is still being held by that shock’s bolt and the trick is to use one hand to gently pull on it whilst using the other to very slowly raise a jack under the rear tyre until it gets to the point where the is no weight on the bolt and it freely slides out. Simples. :slight_smile:

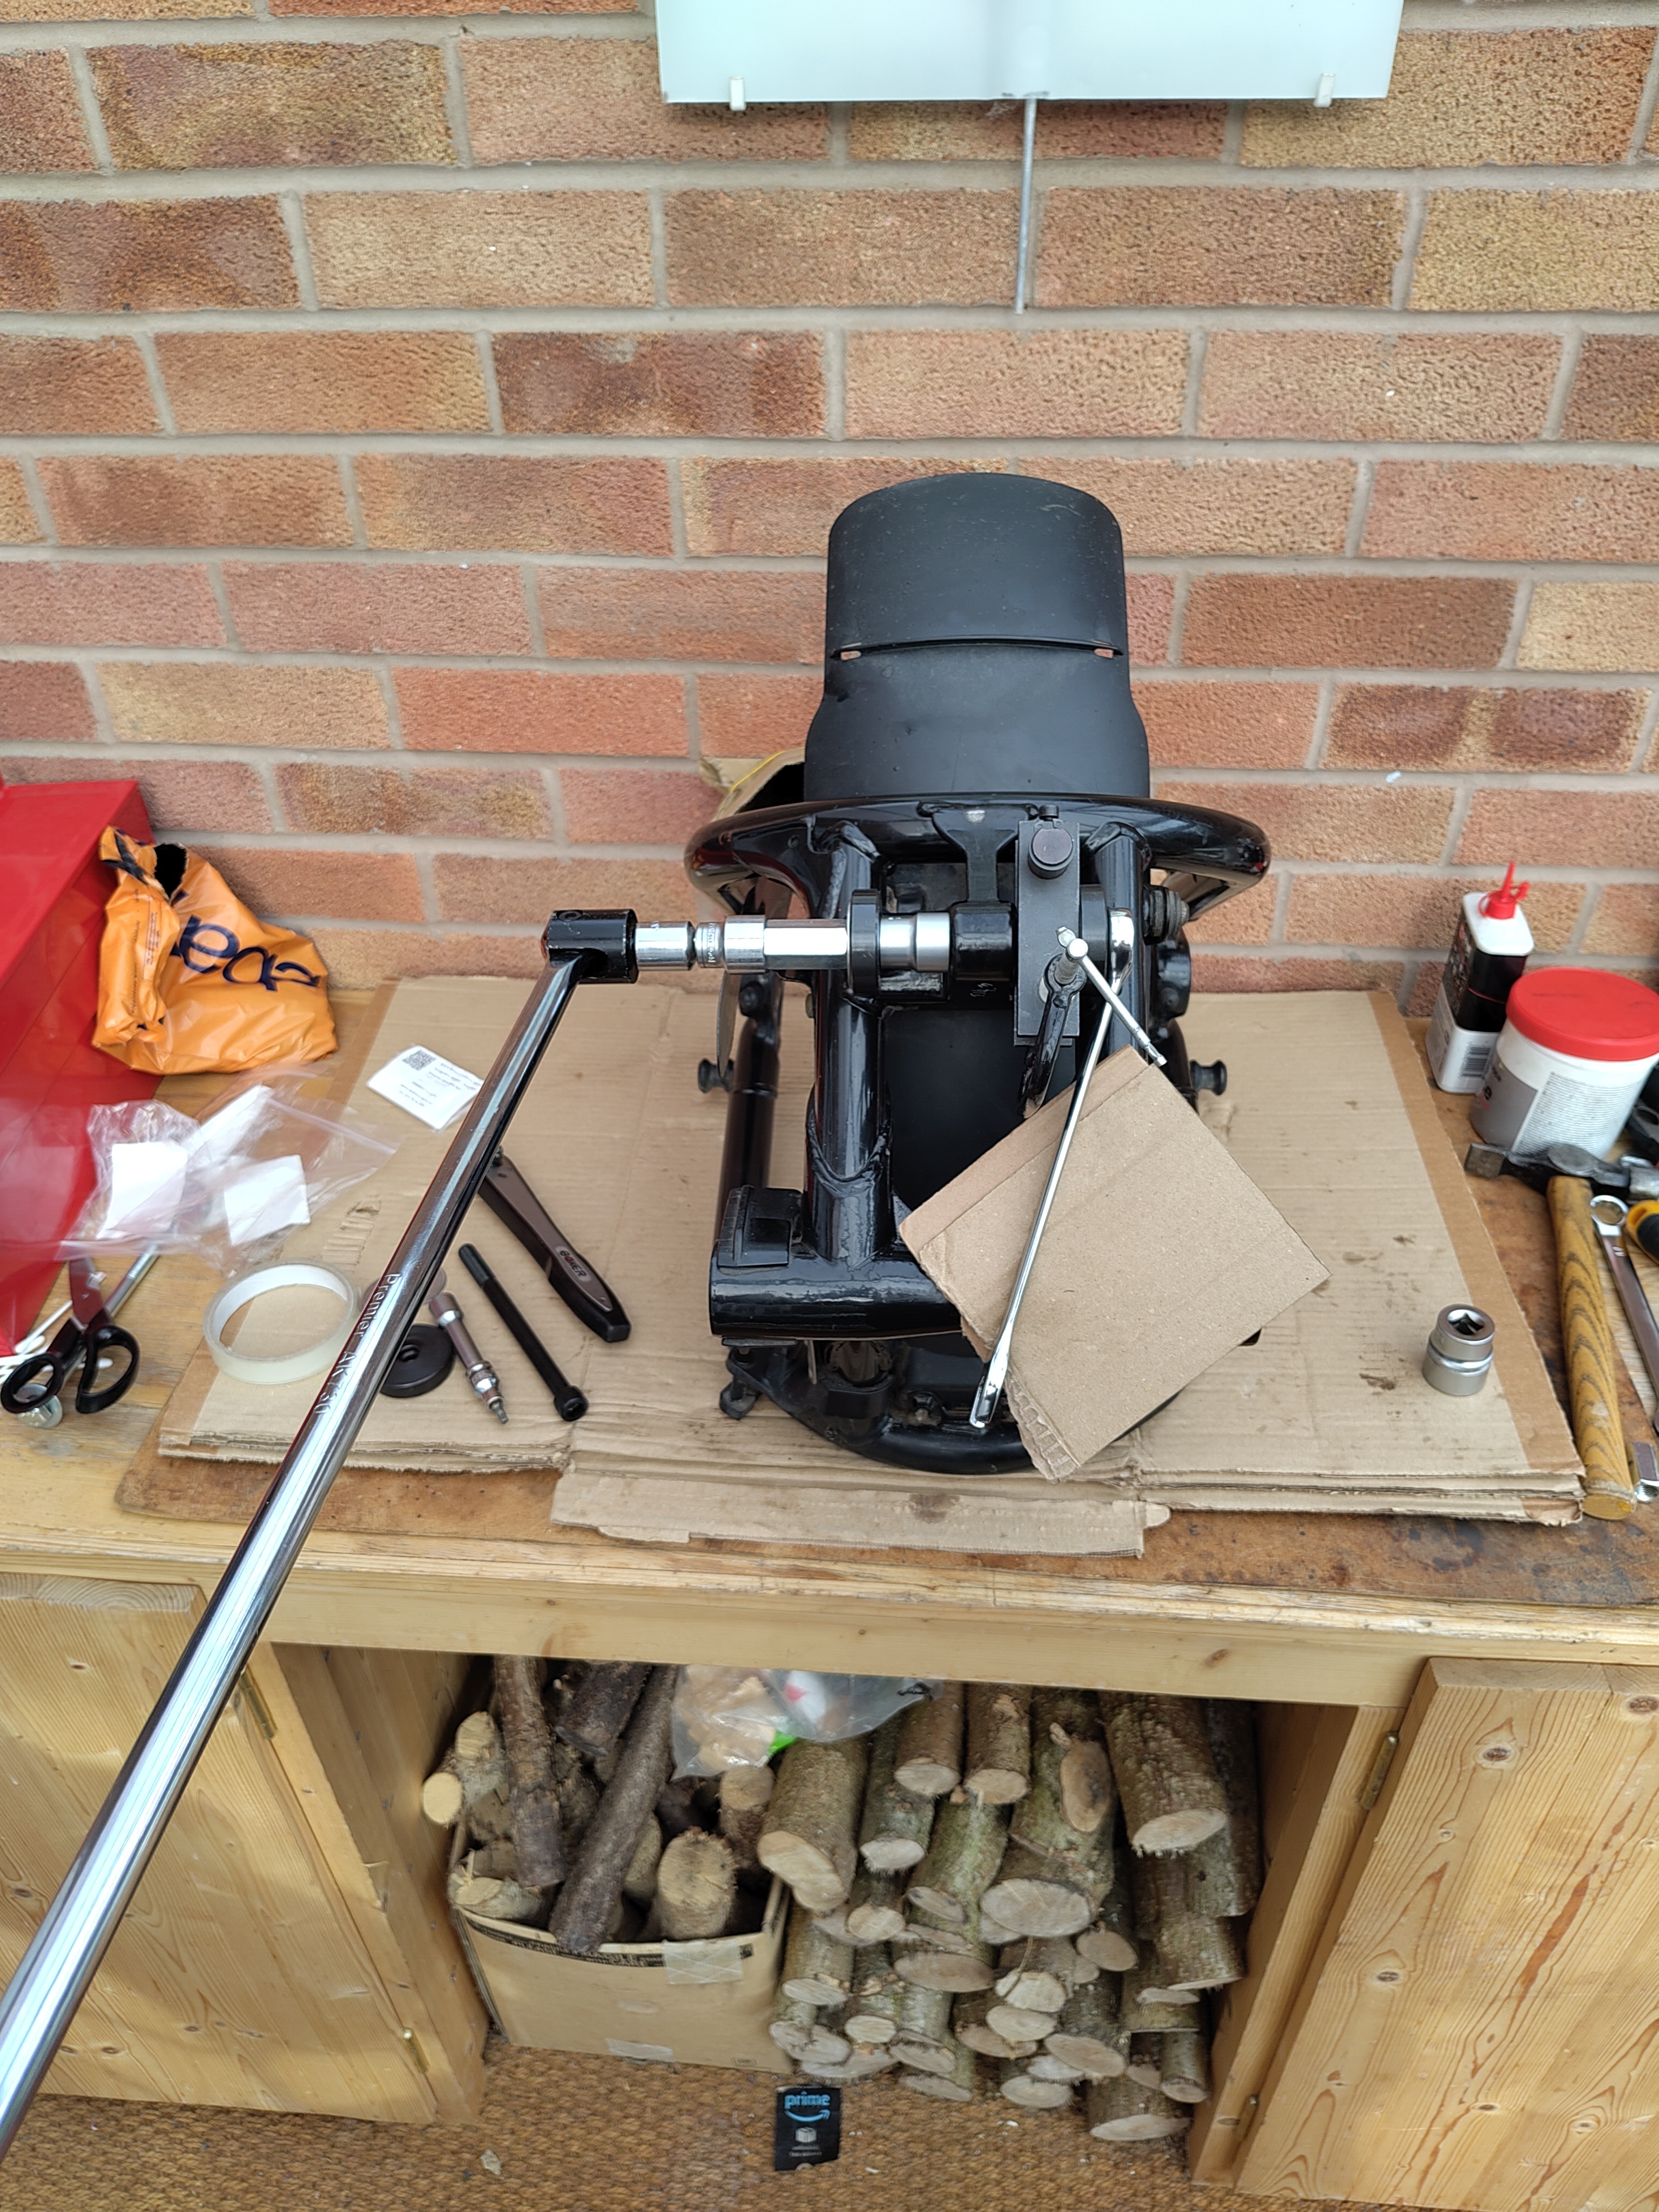
Now the previously loosened bolt where the swingarm connects can be removed and the jack under the rear tyre released to let the rear rest of the paddock stand. As previously noted, the paddock stand needs to be close enough that it doesn’t let the swingarm hit the ECU!

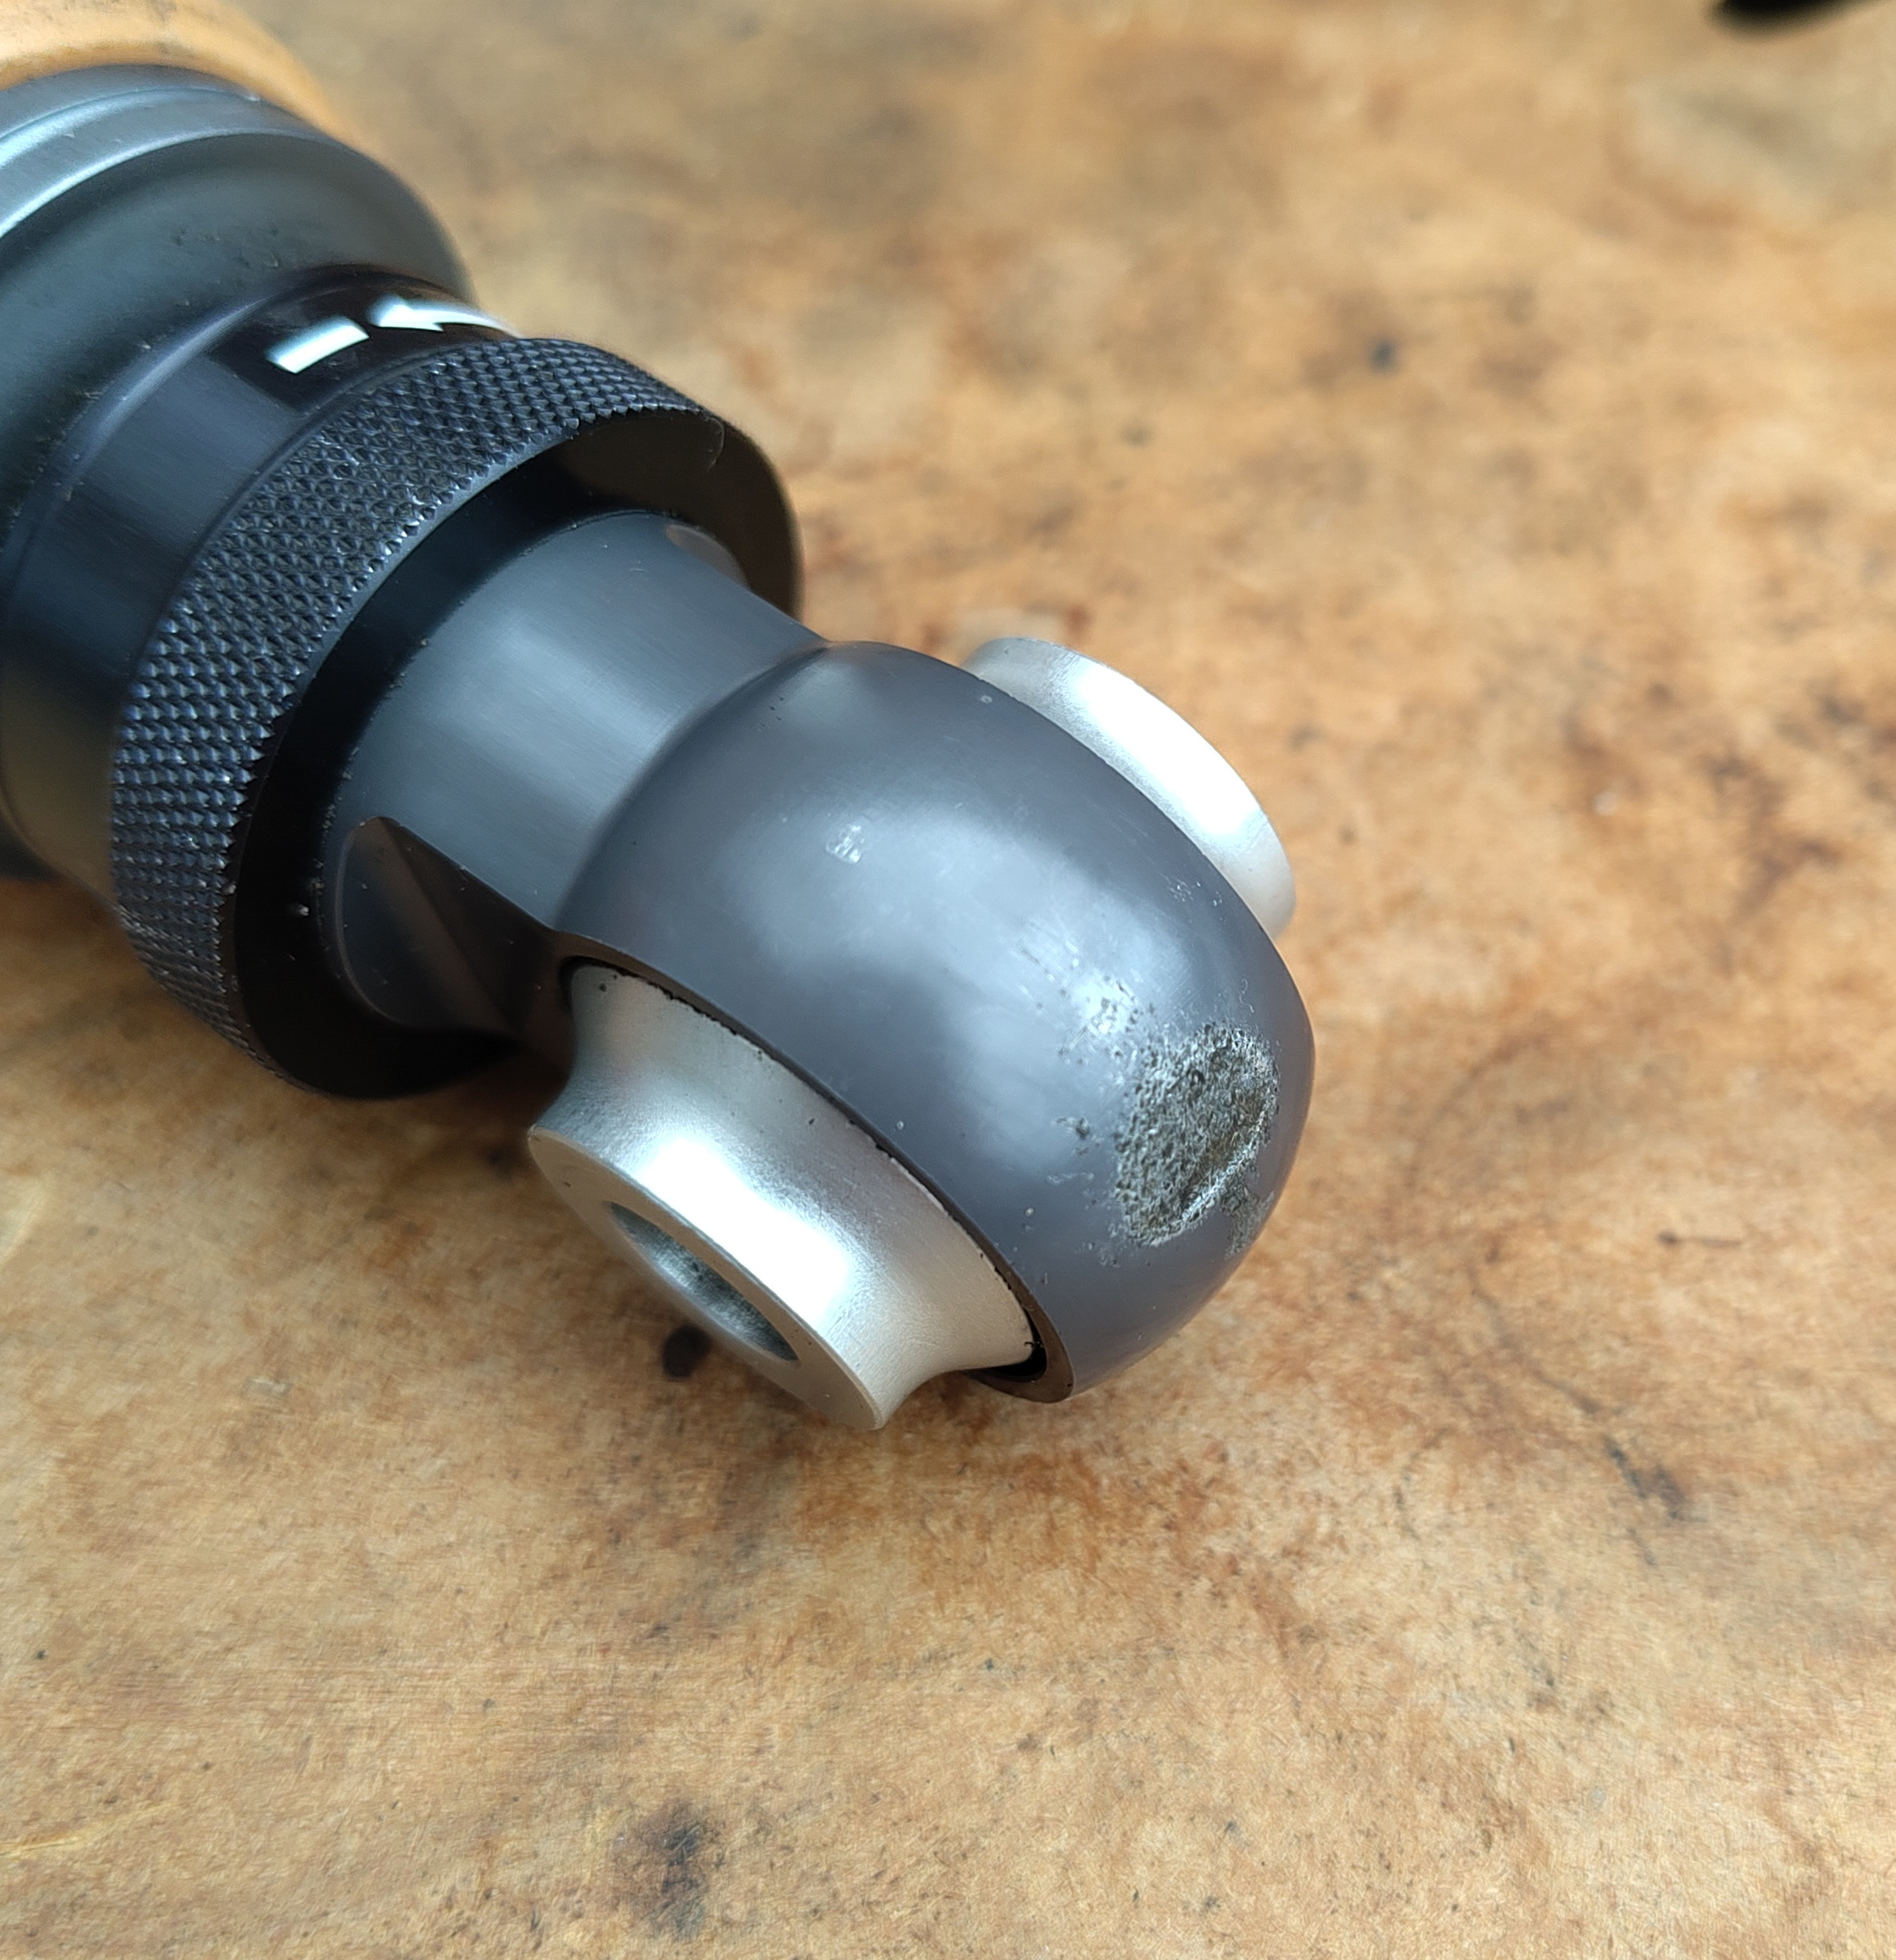
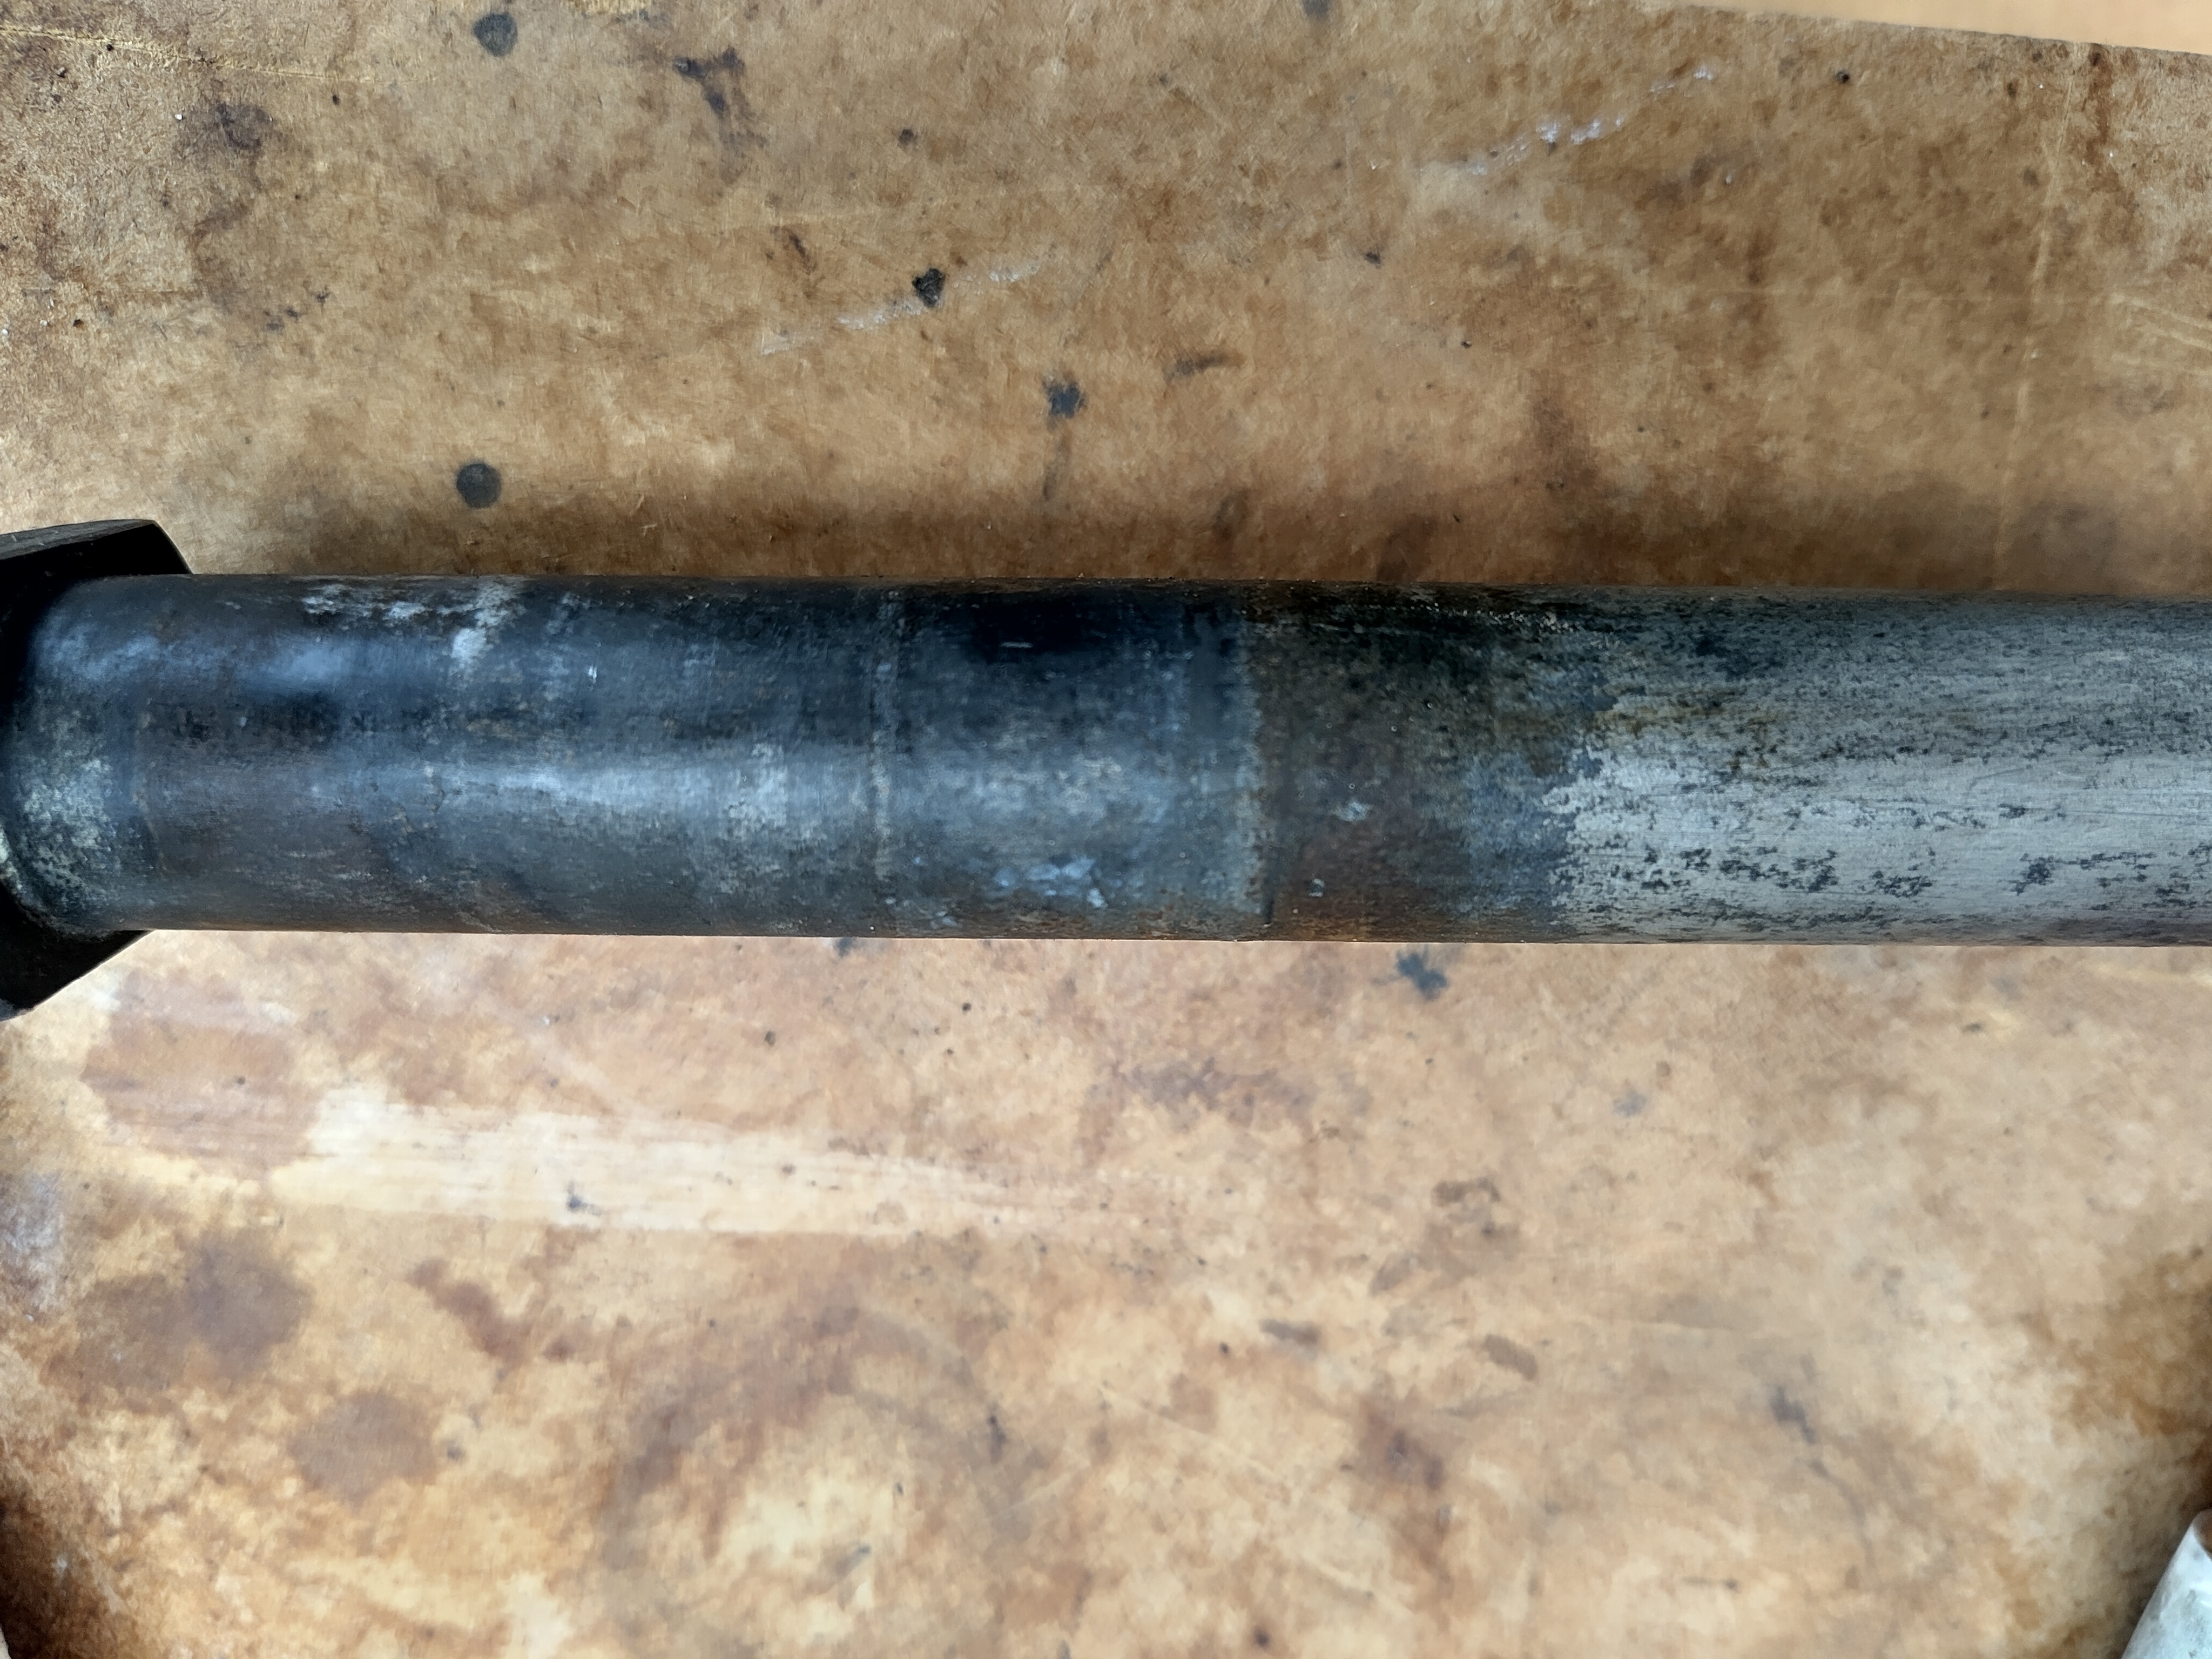
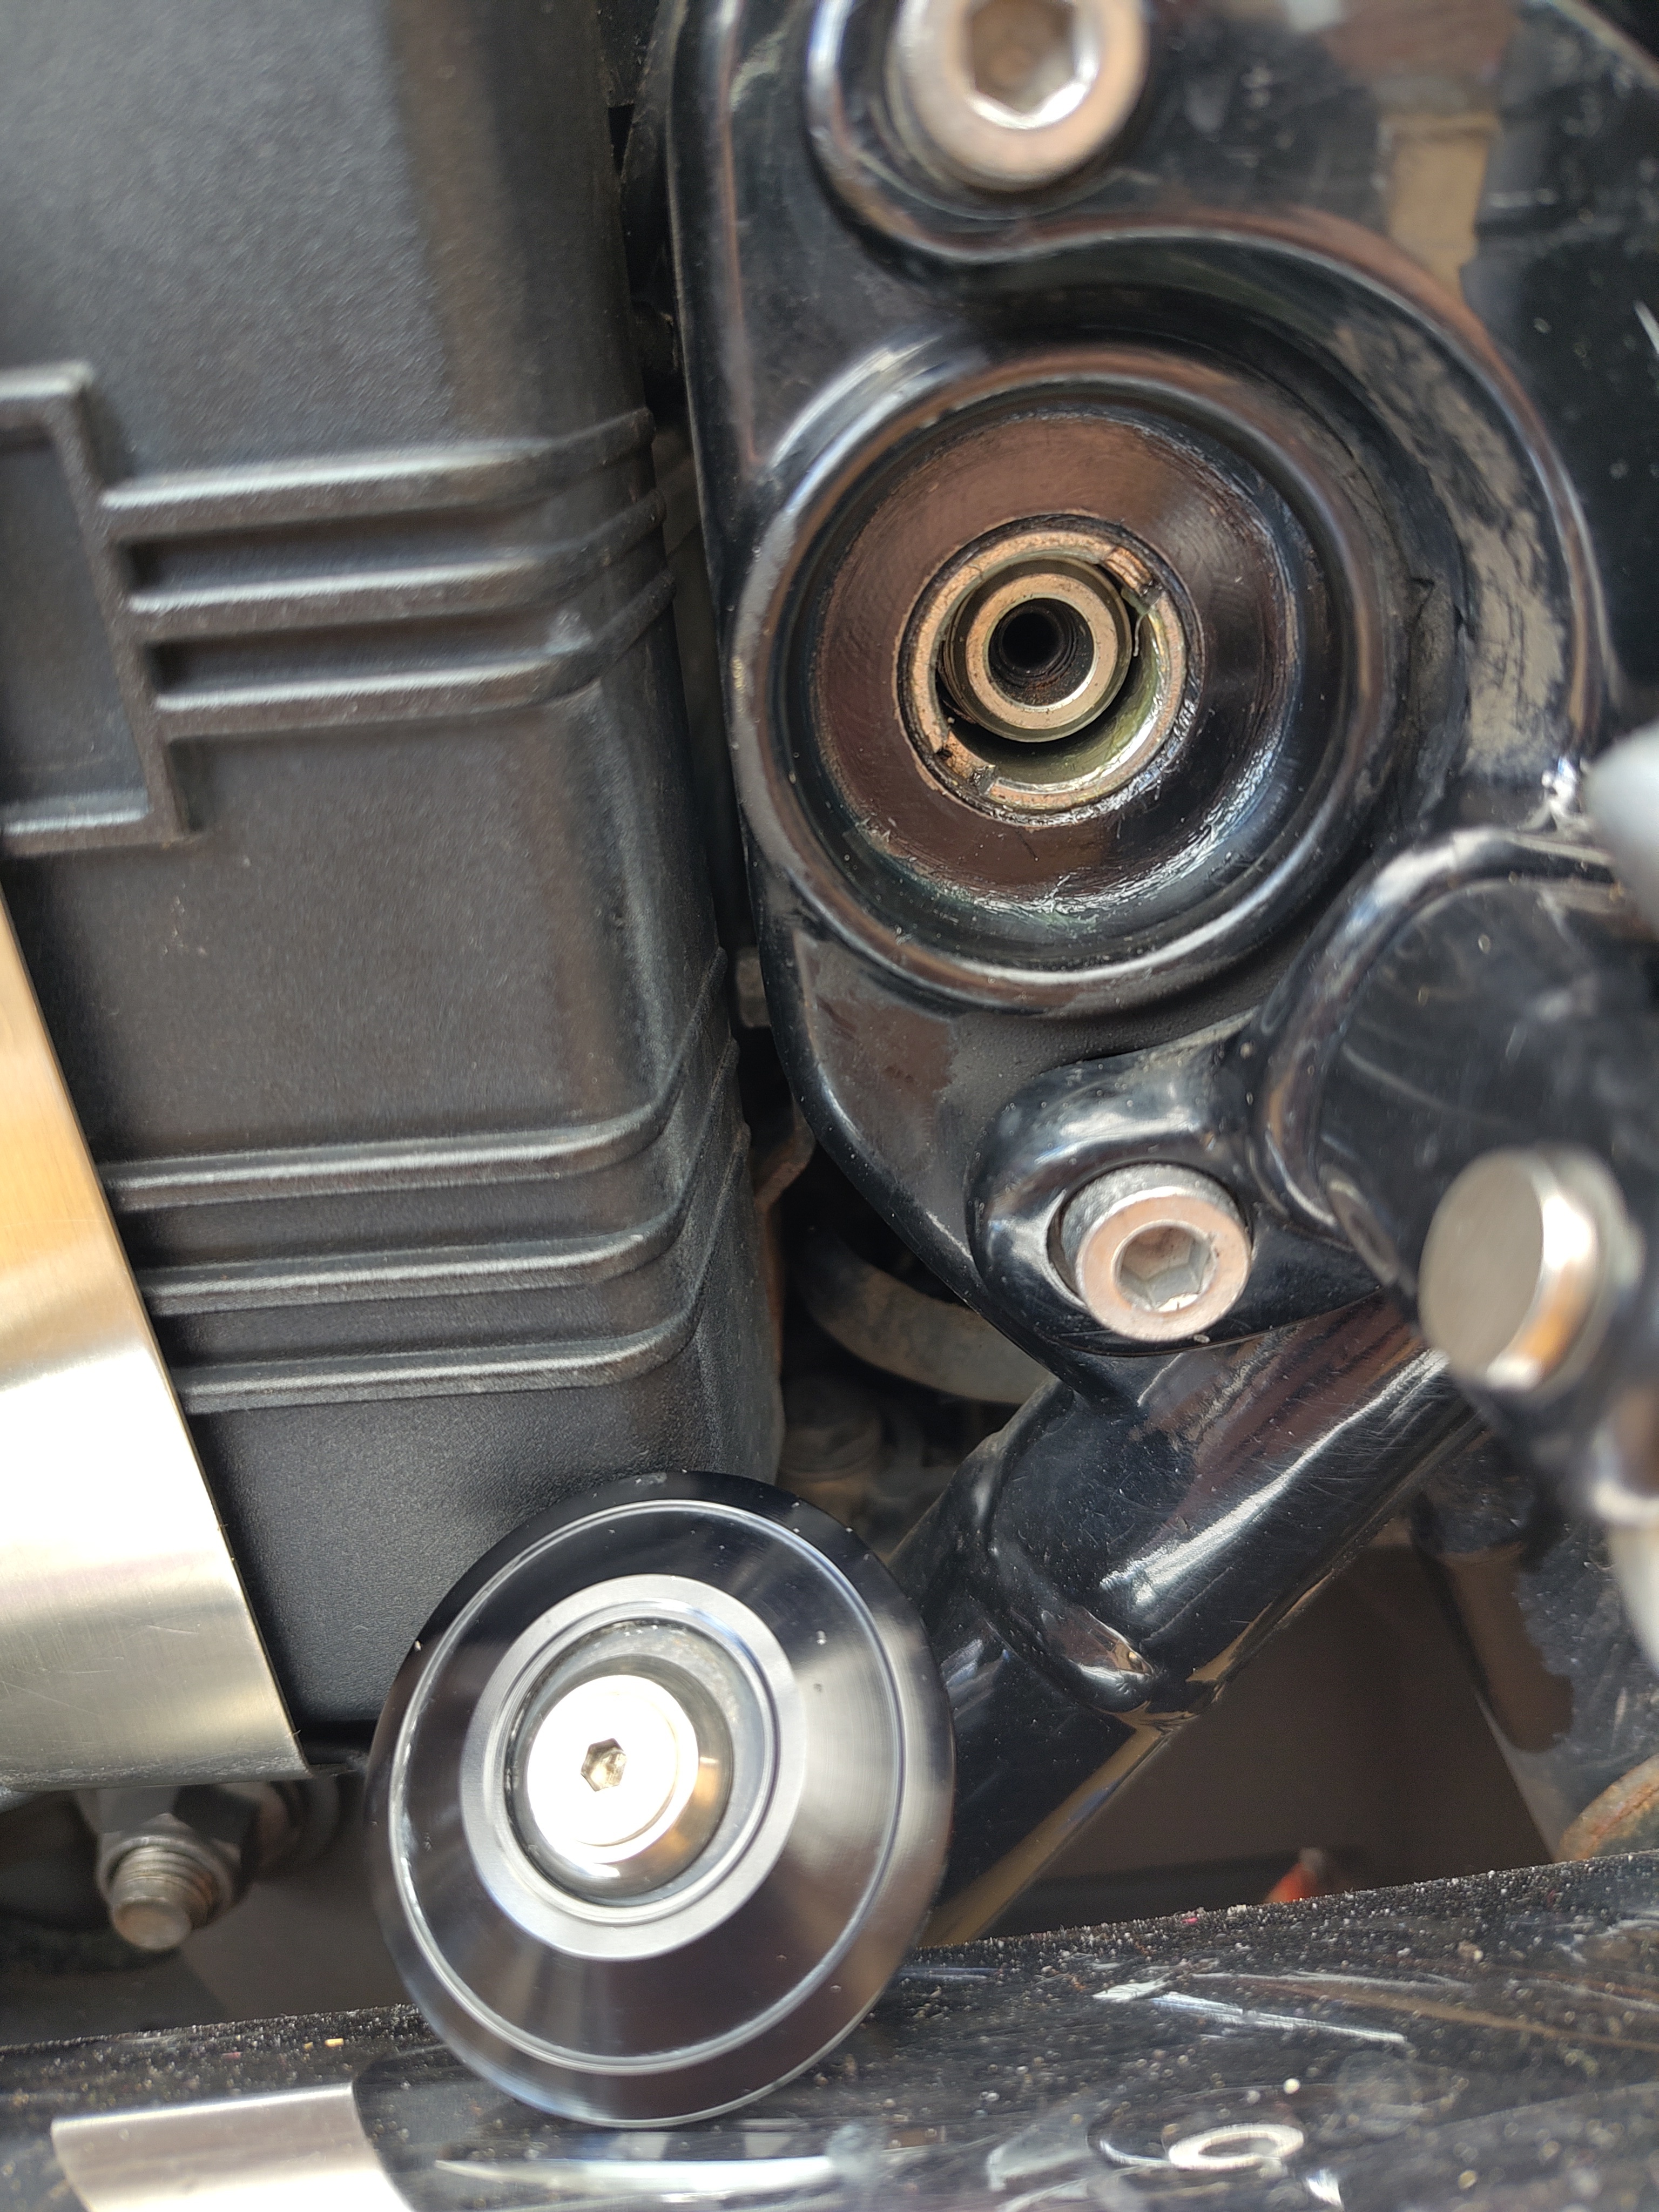
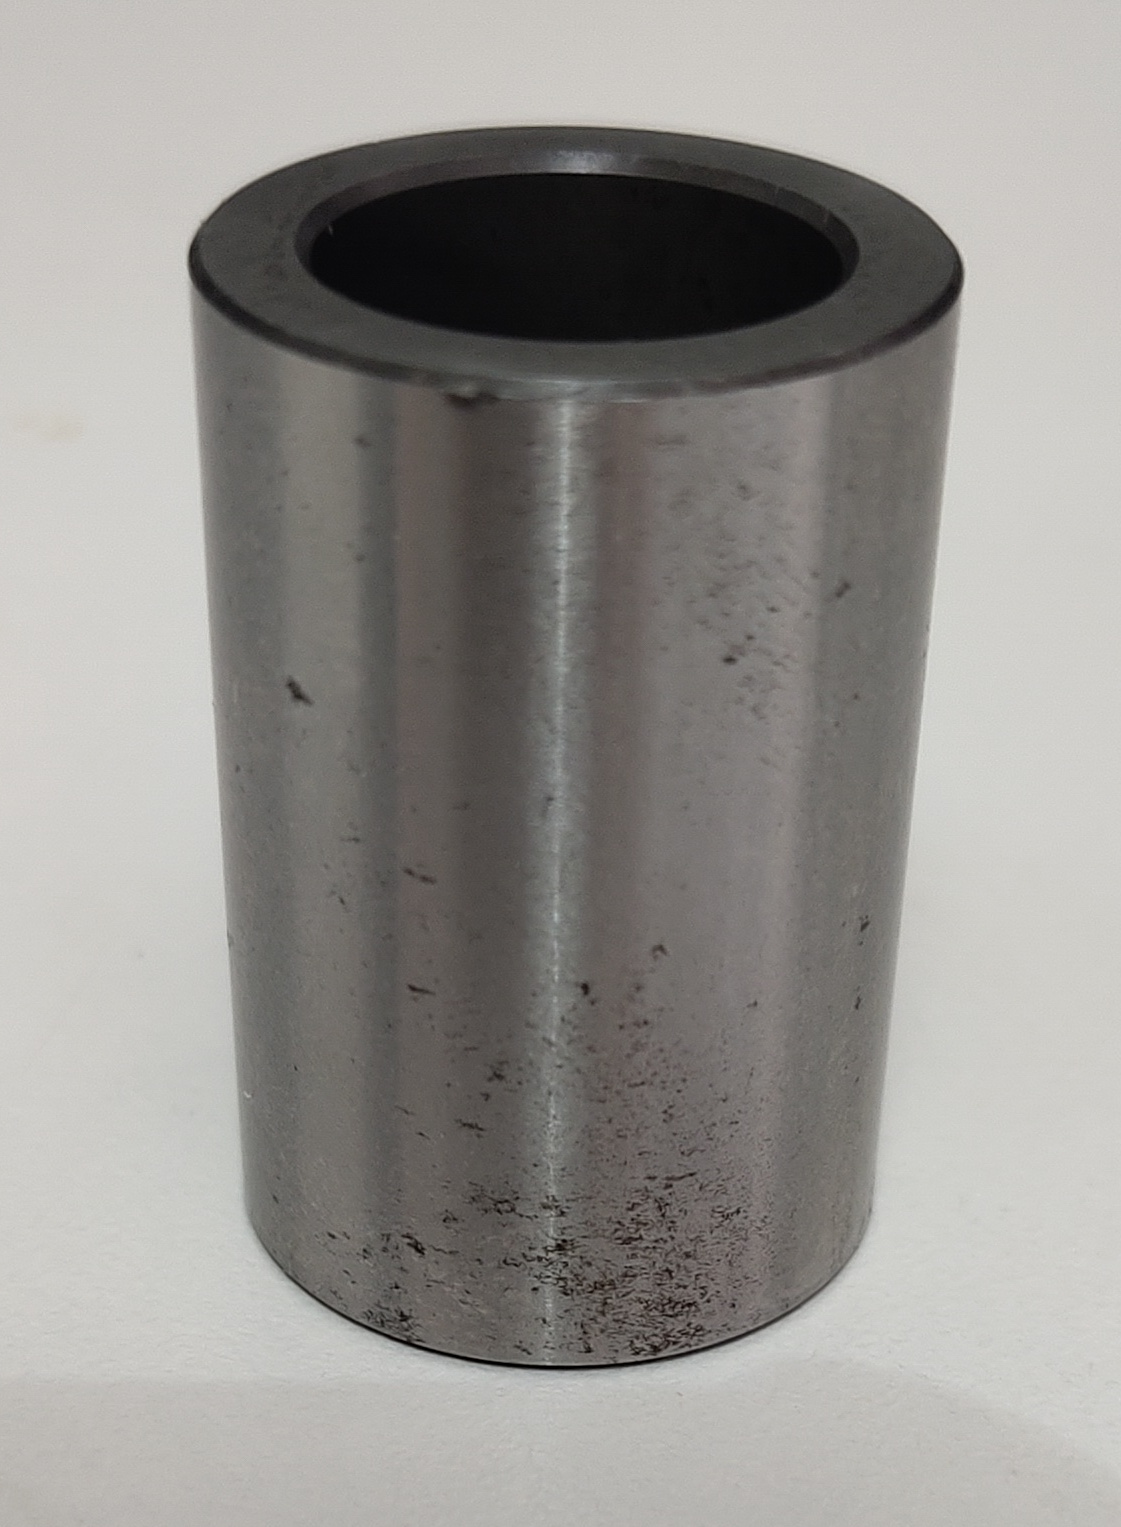
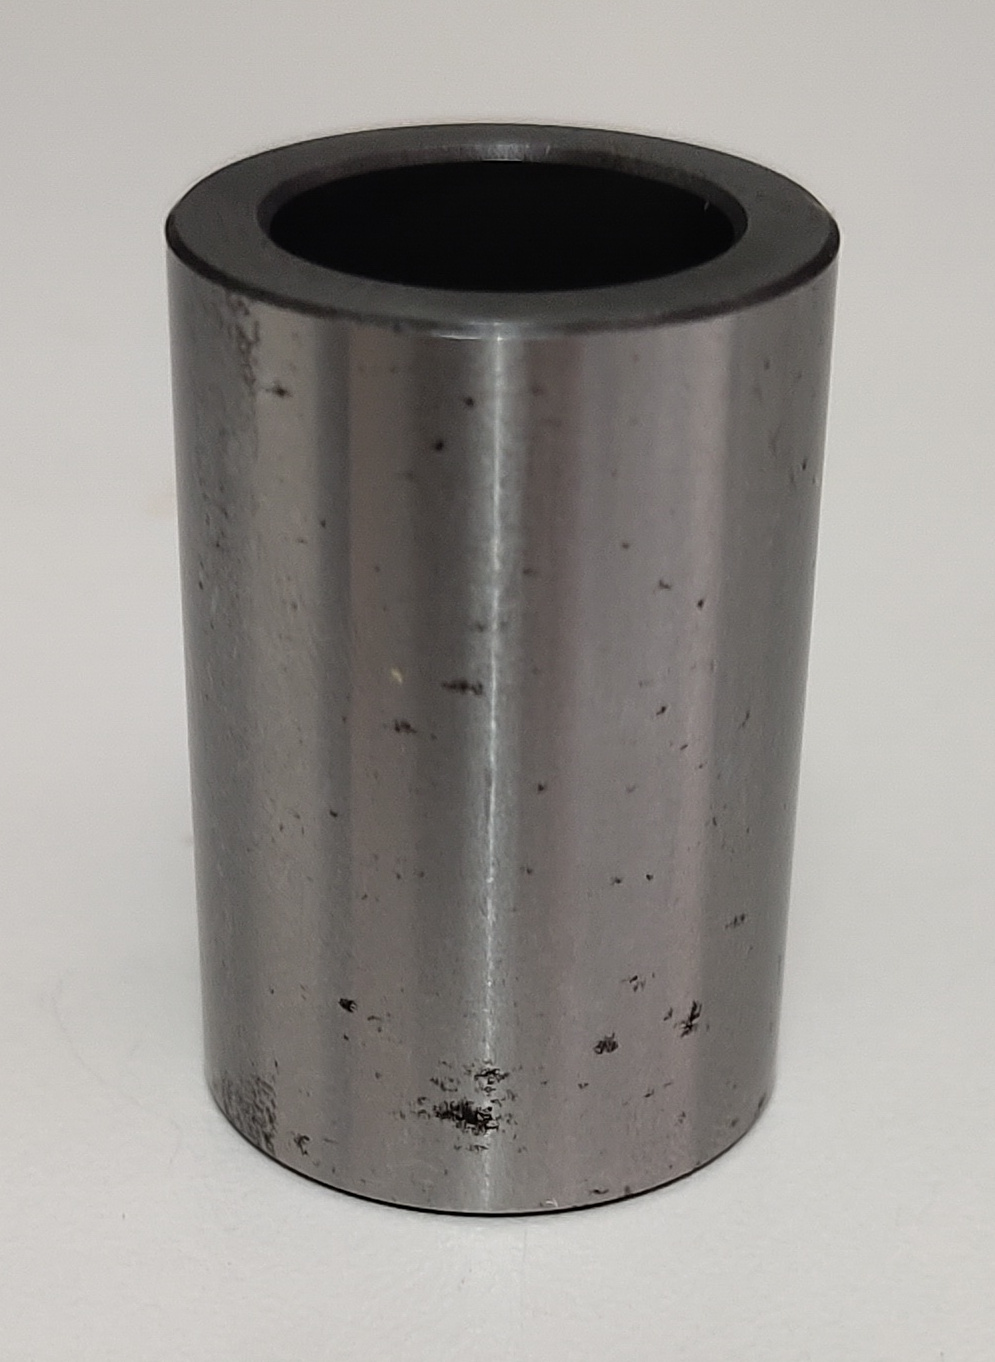
Other bolts in the suspension linkage can now be removed but note that bolts that go through the frame sit inside ‘frame adjusters’. That’s the metal insert with the slot in the end around the bolt in this picture.

These frame adjusters are tubes threaded into the frame and the idea is that they are tightened up enough to remove the gap to the item being bolted to the frame. Without these, tightening up bolts would compress and bend frame around the mounts, not good.

To remove bolts that use these frame adjusters, you push the bolt far enough through to get access to the slot in the adjuster, then unscrew the adjuster a turn or two. This opens up the gap and lets the bolted item drop down onto the bolt, which can the be removed when required.

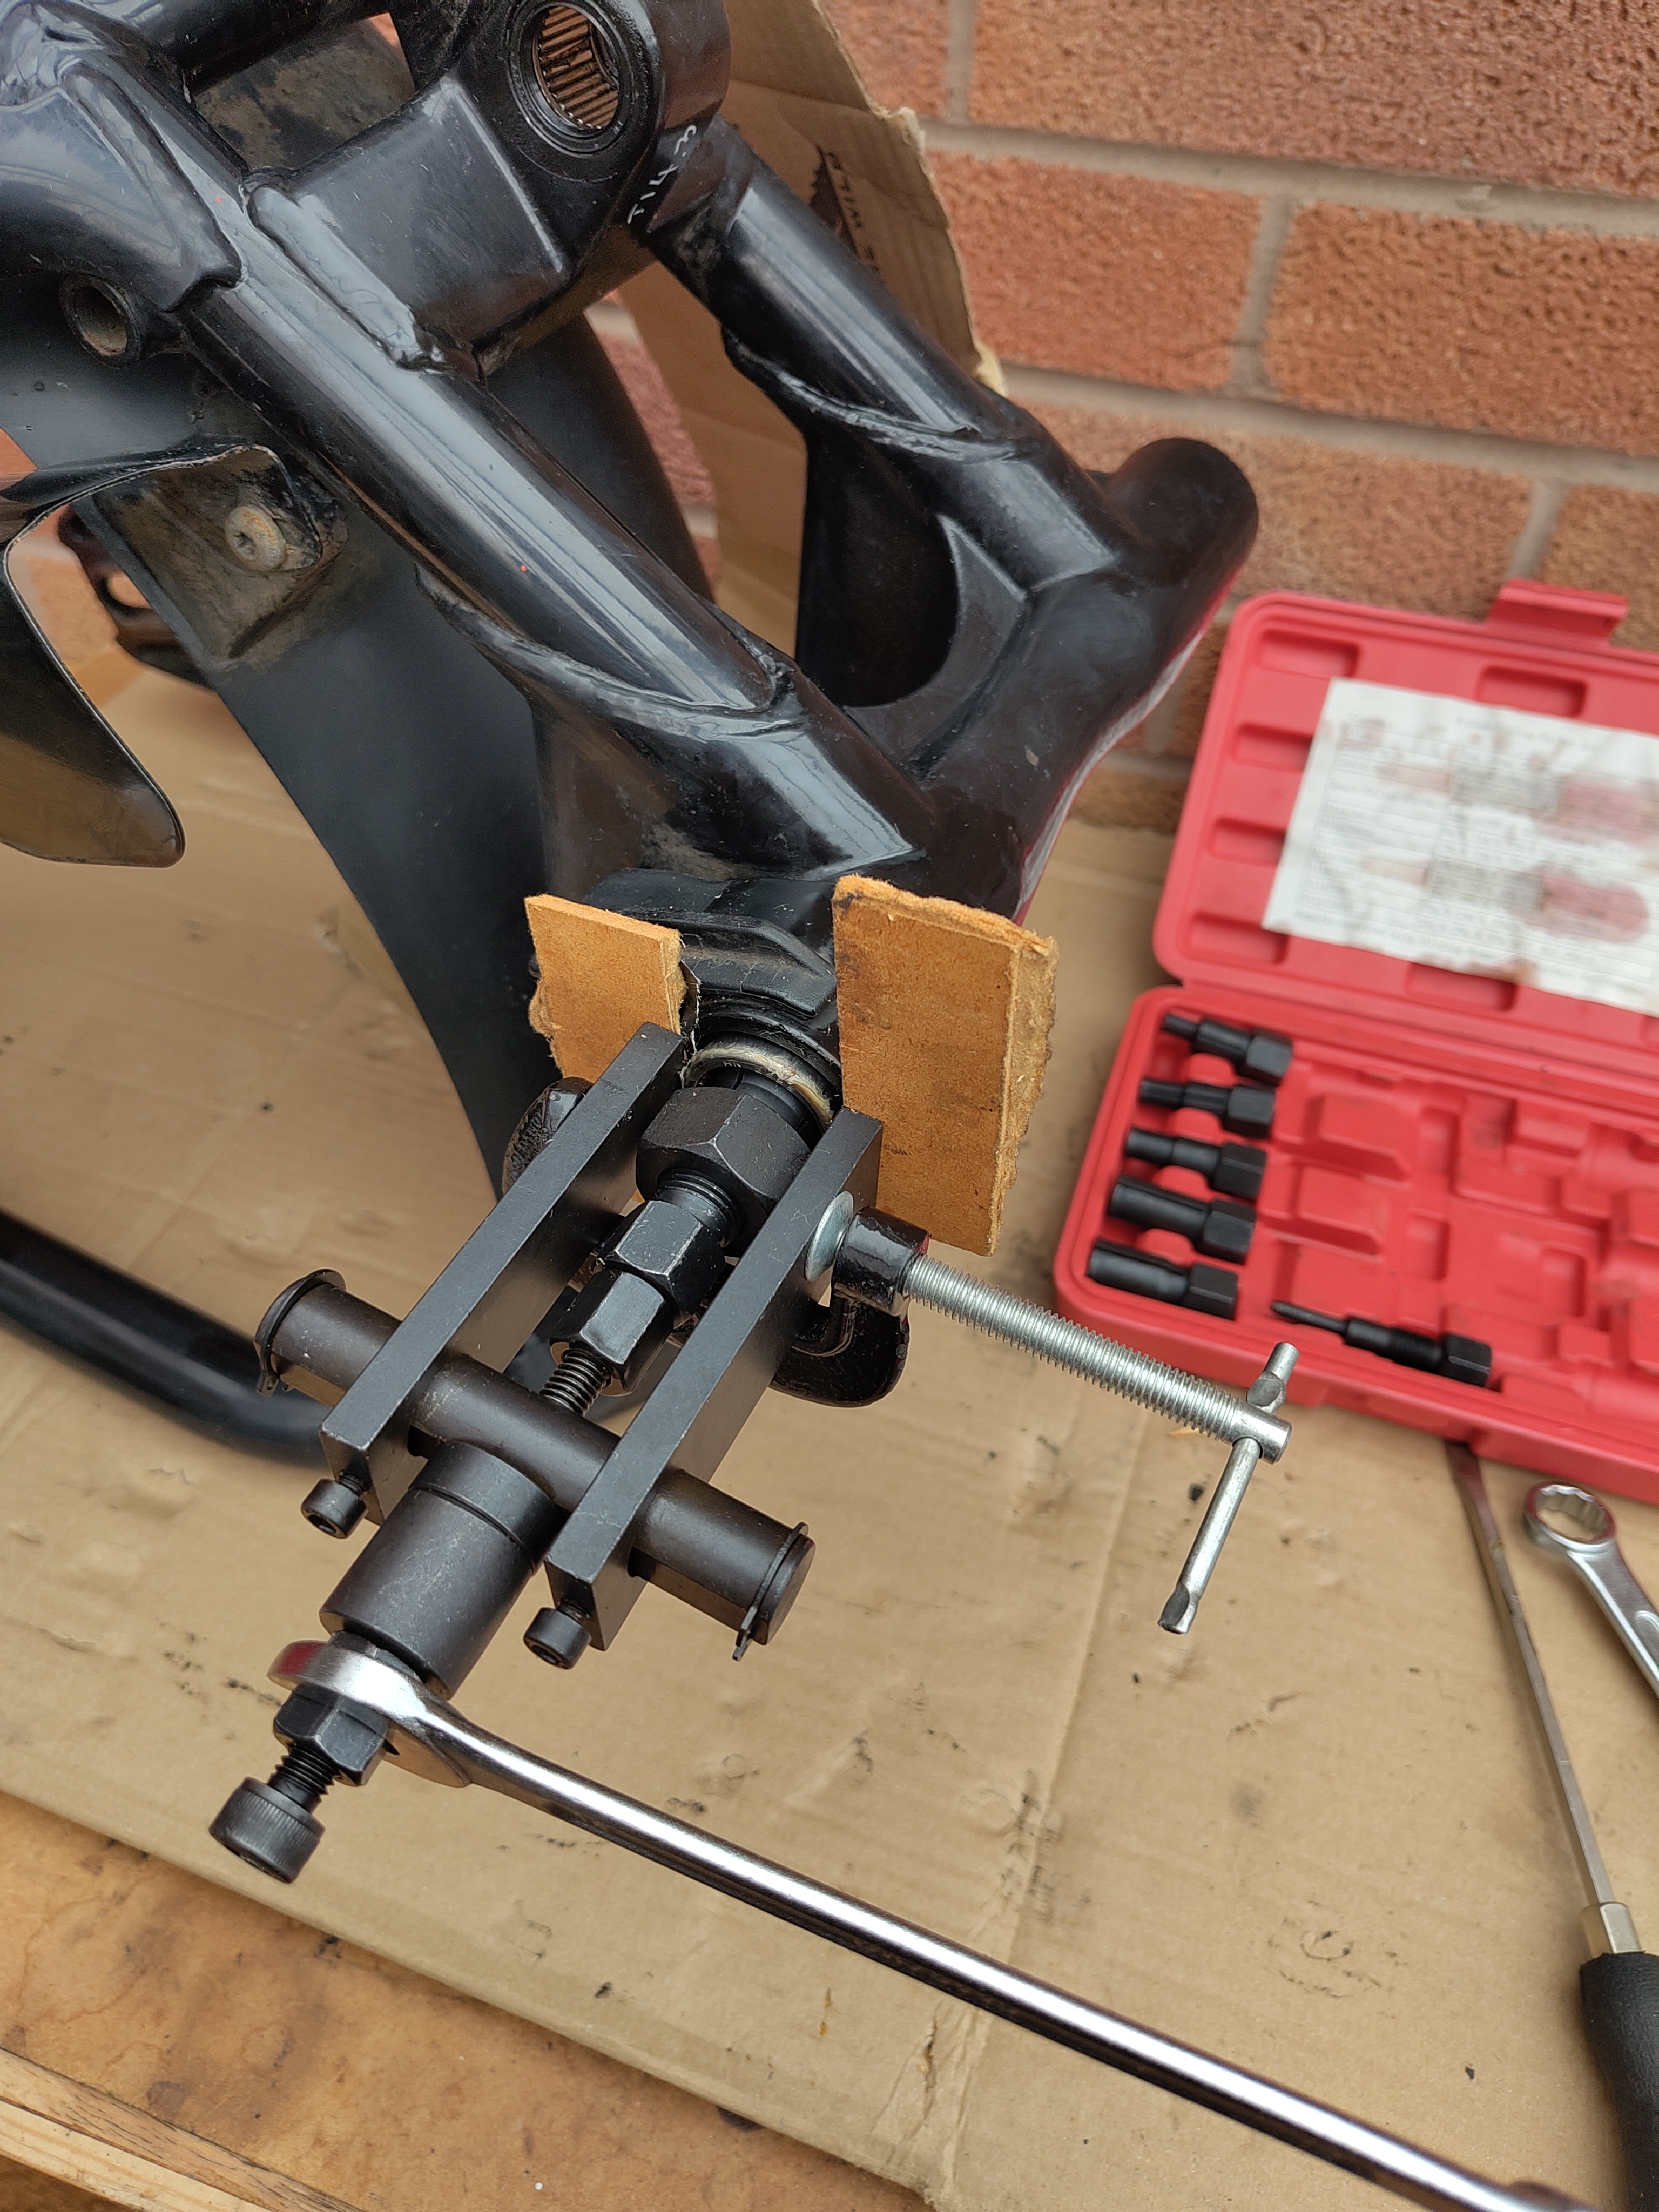
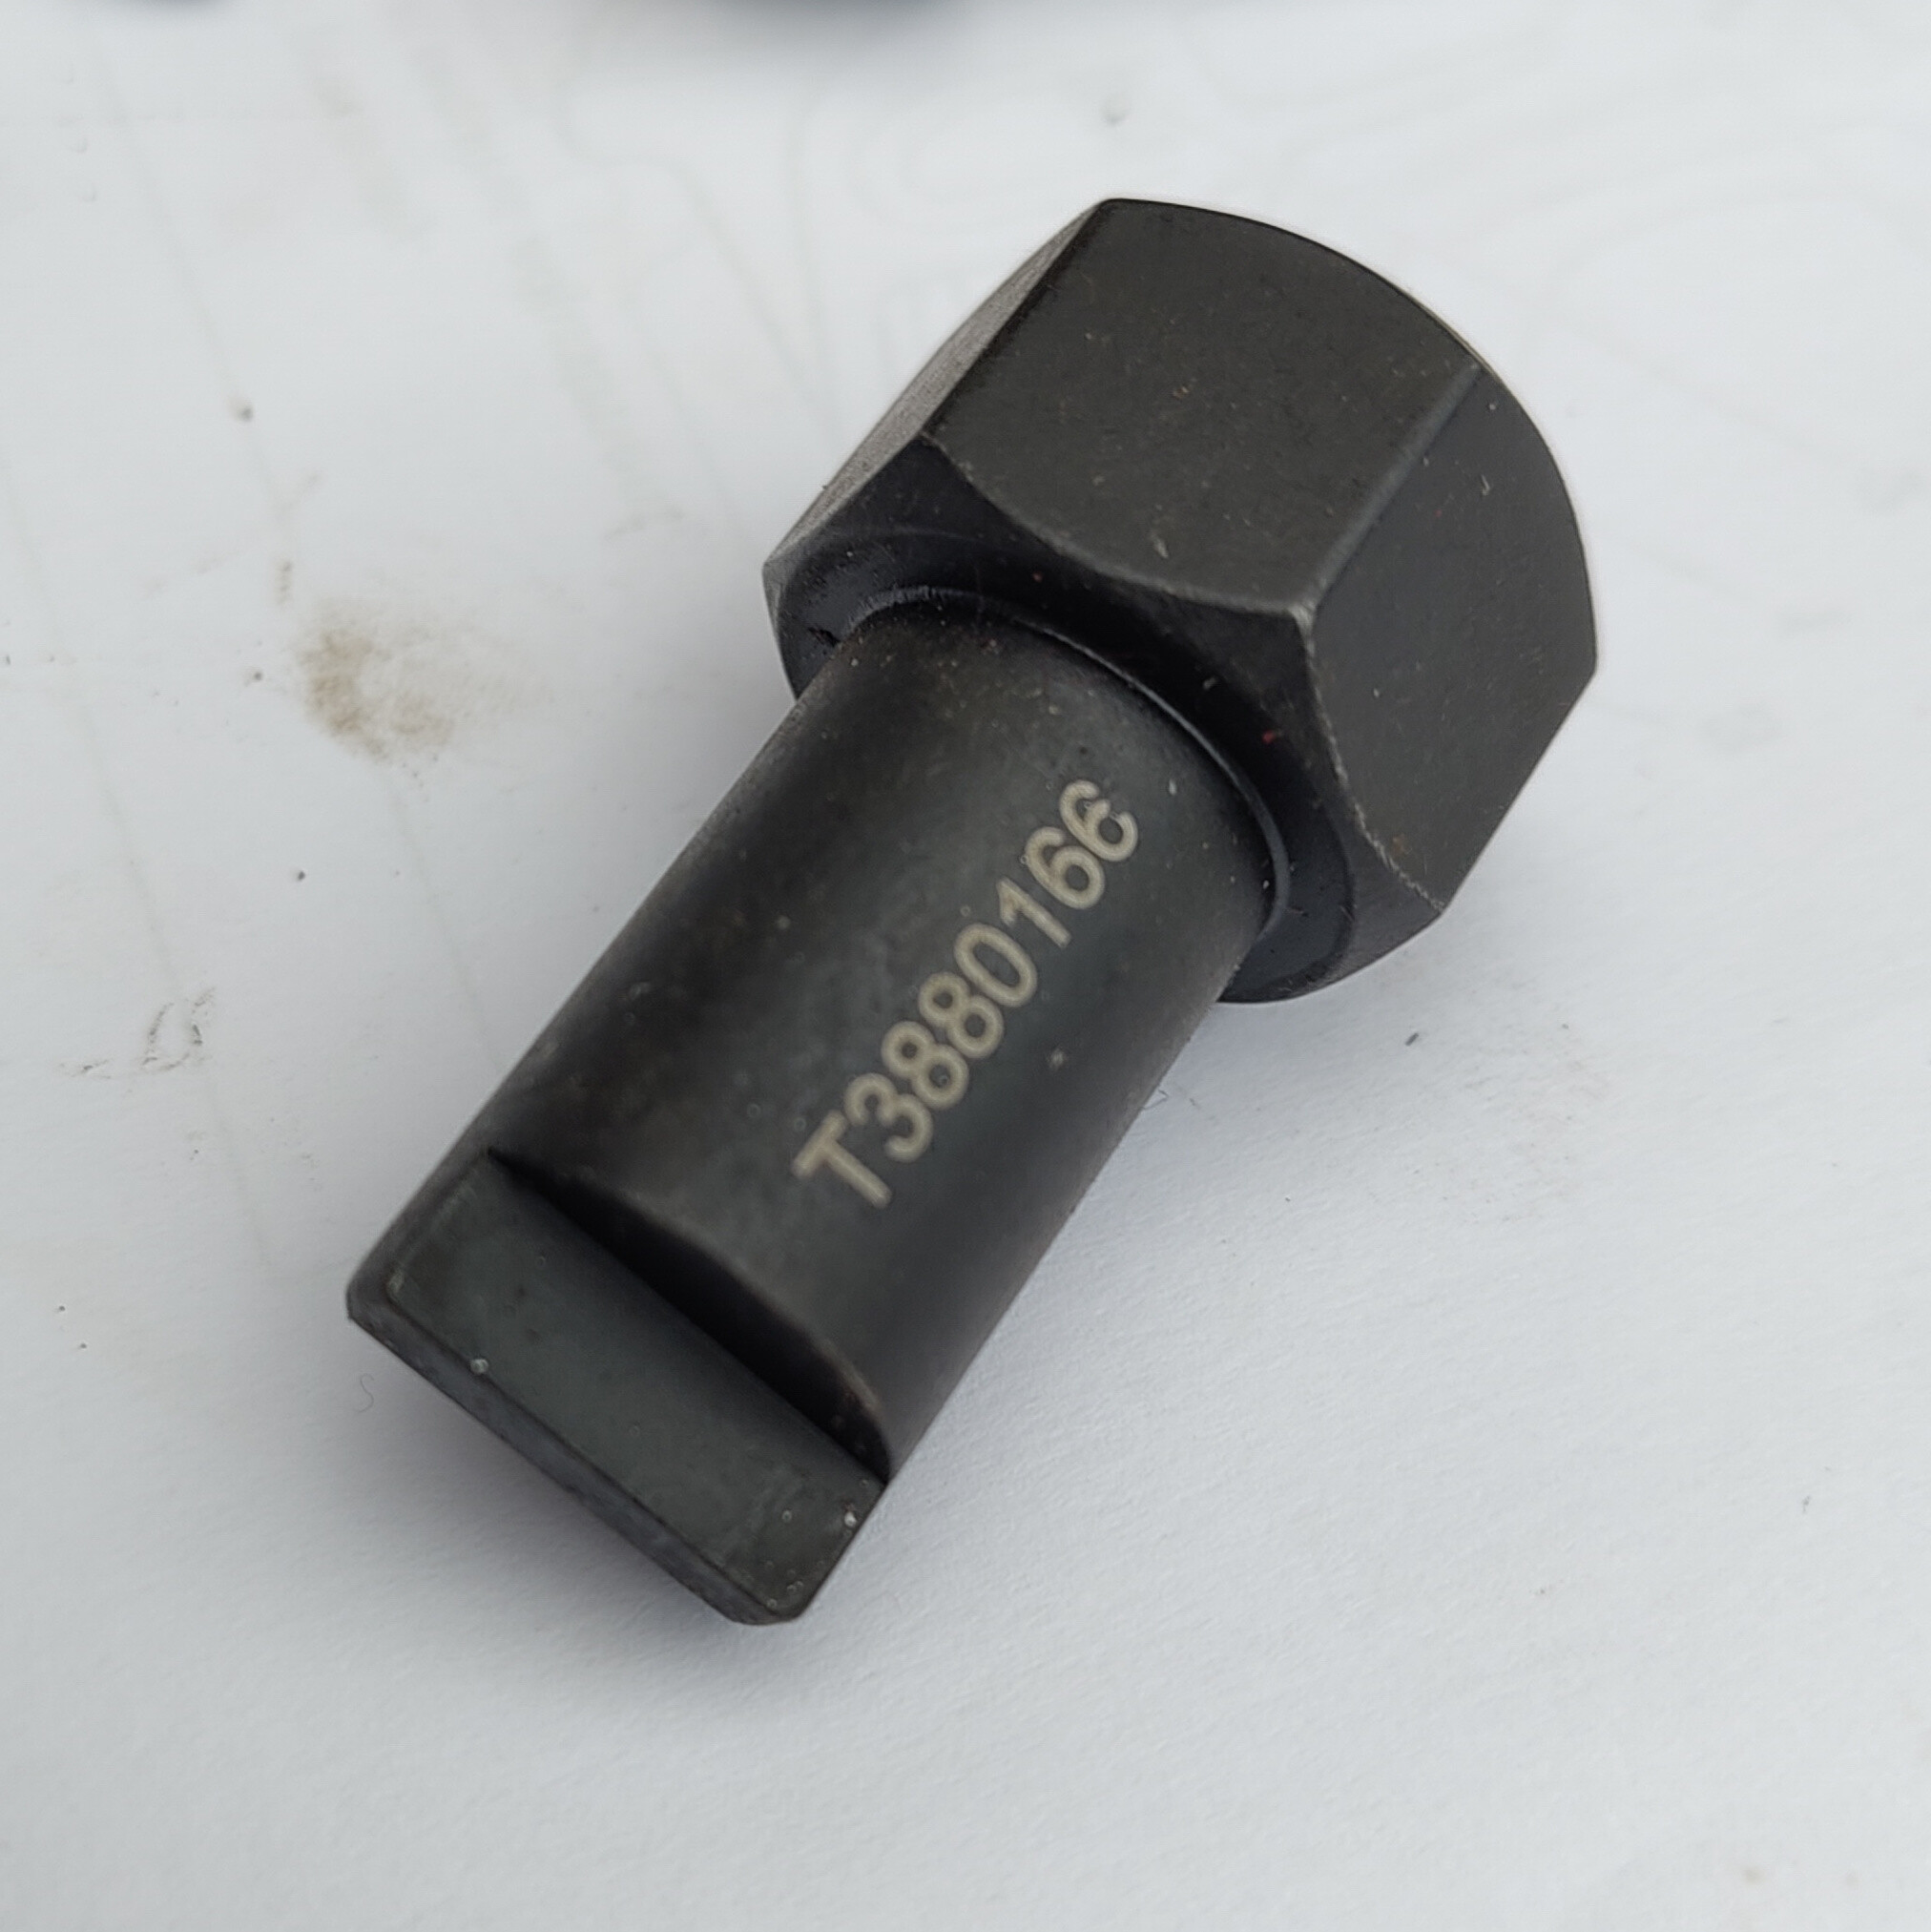
You could improvise something to turn the adjusters but when it came to the second time I needed to do this I bought the official Triumph service tool.

Once all parts were out I put them through the parts washer, also know as the kitchen sink.

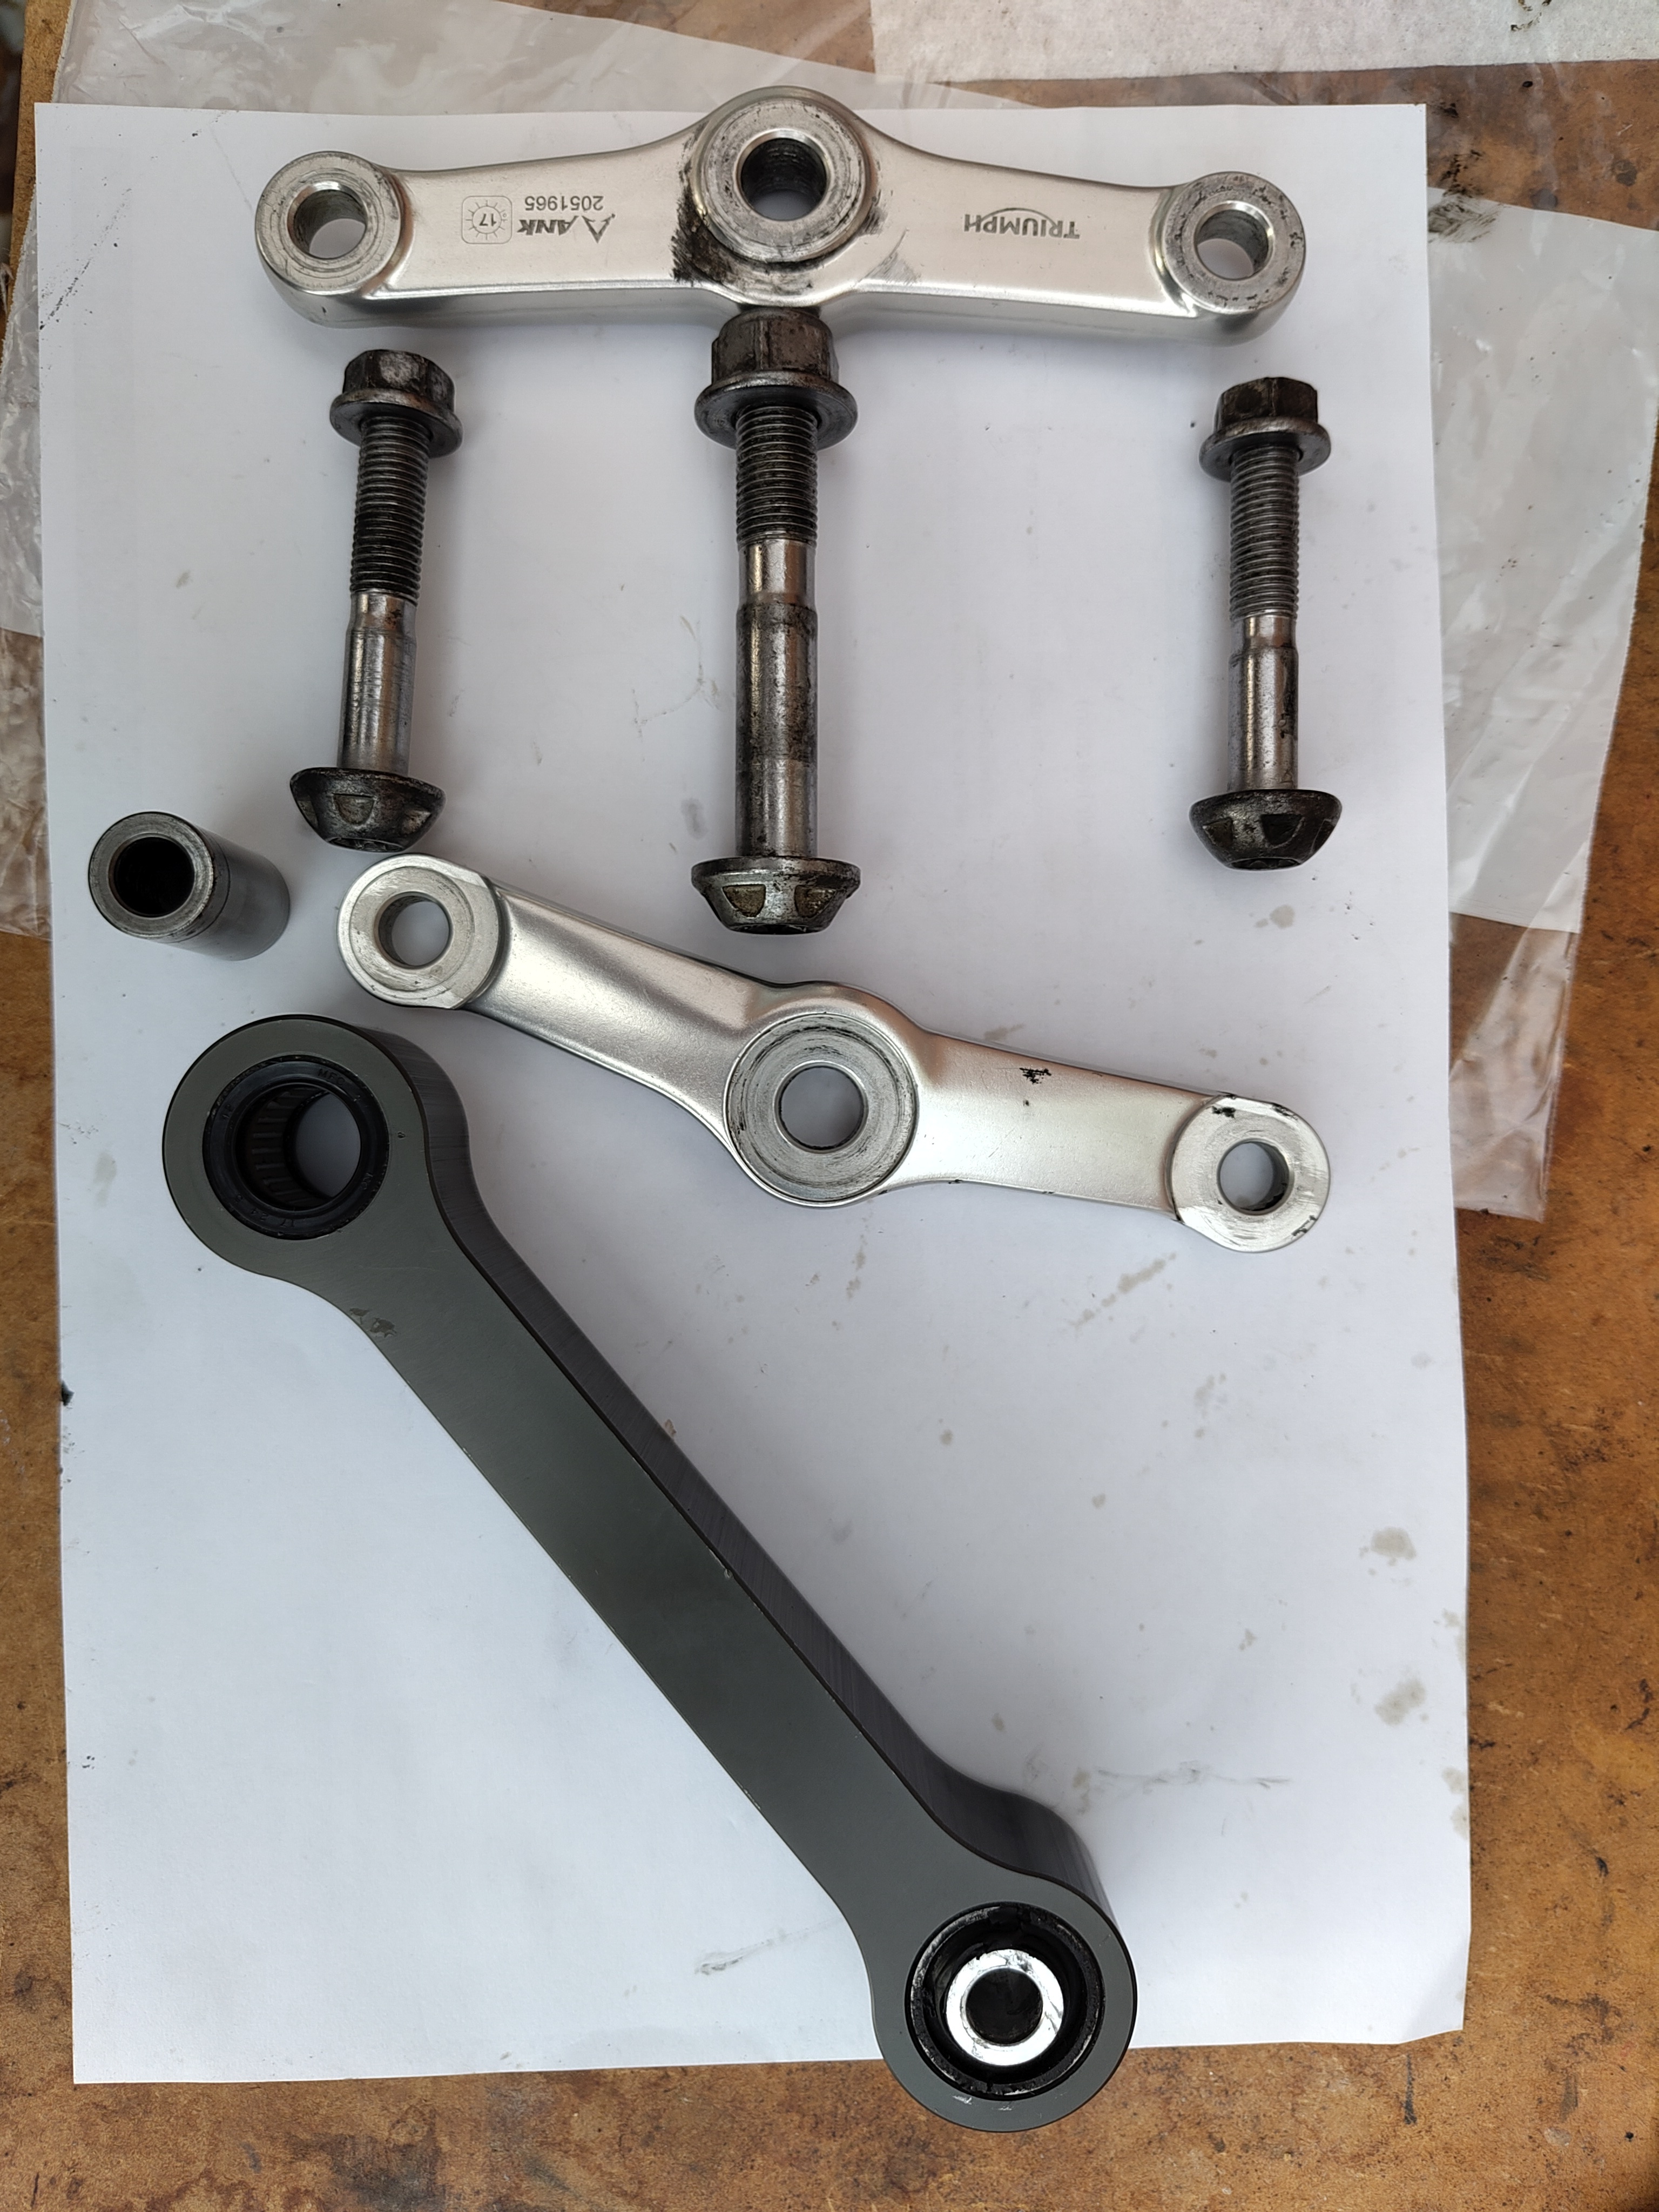
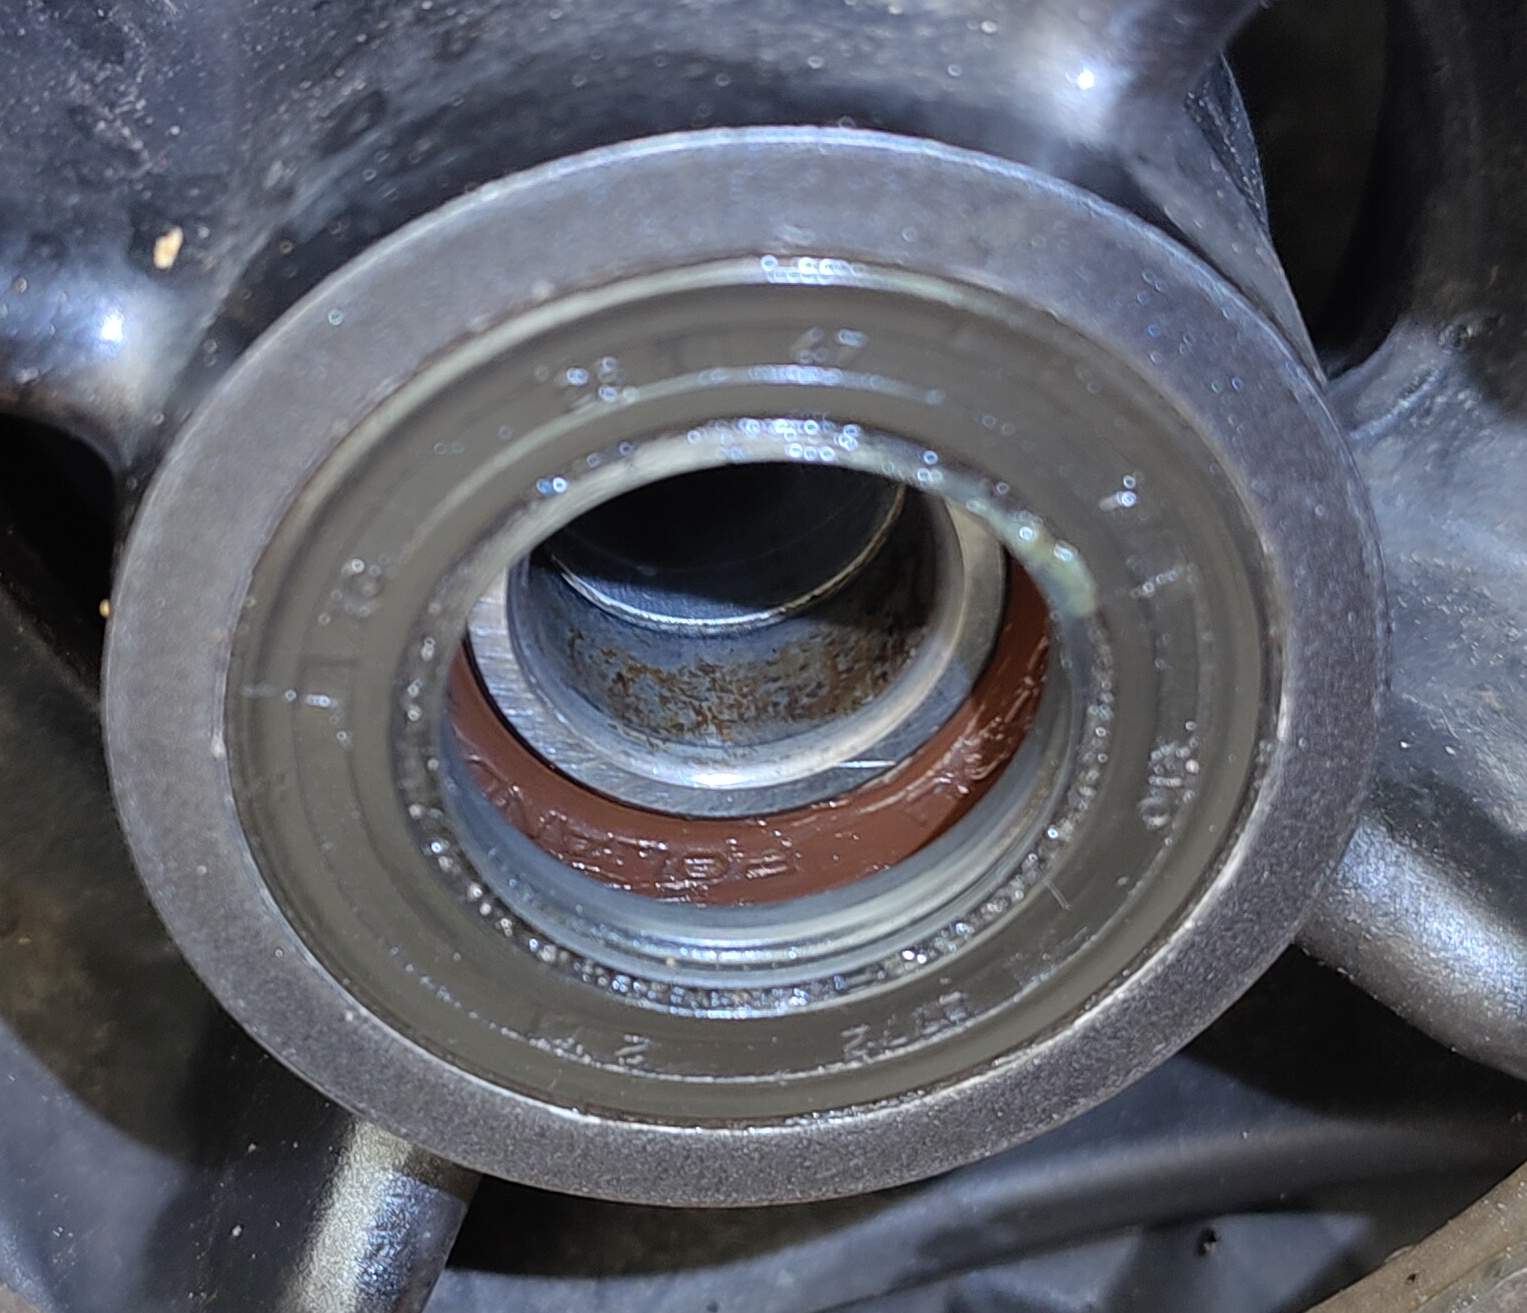
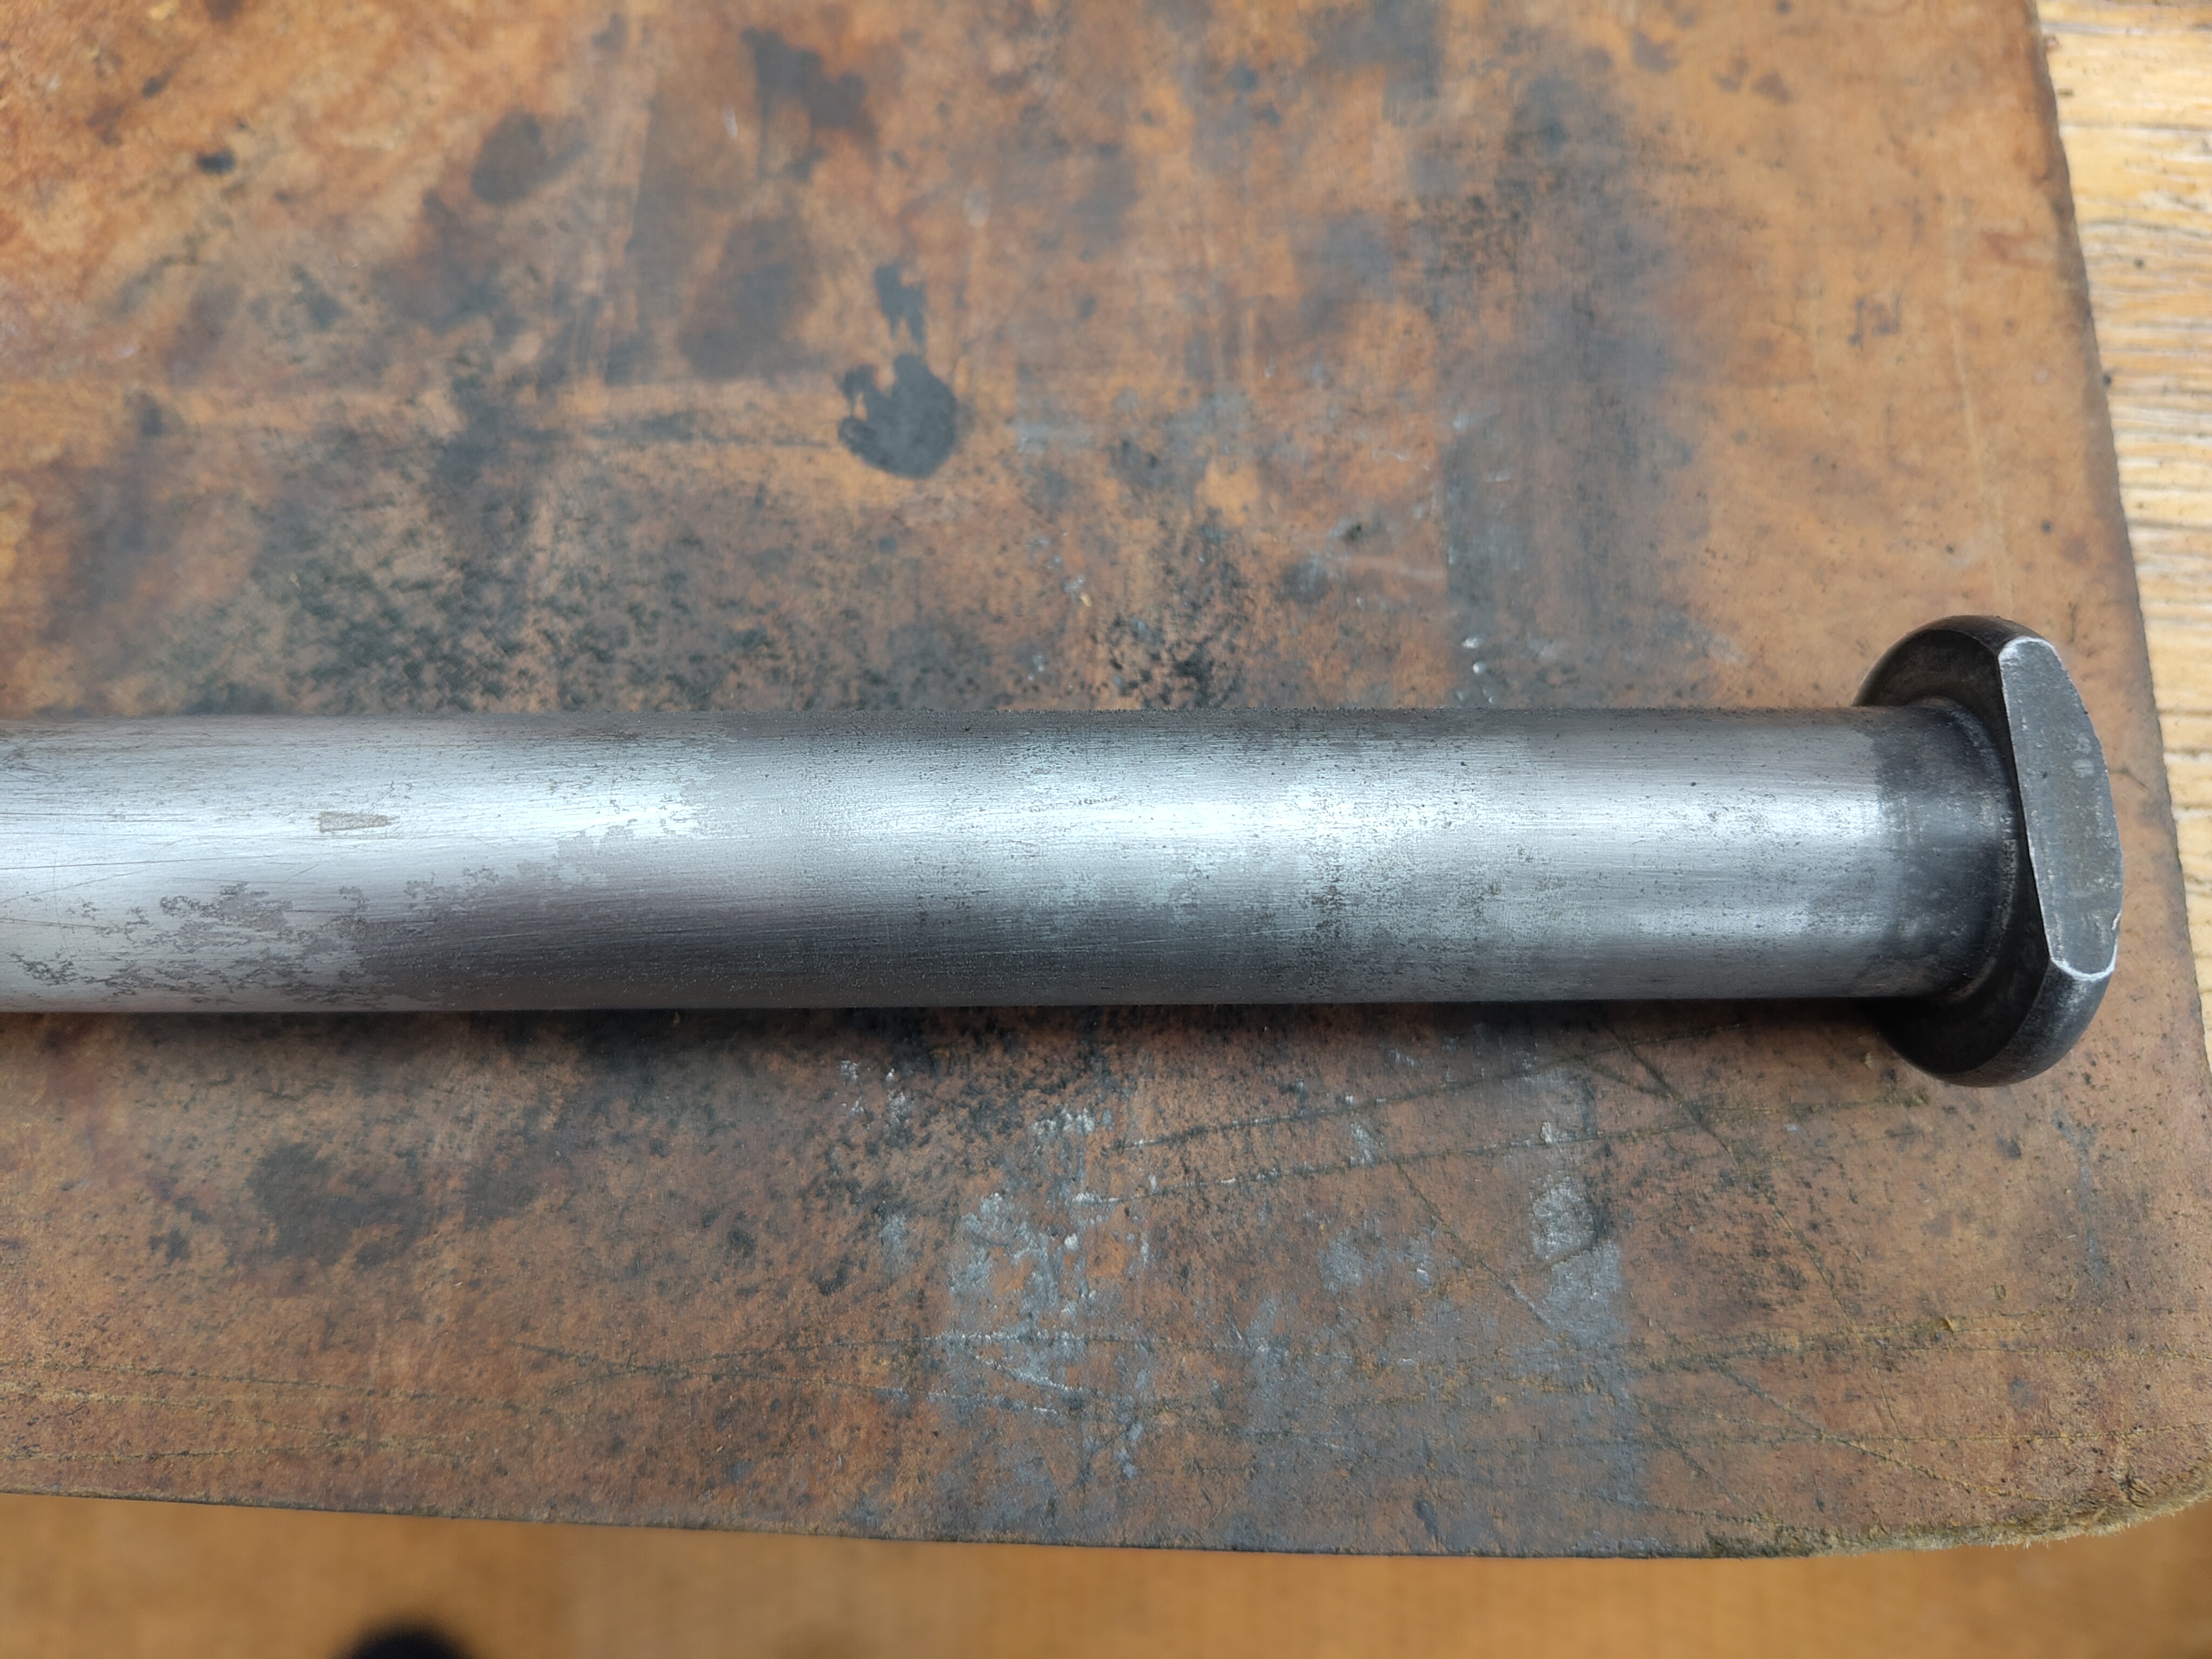
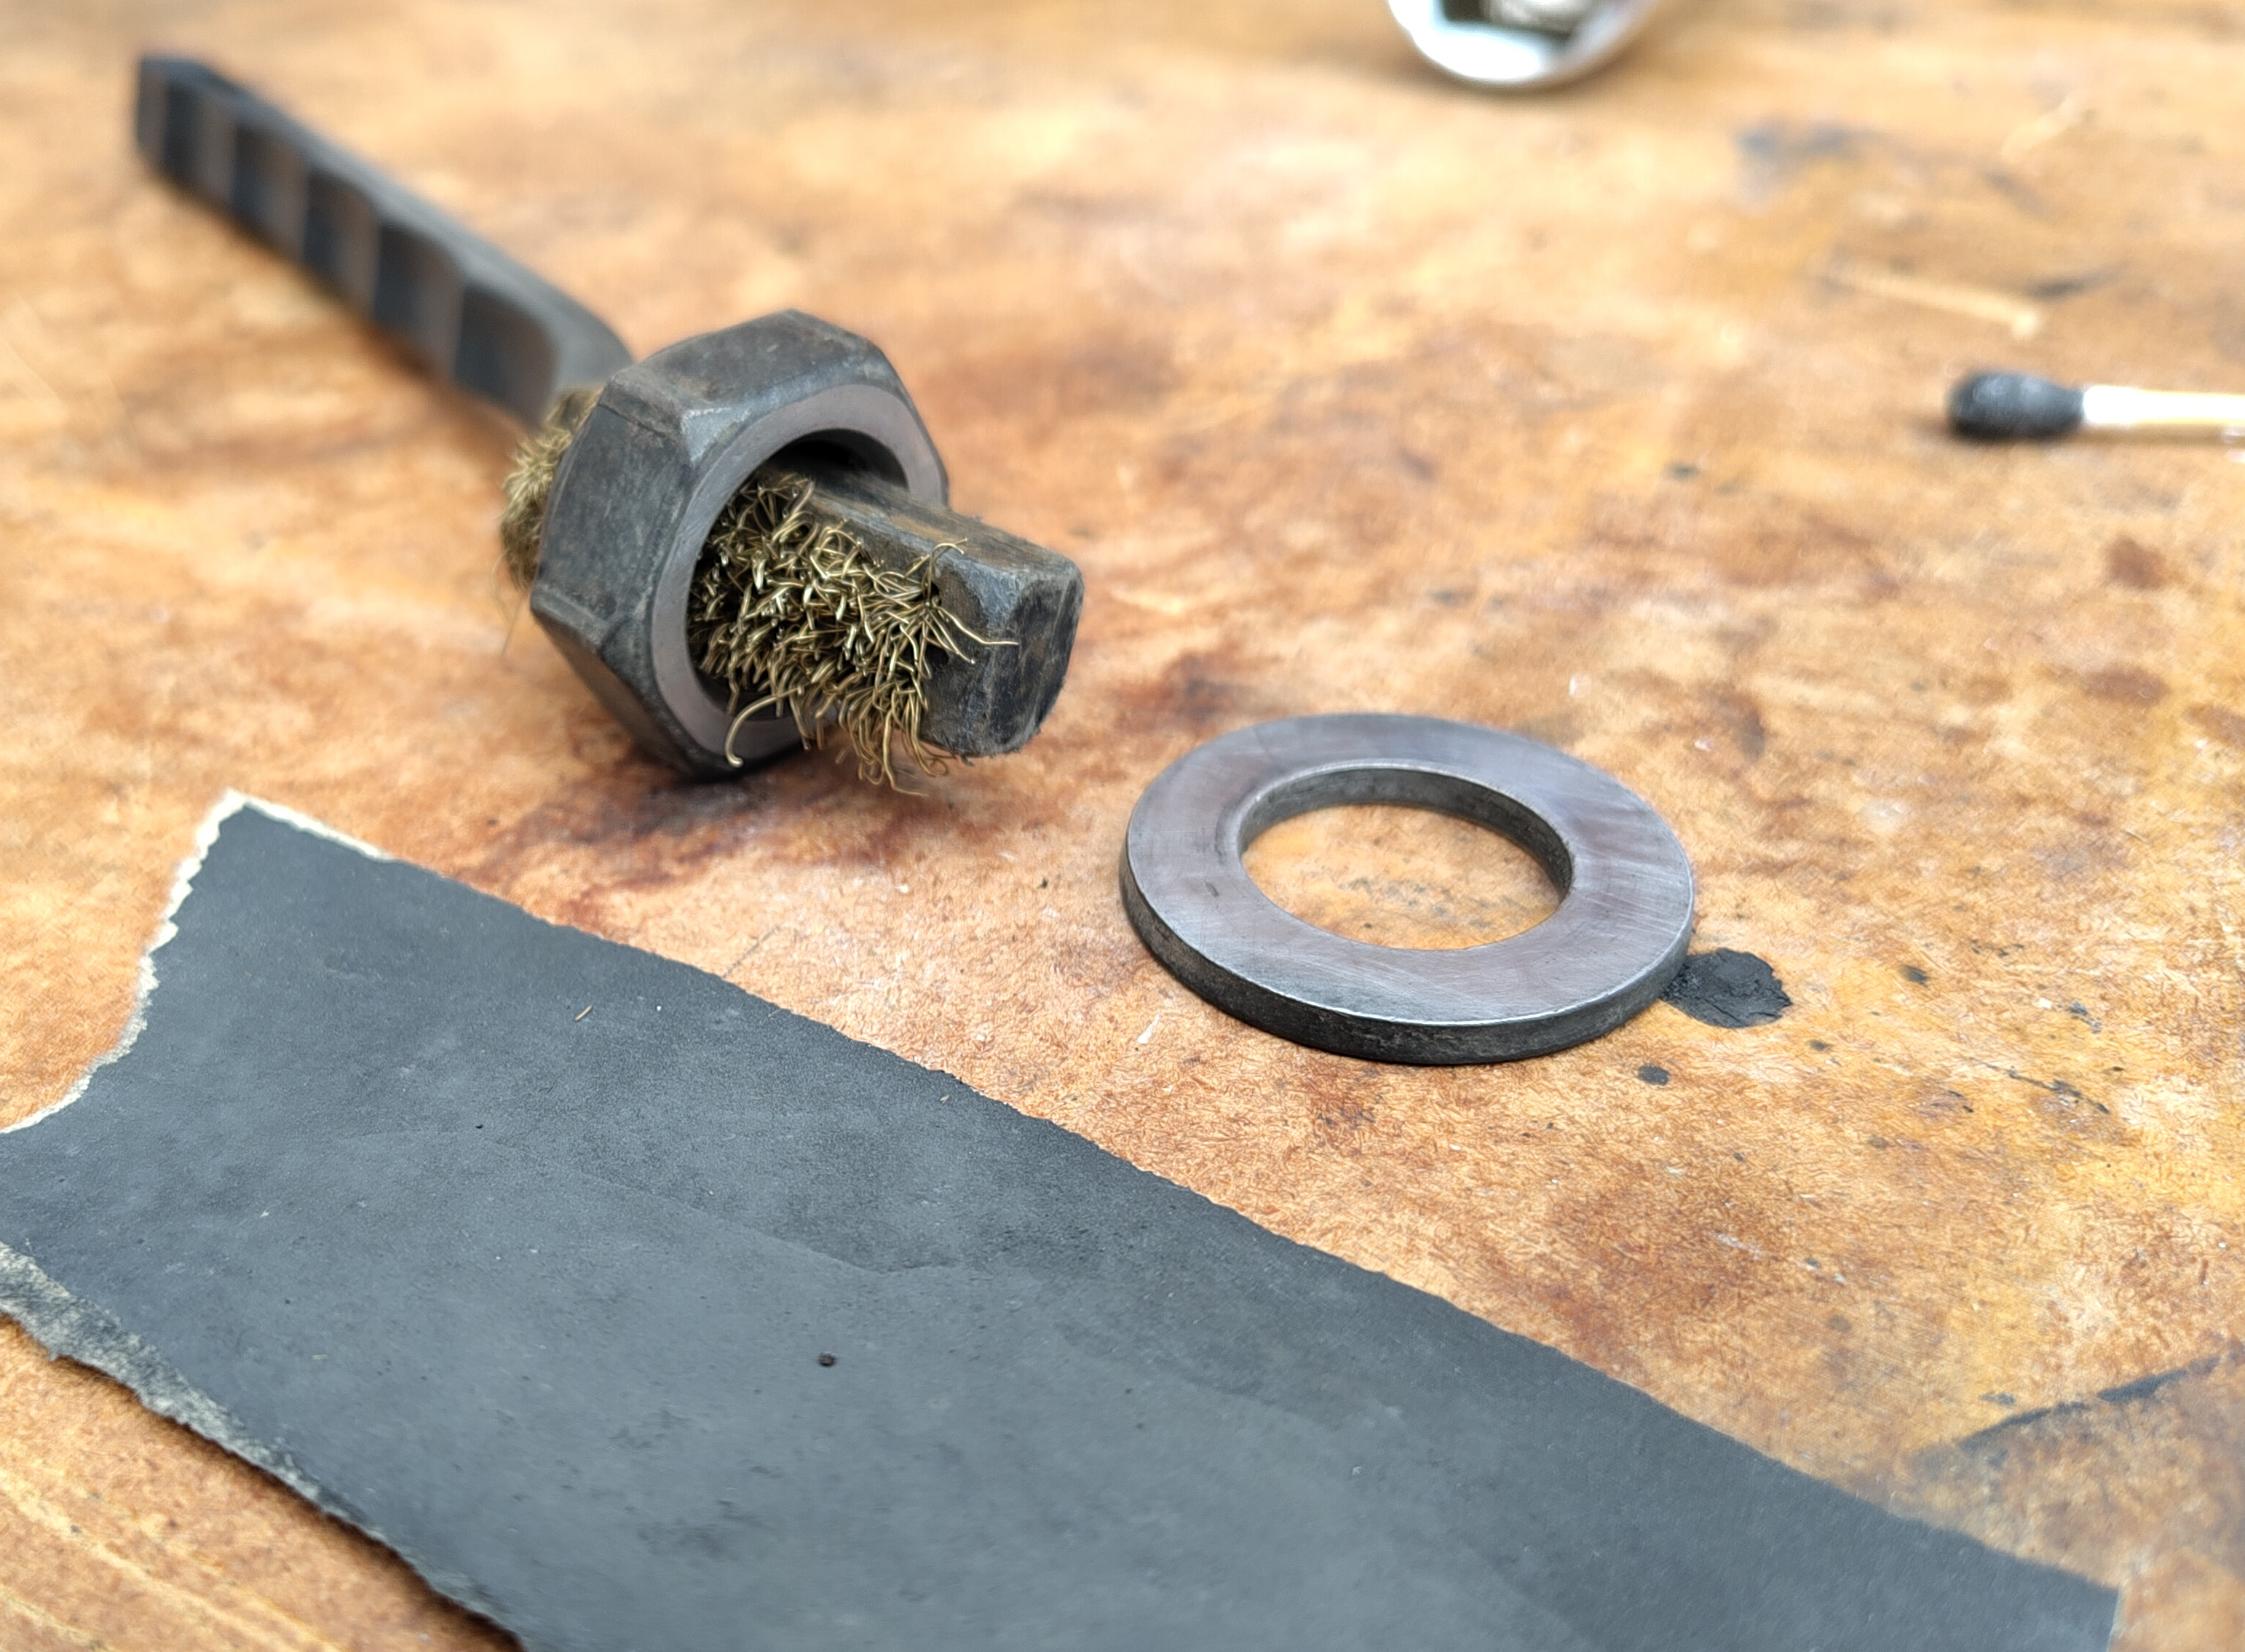
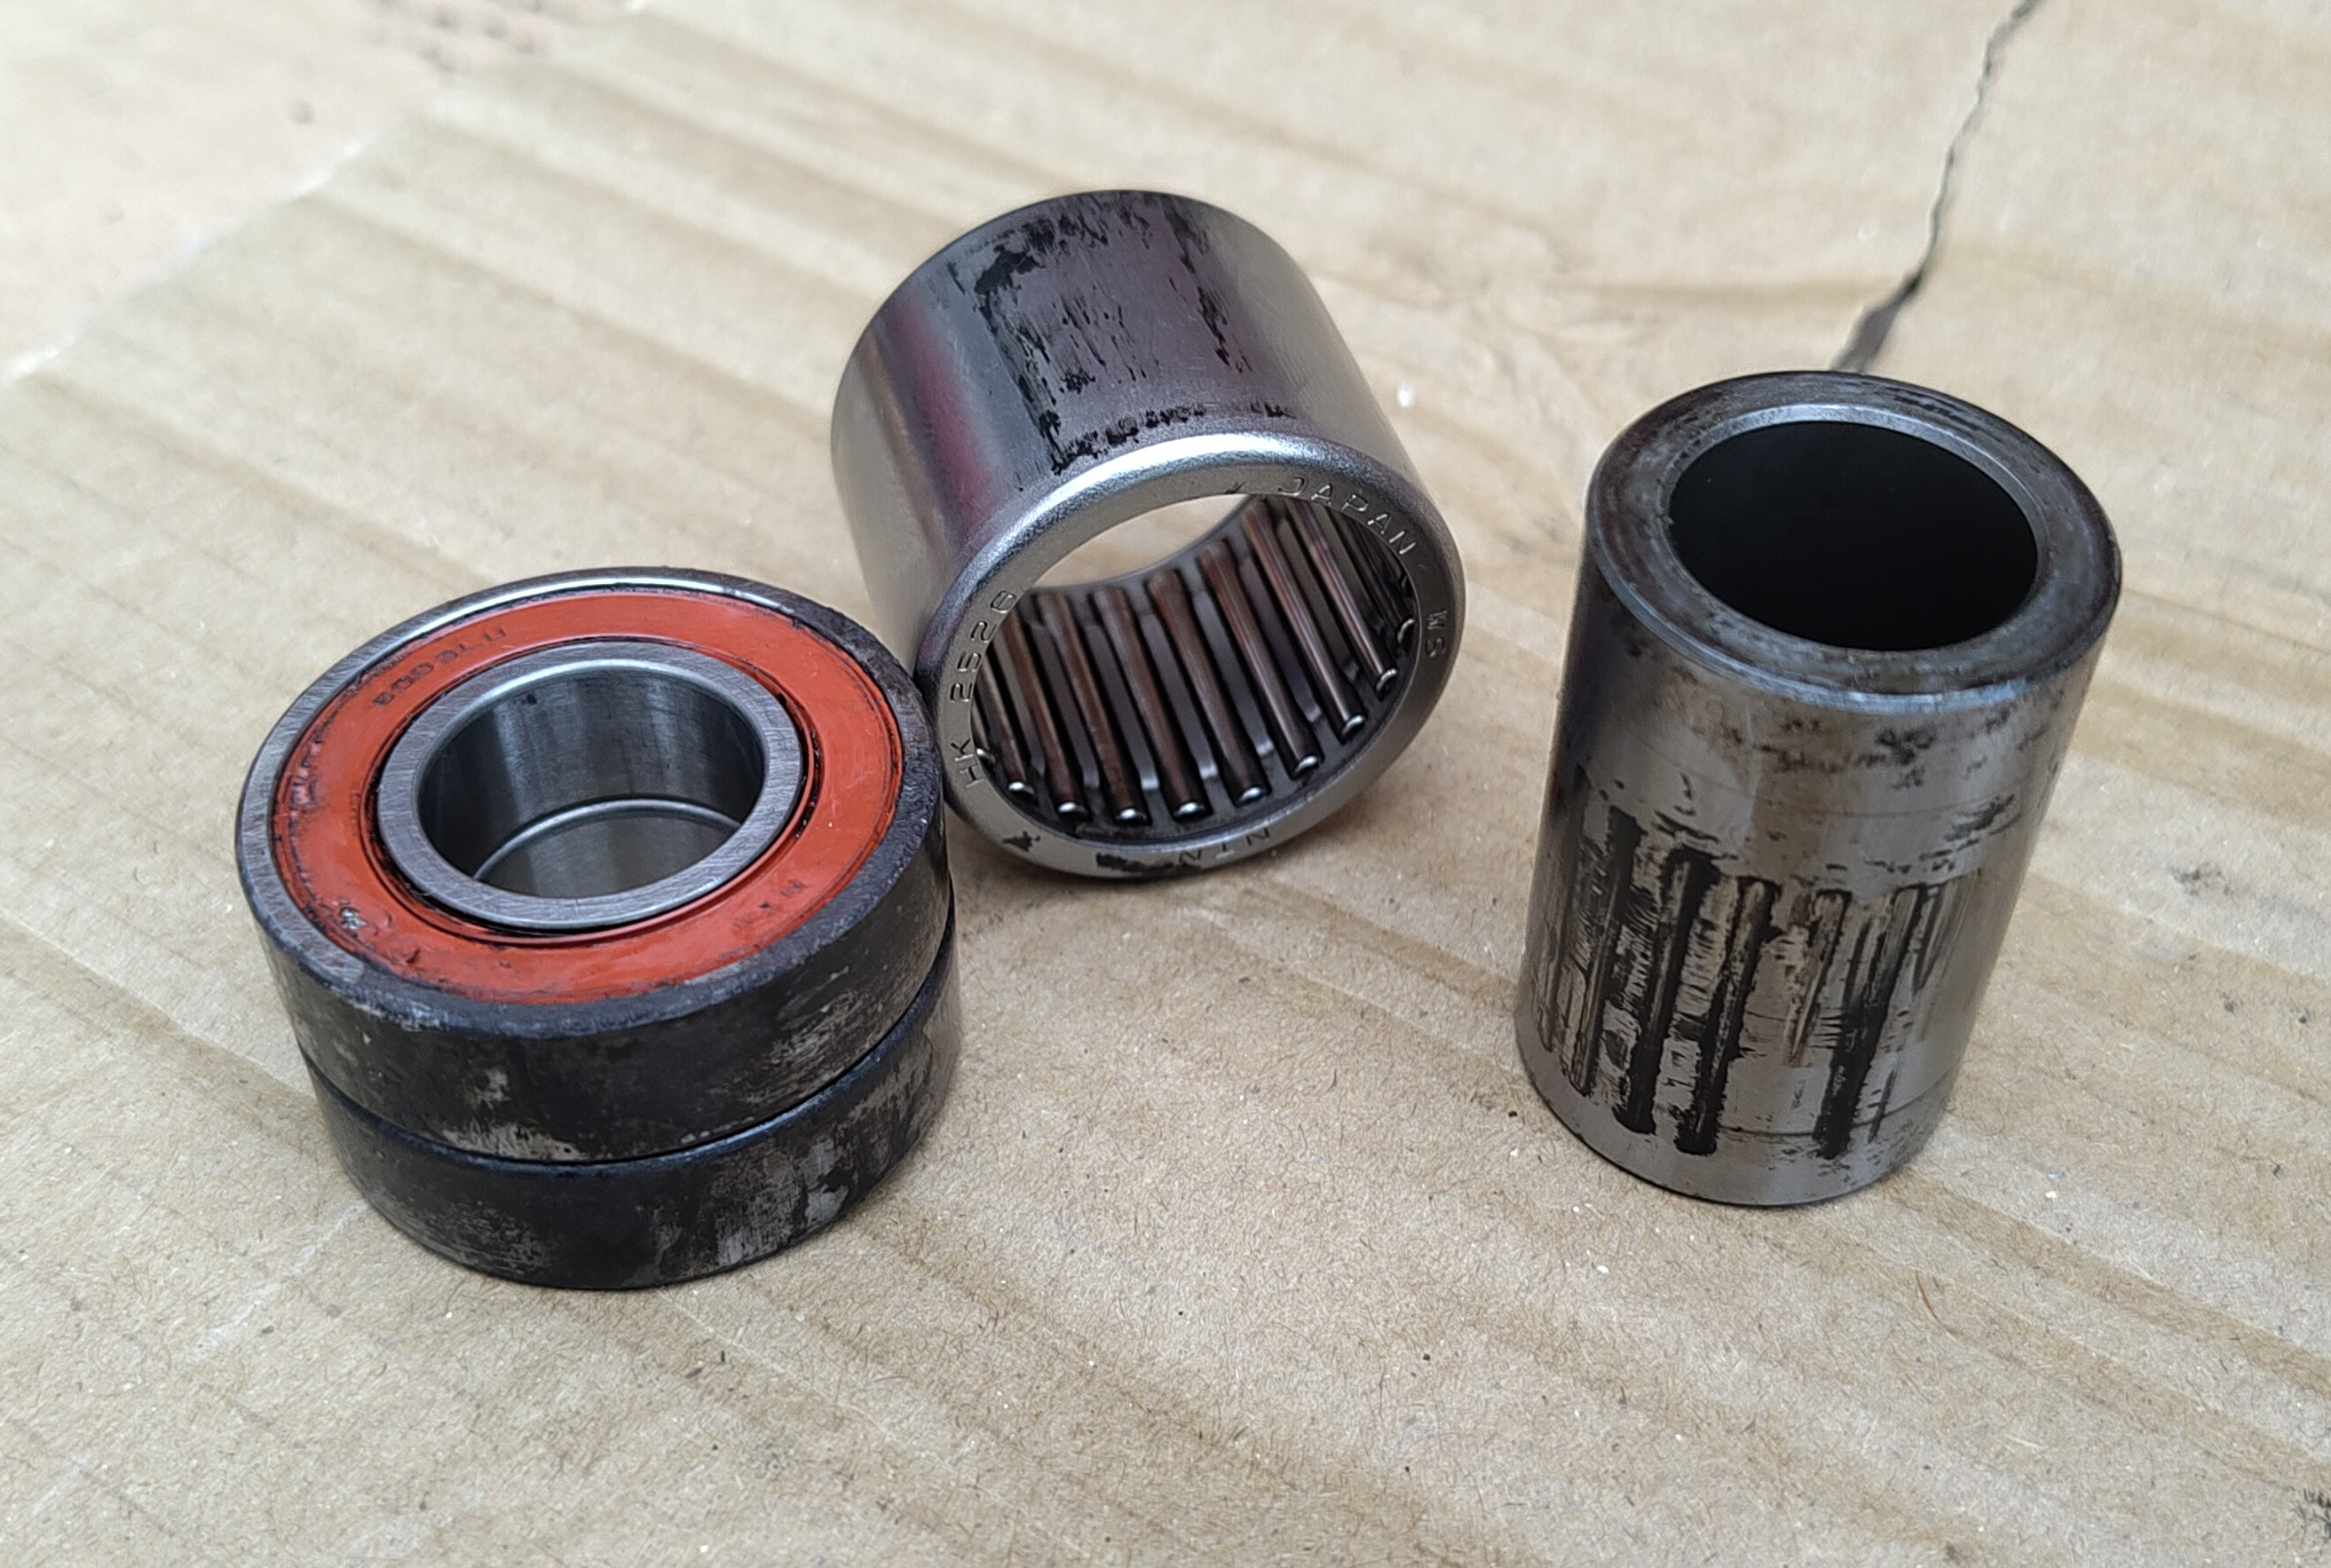
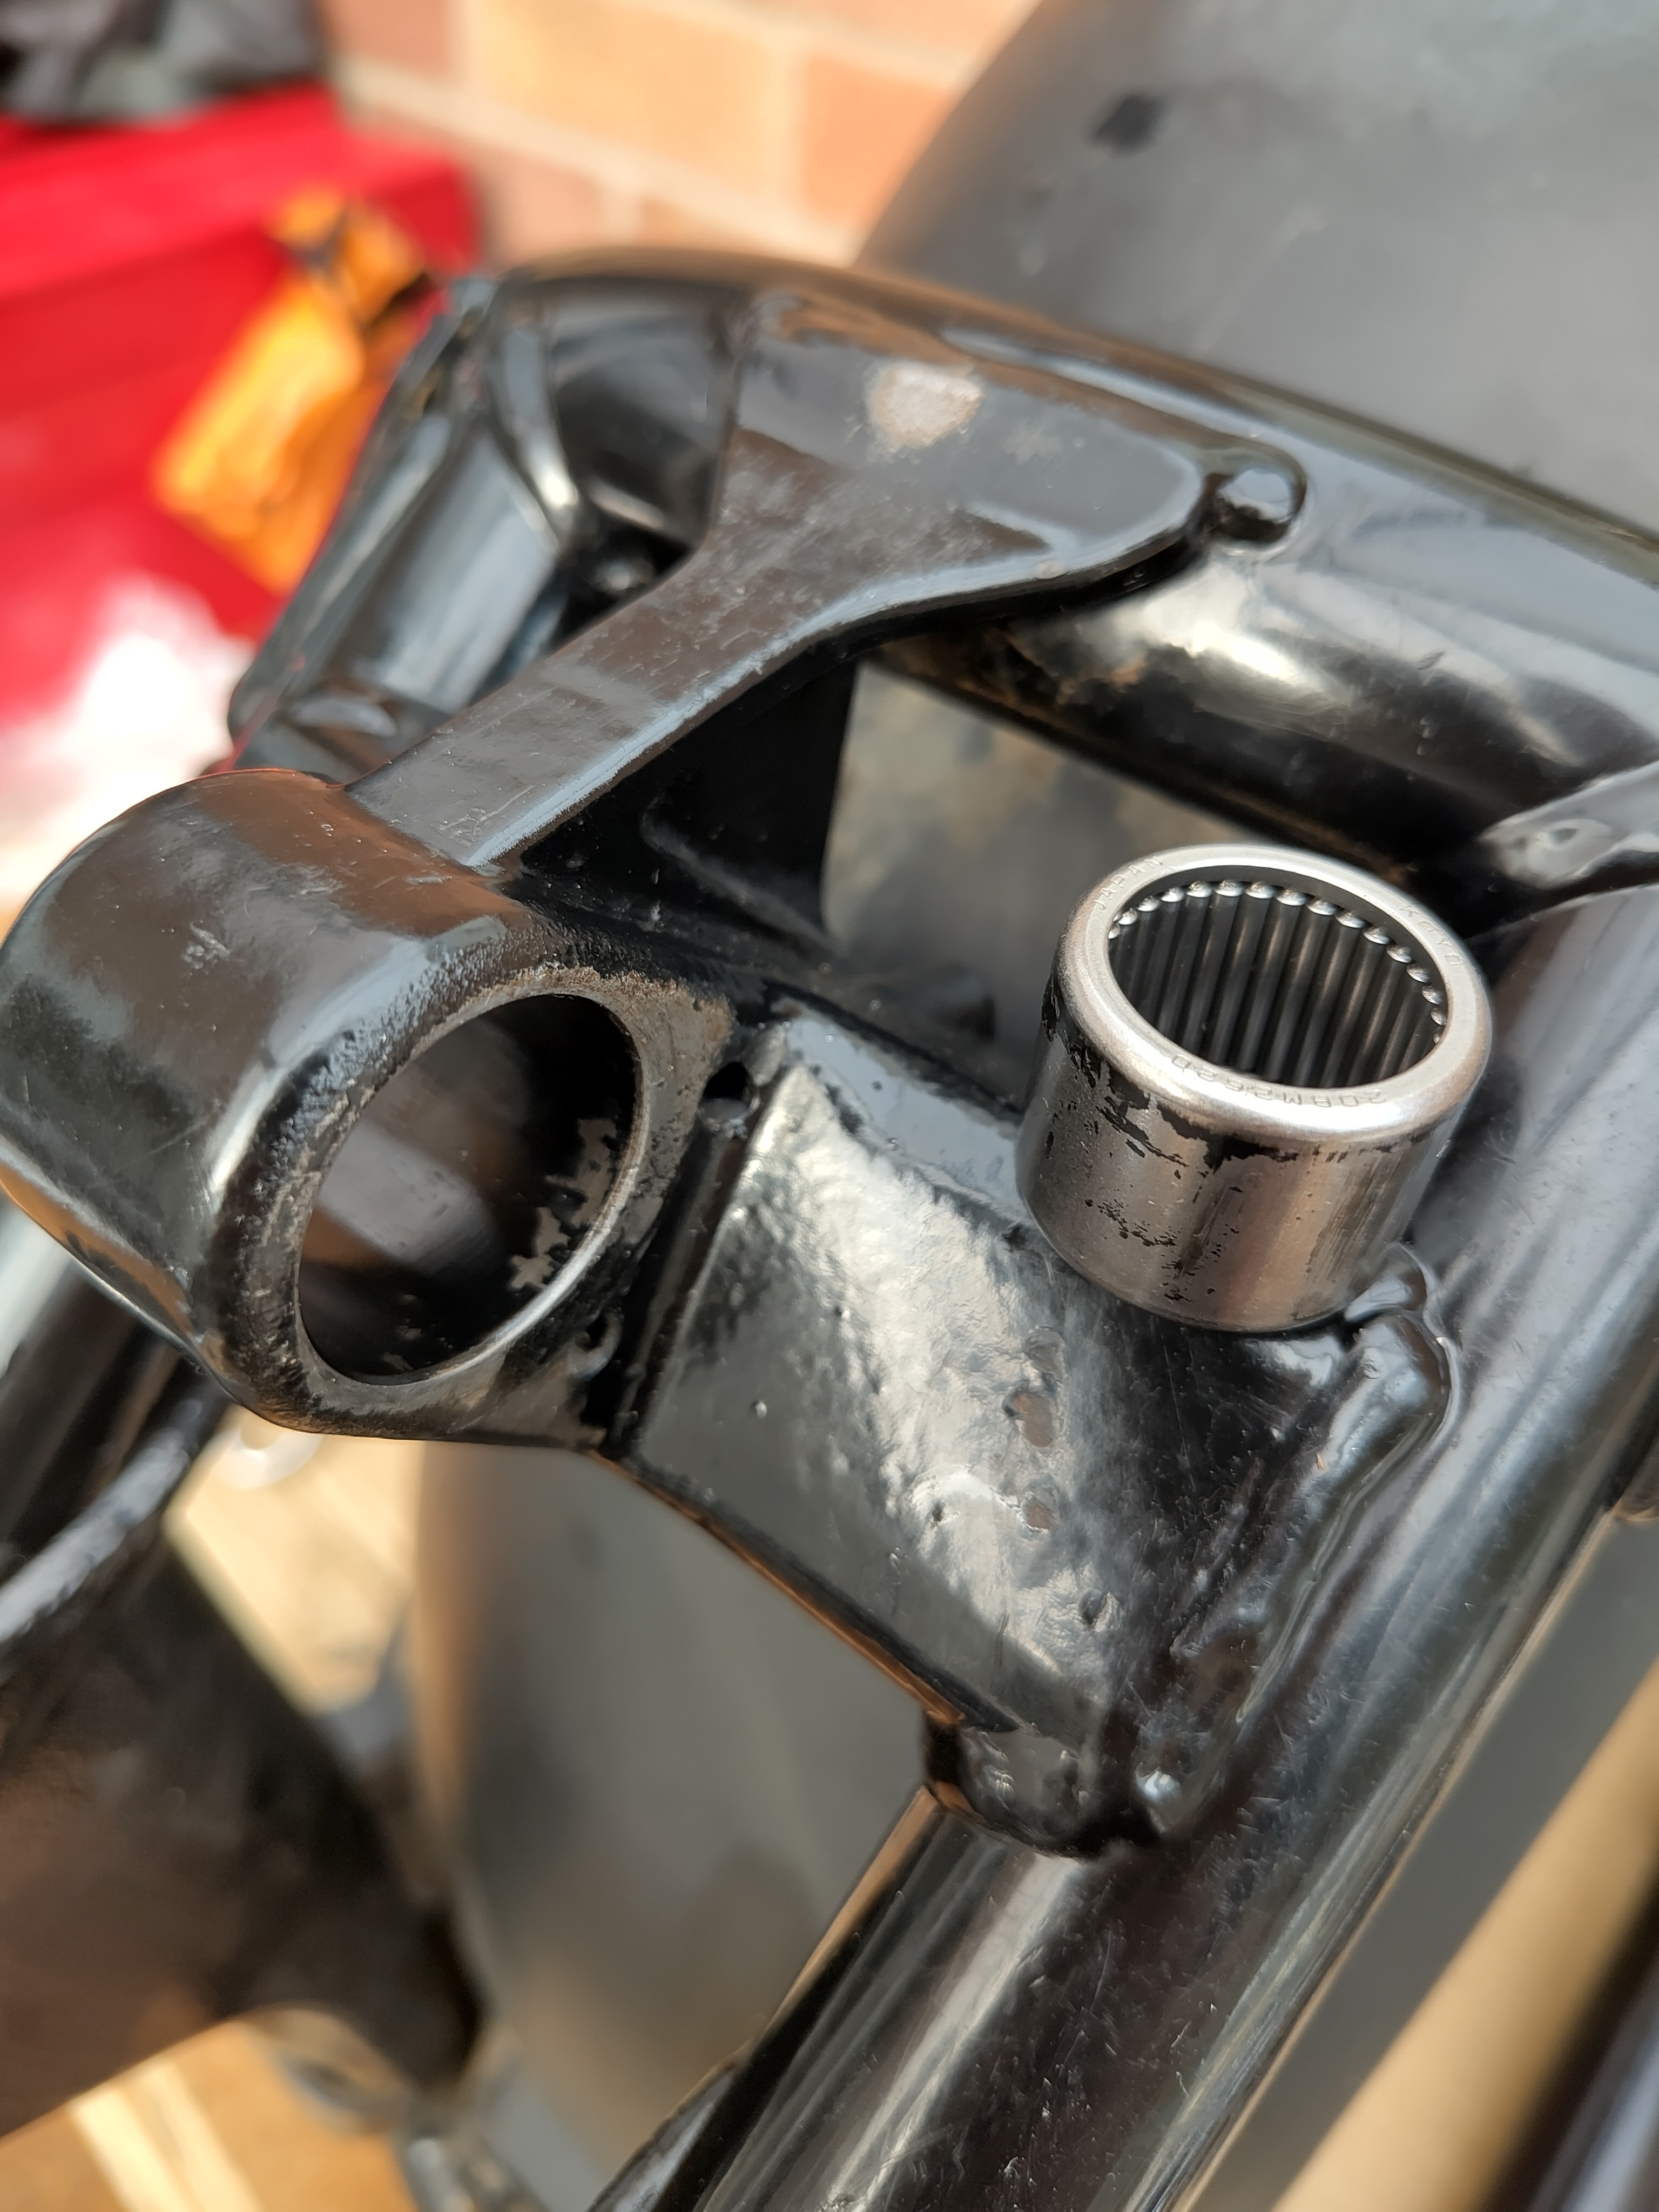
When some of the bolts were still connected a wiggle test showed a little slack in the bearings and a look after the clean showed a small spot of the plastic needle roller support broken away. (As well as the expected groove on the ‘ground sleeve’ that goes through it, which is cause by grit at the seal lip).

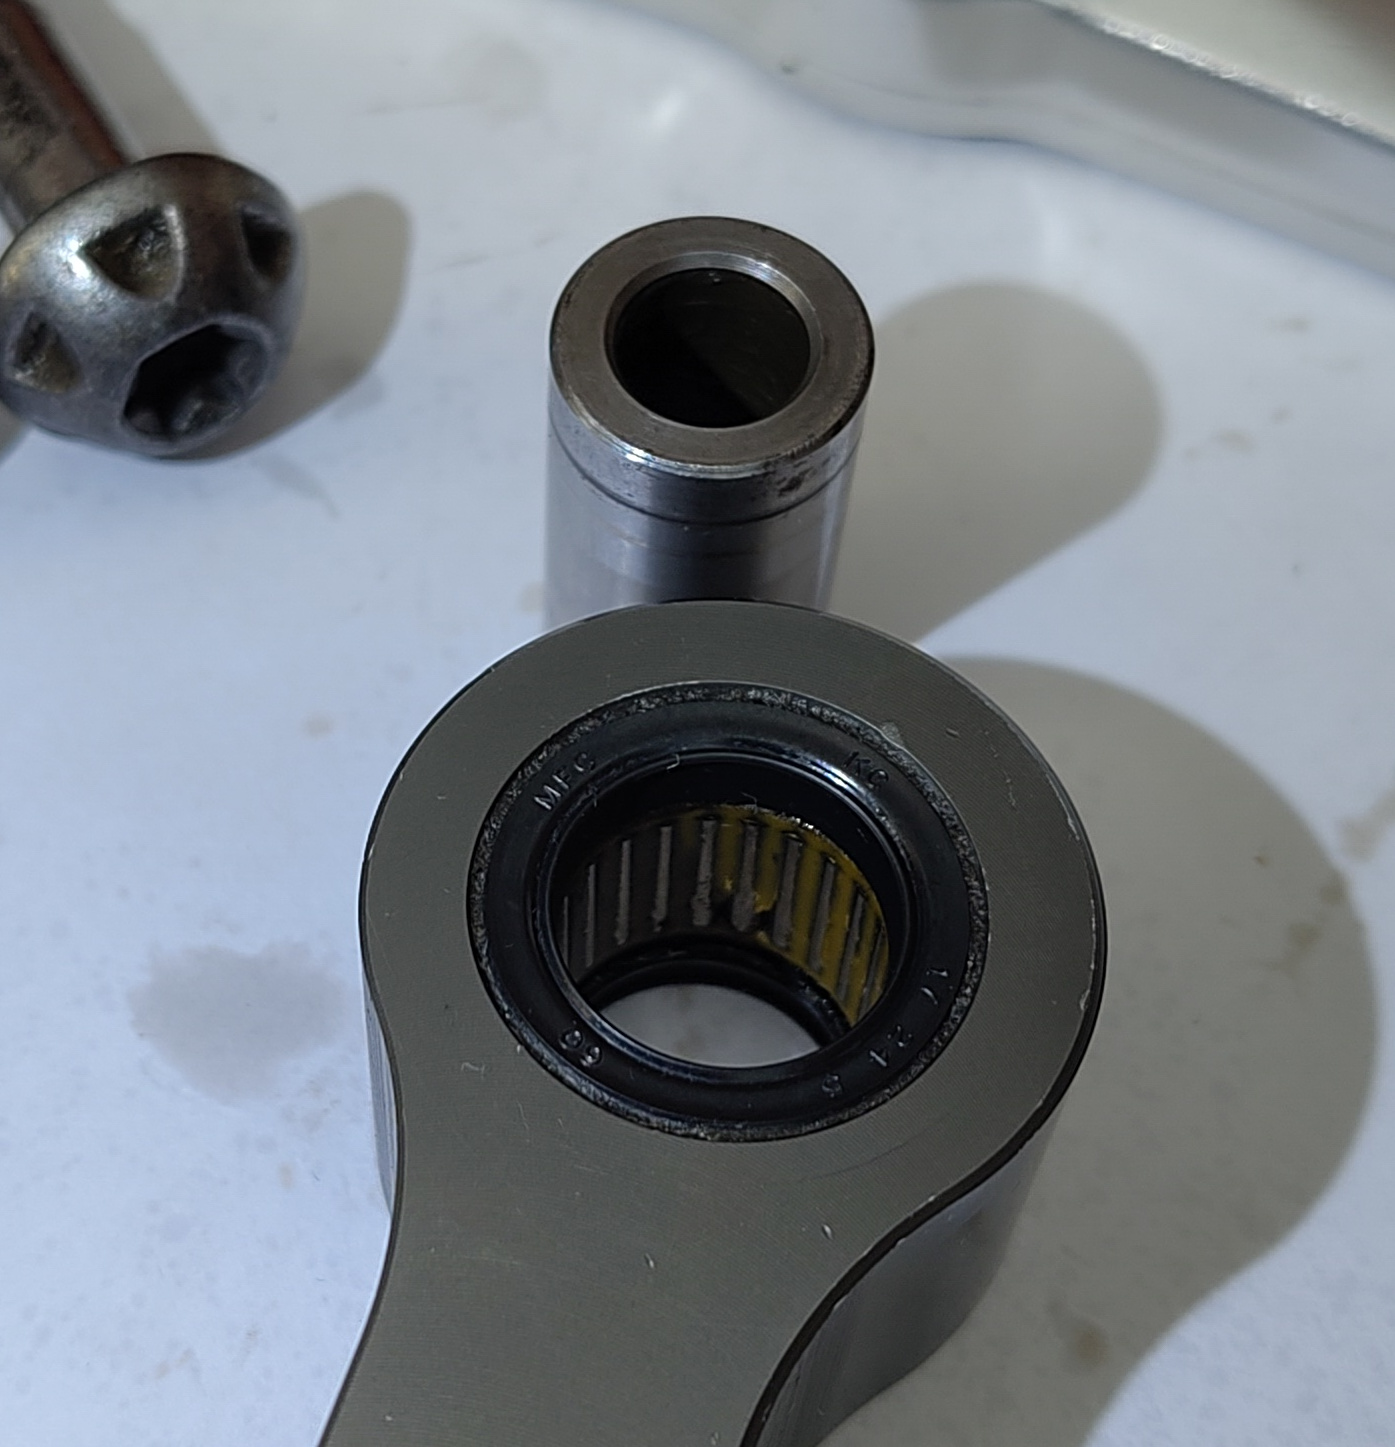
This was the point where I decided that I ought to replace everything, and also do all the swingarm bearings. The bike has done nearly 80,000 miles and these are the only original bearings left, apart for those in the bowels of the engine.

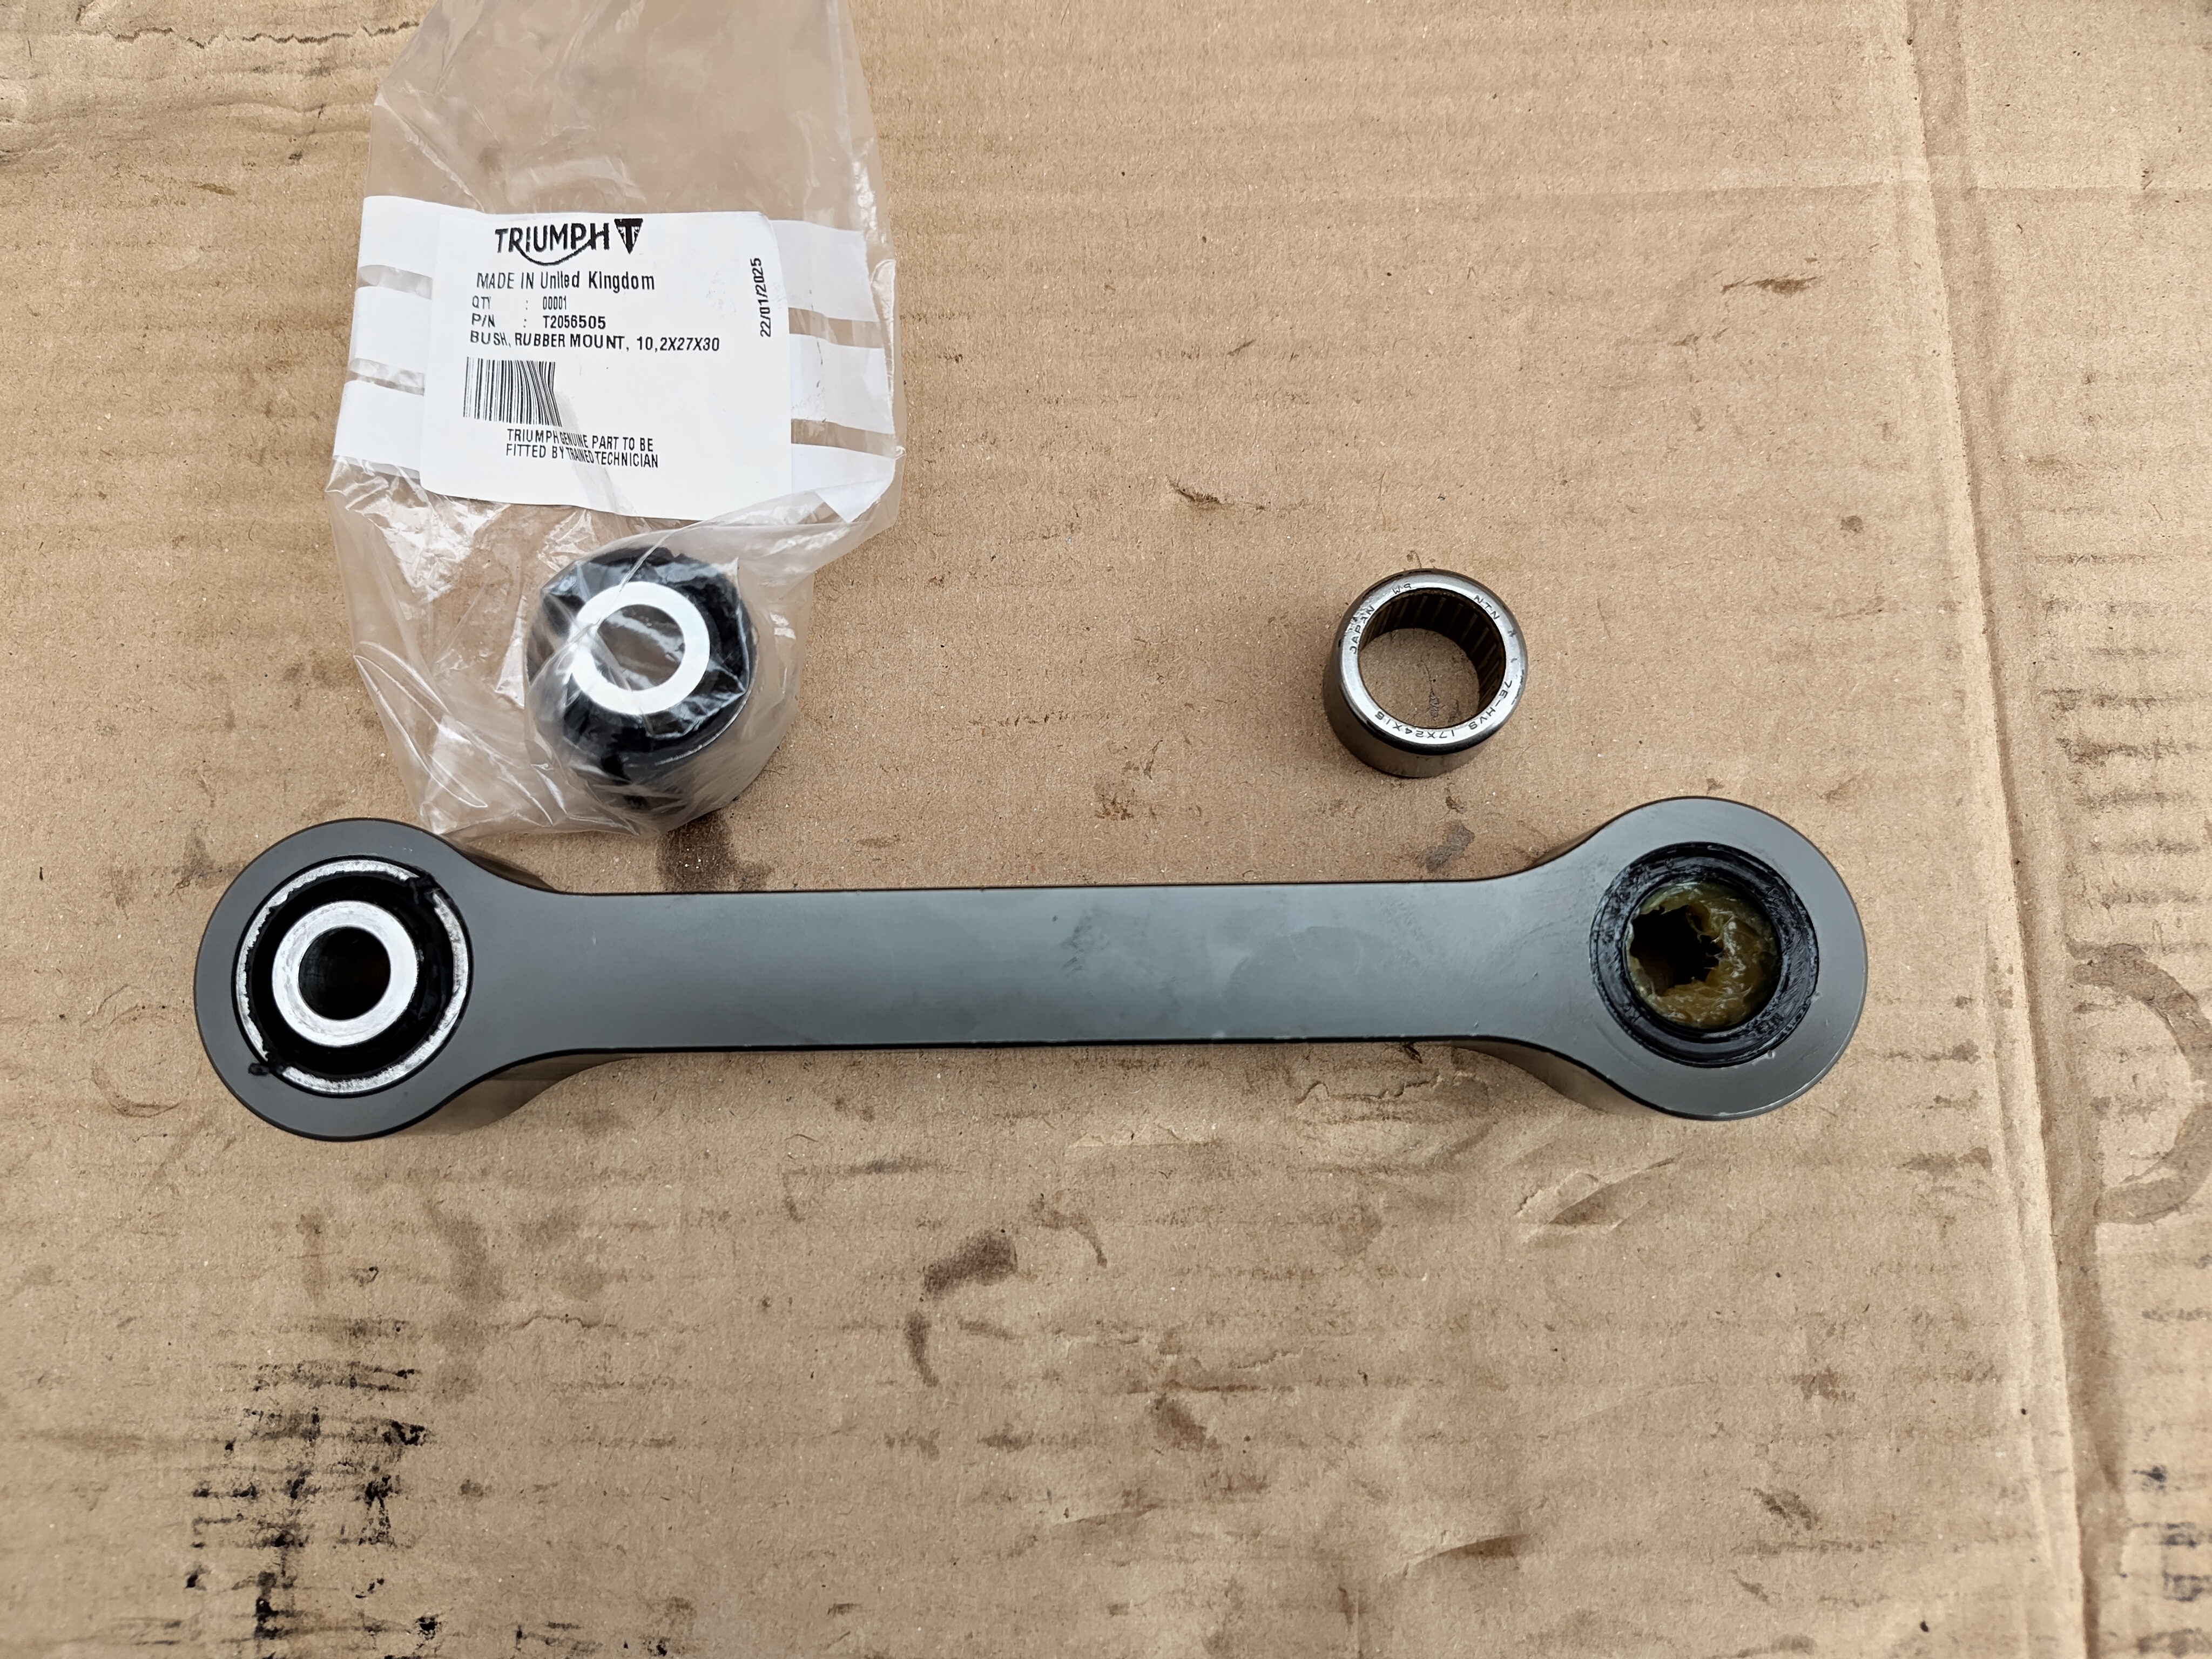
So to end the day I went to Fowlers parts and ordering all the bearings, ground sleeves, seals and spacers I would need to replace, for the princely sum of £165.38. :frowning: One of the bearings was £25 and a similar part on Simply bearings was a third of that, but I want to make sure I’ve got the right size and type of bearing, and I don’t want to remove old bearings to measure until I know I have replacements ready to fit.

2 Likes

is the nitron a big improvement over the original

Well, I got it because the OEM one was always bottoming out, especially with a pillion. But Nitron, who took my weights, fitted a really weak spring which nearly bottomed out just by me sitting on it. I ended up fitting my own spring that was more than twice the stiffness just to be able to adjust it to not bottom out or go solid. So I wouldn’t recommend Nitron.

1 Like

That’s poor service… did they wash their hands of you?

Nitron don’t deal directly with the public, you have to buy through a distributor, though I did try getting Nitron involved directly. Distributor (don’t recall name) boasted how Nitron fit softer springs than other brands and he didn’t seem to understand or want to listen to my explanations of basic physical mechanics, and how I couldn’t just increase the preload because the spring would just go solid (with no gaps between coil turns). As bike was in bits and I wanted a quick solution I bought some other springs to try. they’re pretty cheap in the scheme of things. I did get a refund equivalent to the cost of about one spring and postage, and he suggested I sell the others on eBay. :roll_eyes:

I ended up with a spring that was twice as stiff so it makes me wonder if they had done calculations based on a twin shock setup, or got kilogramme weights mixed up with pounds, or not considered the mechanical leverage of the suspension linkage. Each of those would give an error that’s soft by about a factor of 2.

2 Likes

Glad you resolved it, but appalling service! I had to do something similar on an Orange 222 downhill mtb I bought (2nd hand)… but the difference with a correctly weighted progressive spring was invaluable!

Day Seven

And on the seventh day brown mouse rested :smiley:

7 Likes

I have to say that I have used Nitron for my old Tuono and they were fantastic and it transformed the bike. You can deal direct with them as per this website so I’m really surprised you had those issues, but we all have different experiences of the same manufacturers so can only go on your own findings.

https://www.nitron.co.uk/buy-online/motorcycles/triumph/bonneville---america---speedmaster/speedmaster--18-25-/triumph-speedmaster--18-25--ntr-r1-shock

I know at the time I was looking that Nitron didn’t list my bike. Ohlins wasn’t in the UK and their distributors I tried didn’t get back to me. Hagon’s web site looked like if was from the last century and only listed a phone number (I hate using the phone). That’s why I ended up contacting a localish suspension specialist place who suggested Nitron.

1 Like

Day Eight

When cleaning shock I noticed a mark obviously caused by it coming into contact with something repeatedly. :frowning:

So I reassembled everything with loose bolts to see the cause. Was expecting it to be when bottoming out but it was the opposite, when it tops out. The Nitron shock is 5mm longer than OEM so that would be causing the issue. (Length difference and slightly less travel also contribute to losing 10% of my precious suspension travel, another reasons I wouldn’t recommend it.)

The clearance issue seems to only be a matter of one millimetre so when I come around to putting things back together I’ll look at using the slack in the mounting bolt holes to try and gain an extra millimetre, a little filing wouldn’t go amiss either. (Metal removal is on the low load extension side, not the side exposed to the high compressive load of bike weight and potholes.) I also intend to put a bit of paint on the surface to act as a witness for reoccurrence.

Anyway, the original aim for today was to get swingarm out so I whipped off the wheel spindle nut, took up the wheel weight on the jack and expected to wiggle out the spindle, no such luck. After a bit more wiggling, and a light tap with a hammer is still wouldn’t budge, not had this problem before. :confused: After wondering a while what I might have forgotten and not coming up with anything I could only think it was stuck with corrosion. Then I remembered that the last time this wheel came off was when the muppets at the Scottish tyre place fitted a new tyre. They didn’t even refit and test the brake caliper properly, and they certainly wouldn’t have cleaned and greases the spindle and bearings.

The only thing I could think of was to use a big hammer, but it occurred to me that I didn’t want to be forcing any extra muck through the hole so used neat bike cleaner on all the gaps between parts, then after a while rinsed and brushed on paraffin to clean and flush out as much grime as I could.

With a block of wood over the spindle end to protect it I used a 3lb lump lamp hammer and gave it a couple of good whacks. It still didn’t budge and I was getting concerned, but I couldn’t think of anything else to do. Now I resorted to successively bigger slings with hammer, at one point slipping off and putting a ding in the swingarm :angry: Eventually it moved, and after a centimetre I could get a spanner on the other end to twist spindle back and forth whilst tapping gently with hammer the other side.

When there was no spindle left to hit I found a bit of wood dowelling to drift the spindle out completely.

Yep, spindle has corrosion.

As does the bearing race.

I always make sure these surfaces are clean and well greased when I have wheel off, so to get that corrosion it makes me wonder if they wiped off the old grease. I blame myself for not having the wheel off after getting home to check things.

With all the hitting I’d done I only now got to thinking about what damage that might have caused. The rusted and stuck bearing race would have had high sideways force, but should have been supported by the spacers against the swing arm. Hopefully swingarm itself was up to the hammering.

All the wheel bearings felt smooth and had no play, so decided I wouldn’t replace them. (I did them last 2 years ago.) I wanted to clean the corrosion off the bearings and the spacer tube between them, but I was aware that any abrasive would shed fine particles, and even with sealed bearings I didn’t want to risk bits getting in. So instead things just had a good firm rub with a stiff finger wrapped in a paper towel then gave the holes a good greasing. :open_mouth:

Spindle took 5 minutes with a Scotchbright pad to get cleaned up before greasing.

I then set about doing my usual wheel removing cleaning, like cleaning the thread on the wheel nut by twisting it onto an old brass brush, and using 1000 grit wet-and-dry cloth to get corrosion off washer and other flat surfaces that mate together.

By the time I had done my second run over the sprocket carrier and cush drive with paraffin, then washing up liquid, my finger and wrist were complaining of all the cleaning and scrubbing work they were being subjected too so decided that was enough bike work for the day.

The seals around the wheel spacers had a fair gap so I’ve just ordered replacements from Simply Bearings, they probably contributed to the corrosion. Normally when fitting a tyre I liberally grease the seals and the space behind them, again, not something tyre fitters would have done.

Edit: After sleeping on things I’ve also ordered new wheel bearings, I knew it’s the right thing to do, it was just that after a week of working on bike with many more days to go I was hoping to avoid even more work.

2 Likes

I am with you on the Hagan website going back I was going to order some shocks for a speed twin to much like hard work went somewhere else in the end

Day Nine

Day ended with a big fail, but started out OK…

Time to really get the swingarm out. After getting the caps off the ends of the swingarm spindle I can crack open the nut. Then with the rear of the swingarm supported by the paddock stand I added a jack to the front just enough to take the weight off the spindle so I could push it in with my finger. Nice and easy, like the rear wheel axel should nave been but wasn’t. The swingarm has frame adjusters like the suspension so it’s the same routine: push the spindle through enough to clear the slot and use a (different sized) special tool to loosen it a couple or turns.

After pulling the spindle out the other side, the swingarm was now free and I could lower the jack and tilt the paddock stand to get it out. Except I had forgot to disconnect something, there’s rubber flap which fills the gap between the rear mudguard on the frame and the plastic forward mudguard on the swingarm. This is attached by two arrowhead shaped tabs which need pushing out backwards, after cleaning off the caked on mud and lubricating them with soapy water.

Finally with the swingarm is free it gets a good wash.

I covered the bearings even though I’m replacing them, but didn’t notice the various drain holes in the tubes until too late. So when drying the swingarm afterwards I had to tilt in into various positions to get drain holes near the bottom then aim the dryer airflow across the holes to suck out the water, there was quite a bit.

The above was actually in some spare time yesterday. Today started by watching Delboy change swingarm bearings and reading Haynes manual, to make sure I hadn’t forgotten anything about doing bearings. I had, that bearings should be put in with the markings outwards.

It took me two hours fiddling with the bearing puller to get things out, not sure why. Probably because they were quite stuck and it was really fiddly getting the puller legs to rest on the narrow lip of the hole without causing damage or blocking the hole. I did hit on the idea of putting a G-clamp on the leg ends to stop them from splaying.

I also spent ages trying to get out a rusted circlip which wanted to keep pinging back into it’s groove. And I tried to get the two bearings on the left out one at a time, but the gap between them provided by the chamfer isn’t enough to get a good grip; you need to do them both in one got.

Finally I had the buggers out.

The two roller bearings had badly corroded outer races but when turned with pressure on them were only a little ‘gritty’. The sleeve that goes in the needle roller has prominent marks from the rollers, which themselves looked a bit scuffed up. All definitely in need of replacement but not in an ready-to-disintegrate state.

After lunch I set about what I thought would be the simple task of replacing the small needle roller where the swingarm connects to the suspension linkage.

I couldn’t find any mention of these bearings in Haynes or Triumphs service manual. It didn’t look like there was a lip that would stop the bearing coming out one side so I started by seeing if I could move it with a hammer and drift. When that didn’t work I tried pressing it out by using the bolt drawbar method.

First attempt merely domed in the big washer where the nut was pressing. So I found some other materials and tried harder, then after pondering to consider if it was wise (probably not) resorted to a breaker bar for more leverage. There was that loud scary crack you get when a bearing start to move so as I continued turning I thought I was home free. Nope, it was just stripping the thread on the nut I was turning. :frowning: Nut wouldn’t unscrew, just kept turning, so had to break out the Dremel and cut it into two halves.

On examining the bearing I could seem that it had actually moved by about a millimetre and was otherwise unscathed. I was now half regretting trying to replace it, it didn’t seem toooo bad, but it couldn’t stay as it was.

By now it was time for afternoon tea so I had some cake and opened a beer. (I wasn’t planning on going back to work).

I needed some tougher high tensile bolts to get things moving again, so went online to order some bits. With an eye to needing to press in new main bearings for the swingarm as well I also spent loadsa-money ordering 1m of 12mm high tensile threaded bar. The best I can do before trying to find someone with an hydraulic press who is willing to do the work.

The place I ordered from didn’t have express delivery options and it won’t be sent until tomorrow now, so I’ve probably got quite a few days twiddling thumbs. Or rather, giving my thumbs and other hand and arm related bits a rest. Which considering the medical problem I have with them is probably a good idea.

3 Likes

Day Ten

Progress at last…

This morning I fitted new rear wheel bearings whilst waiting for my delivery of nuts and bolts, which duly arrived just after lunch.

Now I could bring out the big guns to press out that stubborn bearing: 12mm 12.9 grade high tensile bolt with a 50mm connecting nut (lots of threads to resist stripping as I turned it). Managed to work out a way to get this clamped and still leave room for bearing to be pushed out, then I heaved heavily on a breaker bar, a 1/6 of a turn at a time, to press out the bearing which resisted for every last millimetre.

Finally, the bugger was out. I was expecting the problem to be caused rust but there wasn’t any. Instead, it looked like the thin paint coat in the hole was coming away and jamming things up.

After cleaning the hole with fine grit wet and dry paper, I pressed in the new greased bearing. This time I only needing normal spanners.

I next replaced the bearing in the drop link. This was straight forward and I just needed a short ratchet spanner to do the job. The link looks like anodised aluminium and the hole was immaculate after removing old bearing.

I had also bought a new rubber bushing for the other end but decided to quit whilst I was ahead. The rubber in the old one seemed fine, if a little chewed from being pinched when pressed in at the factory (I assume). I didn’t feel confident in being able to press in the new one myself.

By now my back was aching and the light starting to fade, so quit for the day.

7 Likes

Amazing work mate.

3 Likes

Day Eleven

Day started full of hope I might finally get bike together. Pressed in the 3 swingarm bearings without drama but when I went to put the shiny new sleeve into the needle roller I discovered it wasn’t so shiny. :frowning:

I rang Fowlers about the corrosion pitting who said to send email with pics. Come 3pm I’ve not heard back so rather than go to hassle of chasing them up I thought I’d try and avoid more delays than necessary and just order a new one from their website. First one came from their stock but they now show out of stock so would need to wait for them to get one from Triumph, so hopefully in better condition. (Don’t know why these things aren’t coated in oil or something similar, but checking the two I have for the suspension linkage they are also bone dry, but without corrosion thankfully.)

Probably things will get sorted out and I won’t be out of pocket but for the sake of £20 I was willing to try and speed things along by ordering a new one with next day delivery. There will also be a couple of days extra delay for them to get one in. Hopefully I’ve learnt my lesson and not just check orders have correct items when the arrive but also check their condition.

Edit: Fowlers sourced a replacement for the day after I contacted them then sent it next day delivery. They also cancelled and refunded the speculative order I’d placed. So can’t fault them on customer service. The replacement part (which they said they checked before despatch) had some of the same marks as the last one though to a much lesser extent. They seem more black than rust coloured and don’t clean off. So perhaps this is just normal for these parts. They seem smooth enough.

4 Likes

Got an email today from Fowlers saying they got a new one in, have checked it over and will send it for delivery tomorrow. :slight_smile: They’re going to take back the other one and I’m now wondering if I’ve made a mountain out of a mole hill. The marks could just be a bit of muck in the normal surface irregularities and might just clean off with a good scrub or polish. They are barely noticeable when scraping my fingernail across them. But after all the trouble of getting swingarm bearings changed didn’t want to risk it for a £12 component.

1 Like

I think you are right, if there was no alternative… you might accept the risk, but there is an alternative and you have paid for a component with certain engineering specifications…

2 Likes

Day Twelve

Now we’re swinging! Or rather the bike’s swingarm is. Took an hour and half to get everything lined up just perfect and hose and wire routing triple checked before torquing up and cleaning up. By which time back was screaming for me to stop.

The replacement part had some of the same marks as the last one though to a lesser extent. They seem more black than rust coloured and don’t clean off. So perhaps this is just normal for these parts.

3 Likes